This post may contain affiliate links. If you make a purchase through these links, we may earn a commission at no additional cost to you.
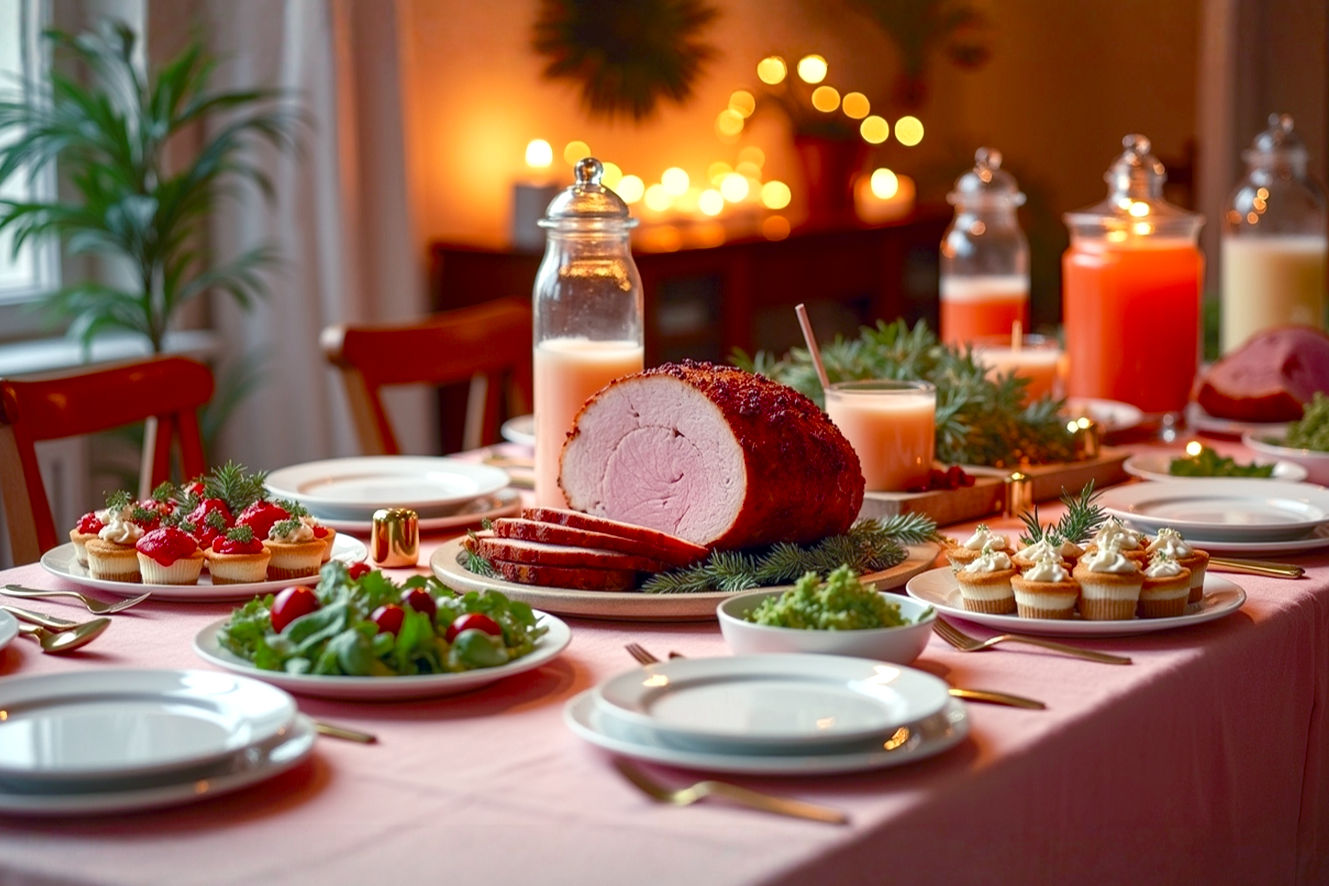
Imagine your Christmas table, beautifully set, with twinkling lights and festive decorations. What’s at the very center, drawing everyone’s eyes and tantalizing their taste buds? For many, it’s the magnificent rib roast, often called prime rib. This impressive cut of beef isn’t just a meal; it’s a statement, a symbol of holiday abundance and culinary triumph. It promises tender, juicy meat with a flavorful, crispy crust, making it the ultimate centerpiece for your holiday feast.
Cooking a rib roast can seem a bit daunting, especially when you’re aiming for perfection for such an important occasion. You might worry about overcooking it, or perhaps not getting that ideal rosy-pink interior. But don’t fret! With the right knowledge and a few key techniques, you can achieve a show-stopping rib roast that will have your family and friends raving for years to come. This definitive guide will walk you through every step, from selecting the best cut to mastering the cooking process and even carving it like a professional. We’ll cover essential tools, ingredients, and even how to make those classic accompaniments like a rich au jus. Get ready to elevate your Christmas dinner to legendary status!
Understanding the Rib Roast: Cut, Quality, and Quantity
Before you even think about cooking, it’s crucial to understand what a rib roast is, how to choose the best one, and how much you’ll need for your holiday gathering. Getting these basics right sets the foundation for a truly perfect result.
What is a Rib Roast (Prime Rib)?
A rib roast comes from the primal rib section of the cow, specifically from ribs six through twelve. This area is known for its incredible marbling—those thin streaks of fat within the muscle—which melts during cooking, keeping the meat incredibly moist and adding a rich, beefy flavor. It’s also a less-worked muscle, meaning it’s naturally tender.
You’ll often hear “rib roast” and “prime rib” used interchangeably. While they refer to the same cut of meat, the term “prime” technically refers to a specific USDA grading of beef. The U.S. Department of Agriculture (USDA) grades beef based on its tenderness, juiciness, and flavor, primarily determined by the amount of marbling. The top three grades are Prime, Choice, and Select. USDA Prime beef has the most marbling and is typically found in high-end restaurants or specialty butcher shops. USDA Choice is also excellent, widely available, and still offers great flavor and tenderness. USDA Select has less marbling and can be less tender. When you see “prime rib” on a menu or at a grocery store, it often just refers to the cut itself, regardless of its USDA grade. For the best holiday rib roast, aim for USDA Prime or a well-marbled USDA Choice cut.
When it comes to the bone, you have two main options: bone-in or boneless. Each has its own benefits and drawbacks for a holiday rib roast.
- Bone-in Rib Roast: This is often considered the traditional choice for a grand presentation. The bones act as natural insulators, helping the meat cook more evenly and preventing the edges from drying out too quickly. Many chefs also believe the bones impart extra flavor to the meat as they cook, though this is a subject of debate among culinary experts. The primary challenge with a bone-in roast is carving; it can be a bit trickier to slice neatly. However, you can ask your butcher to “french” the bones (clean off the meat and fat from the ends) for a more elegant look, or even to remove the bones and tie them back on. This allows you to easily remove the bones after cooking for easier carving, while still getting the benefits of bone-in cooking.
- Boneless Rib Roast: This option offers significant convenience, especially when it comes to carving. Without the bones, slicing the roast into even portions is much simpler and faster, which can be a big plus when you have hungry guests waiting. Boneless roasts also cook a bit faster than bone-in ones. The main consideration is that a boneless roast might lose some of the insulating benefits of the bones, potentially leading to slightly less even cooking if not managed carefully. To counteract this, it’s often recommended to tie a boneless roast tightly with butcher’s twine before cooking. This helps it hold its shape and cook more uniformly. While some argue it lacks the “bone flavor,” a well-seasoned boneless roast can still be incredibly delicious. For a Christmas feast, either option works beautifully, so choose what feels right for your comfort level and presentation goals.
Choosing the Right Size for Your Holiday Feast
One of the most common questions when planning a rib roast for Christmas dinner is: how much do I need? Calculating the right size ensures you have enough for everyone without an overwhelming amount of leftovers (unless you want them!).
A good general guideline is to plan for one rib per 1-2 people. This means a 3-rib roast typically serves 6-8 people, a 4-rib roast serves 8-10, and so on. If you have big eaters or want plenty of leftovers, you might lean towards the lower end of that range (one rib per person). For example, if you’re hosting 10 guests, a 5-rib roast (approximately 10-12 pounds for bone-in) would be a good target. A boneless roast will yield more edible meat per pound, so you might need slightly less weight for the same number of servings compared to a bone-in roast.
When buying your rib roast, look for a piece with good marbling throughout the meat. This internal fat is key to a juicy and flavorful roast. The meat should be a vibrant, deep red color, and the fat should be creamy white, not yellowish. It’s always a good idea to purchase from a reputable butcher. They can help you select the best cut for your needs, answer any questions, and even prepare the roast (like tying or frenching the bones) if you ask. Don’t hesitate to talk to your butcher; they are a valuable resource!
Aging Your Rib Roast for Enhanced Flavor
You might have heard about “dry aging” beef, a process where meat is stored in a controlled environment to allow enzymes to break down muscle fibers, tenderizing the meat and concentrating its flavor. True dry aging is a complex process typically done by professionals and takes weeks. However, there’s a simpler, highly effective method you can do at home to significantly improve the flavor and texture of your Christmas rib roast: dry brining.
Dry brining is essentially salting the meat in advance and letting it sit uncovered in the refrigerator. This process works wonders for a perfect rib roast. Here’s how it works: When you apply salt to the surface of the meat, it initially draws out some moisture through osmosis. The salt then dissolves in this moisture, creating a concentrated brine. This brine is then reabsorbed into the meat, carrying the salt deep into the muscle fibers. This not only seasons the meat throughout, rather than just on the surface, but also helps the muscle fibers retain moisture during cooking, resulting in a juicier roast. The uncovered refrigeration also allows the surface of the meat to dry out, which is crucial for developing that beautiful, crispy crust when it cooks.
To dry brine your rib roast:
- Pat it dry: Use paper towels to thoroughly pat the entire surface of the roast dry. This is important for the salt to adhere and for the surface to dry out.
- Apply salt generously: Use a good quality kosher salt or sea salt. Sprinkle it evenly over all surfaces of the roast, including the ends and any exposed bone. Don’t be shy; the meat will only absorb what it needs. A general rule of thumb is about 1/2 teaspoon of kosher salt per pound of meat, but adjust based on your preference.
- Refrigerate uncovered: Place the salted roast on a wire rack set inside a baking sheet. This allows air to circulate around the entire roast. Put it in your refrigerator, uncovered, for at least 24 hours, and ideally up to 3 days. The longer it sits, the more effective the brining and drying process will be.
- No need to rinse: When it’s time to cook, you don’t need to rinse the salt off. Just pat it dry again if there’s any surface moisture. The salt will have been absorbed or created a flavorful crust.
Dry brining is a simple step that makes a huge difference in the final taste and texture of your holiday rib roast. It’s a small investment of time that pays off big in flavor.
Essential Tools and Ingredients for a Perfect Rib Roast
Having the right equipment and high-quality ingredients is just as important as understanding the cooking techniques. Don’t underestimate the impact of these foundational elements on your final Christmas rib roast.
Must-Have Kitchen Tools
You don’t need a professional kitchen, but a few specific tools will make the process of cooking a rib roast much smoother and more successful.
- Roasting Pan with a Rack: This is non-negotiable. A sturdy roasting pan allows you to collect all those delicious drippings for your au jus. The rack is critical because it lifts the roast out of the drippings, allowing hot air to circulate all around the meat. This ensures even cooking and helps develop a crispy crust on the bottom, preventing it from steaming. Look for a pan that’s large enough to comfortably hold your roast without it touching the sides.
- Meat Thermometer (Leave-in Probe Thermometer Recommended): This is perhaps the single most important tool for cooking a perfect rib roast. Guessing the internal temperature is a recipe for disaster, often leading to an overcooked, dry roast. A leave-in probe thermometer has a probe that stays in the thickest part of the meat while it cooks, with a wire leading to an external display. This allows you to monitor the temperature without opening the oven door, which helps maintain a consistent oven temperature. Digital instant-read thermometers are also useful for quick checks, but a leave-in probe gives you continuous monitoring.
- Sharp Carving Knife and Carving Fork: After all your hard work, you want to carve your masterpiece cleanly and efficiently. A long, sharp carving knife (often 8-10 inches) with a thin blade is ideal for slicing through the roast. A sturdy carving fork helps stabilize the roast while you slice, making the process safer and easier.
- Butcher’s Twine: If you’re using a boneless roast, or if your butcher has removed and tied back the bones, butcher’s twine is essential. It helps keep the roast in a compact, uniform shape, which promotes even cooking. It also helps secure any herb crust you apply. Make sure it’s food-safe cotton twine, not synthetic string.
- Aluminum Foil for Resting: After cooking, your rib roast needs a crucial resting period. A large piece of aluminum foil, or even two pieces overlapped, will be used to loosely tent the roast during this time. This helps keep the roast warm while allowing the juices to redistribute.
High-Quality Ingredients for a Flavorful Rib Roast
While the star of the show is undoubtedly the rib roast itself, the supporting ingredients play a vital role in building its incredible flavor profile.
- The Rib Roast: As discussed, aim for USDA Prime or a well-marbled USDA Choice cut. This is your foundation, so invest in the best quality you can find.
- Fresh Herbs: Rosemary and thyme are classic partners for beef, offering earthy, aromatic notes that complement the rich flavor of the roast. Fresh garlic cloves are also indispensable. These herbs and garlic will be finely chopped and used to create a fragrant crust.
- Good Quality Olive Oil or Butter: A little olive oil or melted butter acts as a binder for your herb crust, helping it adhere to the meat. It also contributes to the browning and crisping of the exterior.
- Salt (Kosher or Sea Salt) and Freshly Ground Black Pepper: These are the fundamental seasonings. Kosher salt or coarse sea salt is preferred for dry brining and seasoning because its larger crystals adhere well to the meat and dissolve slowly, providing even seasoning. Freshly ground black pepper offers a more potent and aromatic flavor than pre-ground pepper.
- Optional Aromatics for the Roasting Pan: While not strictly necessary for the roast itself, adding chopped onions, carrots, and celery to the bottom of your roasting pan can significantly enhance the flavor of your au jus. These vegetables caramelize and contribute deep, savory notes to the pan drippings.
By having these tools and ingredients ready, you’ll be well-prepared to tackle the next steps in creating your perfect Christmas rib roast.
Preparing Your Rib Roast: From Fridge to Oven
Proper preparation before the roast even touches the heat is crucial for achieving that ideal doneness and a fantastic crust. These steps are simple but make a significant difference.
Bringing the Rib Roast to Room Temperature
This step is often overlooked, but it’s incredibly important for even cooking. A cold roast going directly into a hot oven will cook unevenly; the outside will overcook before the center reaches your desired doneness. This phenomenon, known as temperature gradient, means that the outer layers of the meat will heat up much faster and reach higher temperatures than the inner core. If you start with a very cold roast, by the time the center is cooked, the outer edges could be dry and gray.
Bringing the rib roast to room temperature, or at least closer to it, allows the heat to penetrate the meat more uniformly. This minimizes the temperature difference between the exterior and interior, leading to a roast that’s beautifully cooked from edge to edge. For a large rib roast, this can take anywhere from 2 to 4 hours depending on its size and the ambient temperature of your kitchen. Remove the roast from the refrigerator, unwrap it, and let it sit on your counter. You can place it on a wire rack over a baking sheet to catch any drips. Don’t worry about food safety during this time; a large cut of meat like a rib roast won’t reach dangerous temperatures quickly.
Scoring the Fat Cap: Enhancing Flavor and Texture
Most rib roasts come with a thick layer of fat on one side, known as the fat cap. This fat is a treasure trove of flavor, and scoring it properly helps it render (melt and crisp up) beautifully during cooking, creating an irresistible crispy crust. It also allows your seasonings to penetrate deeper into the fat and the underlying meat.
To score the fat cap:
- Place the roast fat-cap side up on a cutting board.
- Using a sharp knife, carefully make shallow cuts through the fat, but not into the meat itself. You want to cut just deep enough to go through the fat layer.
- Make these cuts in a crosshatch or diamond pattern, about 1 inch apart. This creates a grid of small squares.
- The technical benefit of scoring is that it increases the surface area of the fat exposed to heat, promoting more efficient rendering. As the fat renders, it bastes the meat below, keeping it moist. The cuts also prevent the fat cap from shrinking unevenly and pulling away from the meat during cooking, which can distort the roast’s shape and prevent even browning. When the fat crisps up, those scored sections become wonderfully crunchy “cracklings” that add incredible texture and flavor.
Crafting the Perfect Herb Crust for Your Christmas Prime Rib
A flavorful herb crust is what truly elevates a rib roast from good to unforgettable. It adds a layer of aromatic complexity and a satisfying textural contrast to the tender meat.
Here’s a detailed recipe for a classic herb rub that works perfectly for your Christmas prime rib:
Classic Herb Rub Recipe:
- 6-8 cloves garlic, minced (or 2 tablespoons garlic powder)
- 3 tablespoons fresh rosemary, finely chopped
- 3 tablespoons fresh thyme leaves, finely chopped
- 2 tablespoons kosher salt (adjust based on dry brining, if used)
- 1 tablespoon freshly ground black pepper
- 2 tablespoons olive oil (or melted unsalted butter)
- 1 tablespoon Dijon mustard (optional, acts as a binder for the rub and adds a subtle tang)
Instructions for Application:
- In a small bowl, combine the minced garlic, chopped rosemary, chopped thyme, kosher salt, and black pepper.
- Add the olive oil (or melted butter) and Dijon mustard (if using). Mix everything together until it forms a thick paste. The Dijon mustard isn’t for flavor dominance; its primary role is to help the rub adhere evenly to the meat, creating a better crust.
- Once your rib roast has come to room temperature and its fat cap is scored, pat it dry one last time with paper towels. This ensures the rub sticks well.
- Generously apply the herb rub over the entire surface of the roast, including the fat cap, the meaty sides, and the ends. Really get in there and massage it into the scored fat and all crevices. Don’t forget the underside!
- If you’re cooking a boneless roast, or if your butcher has removed and tied back the bones, now is the time to secure it with butcher’s twine. Tie the roast at 1-inch intervals along its length to ensure it holds a uniform shape during cooking. This even shape is critical for consistent heat distribution and prevents thinner sections from overcooking while thicker sections are still raw.
With your rib roast expertly prepared and seasoned, it’s ready for the main event: cooking.
Mastering the Cooking Techniques: Achieving Perfection
This is where the magic happens. The cooking method you choose, and how precisely you execute it, will determine the ultimate tenderness, juiciness, and crust of your Christmas rib roast. We’ll focus on the reverse sear method, our top recommendation, but also touch on a traditional approach.
The Reverse Sear Method: Our Top Recommendation for a Holiday Rib Roast
The reverse sear method has gained immense popularity among professional chefs and home cooks alike, and for good reason. It’s particularly well-suited for large cuts of meat like a rib roast because it delivers incredibly consistent results.
- Concept: The reverse sear involves cooking the meat “low and slow” at a relatively low oven temperature until it’s almost done, then finishing it with a short burst of very high heat to create a beautiful, crispy crust. This differs from traditional methods that start with high heat.
- Benefits:
- Even Doneness: This is the primary advantage. By cooking at a lower temperature, the heat penetrates the meat more gently and evenly. This significantly reduces the “gray band” of overcooked meat often seen just under the crust in traditionally roasted meats. You get a rosy-pink interior from edge to edge.
- Incredible Crust: While the low-temperature phase dries out the surface of the meat slightly, making it more receptive to browning, the final high-heat sear then rapidly crisps up the exterior, creating a deep, flavorful crust (the Maillard reaction at its finest).
- Less Stress: Because the cooking process is slower, you have a wider window of time to pull the roast from the oven at the perfect internal temperature, making it more forgiving.
Step-by-step Reverse Sear Process:
- Low Temperature Roasting: Preheat your oven to a low temperature, typically around 250°F (120°C). Place your prepared rib roast, fat-cap side up, on the rack in your roasting pan. If using optional aromatics like onions and carrots, place them in the bottom of the pan. Insert the probe of your leave-in meat thermometer into the thickest part of the roast, making sure it doesn’t touch any bone.
- Monitoring Internal Temperature: Roast the prime rib until the internal temperature reaches 10-15°F (5-8°C) below your target doneness. For example, if you’re aiming for medium-rare (130-135°F), you’ll pull the roast when it reaches about 115-120°F (46-49°C). This low-temperature cooking can take several hours, depending on the size of your roast (e.g., a 4-rib roast might take 2.5-4 hours). The exact time isn’t as important as the internal temperature.
- Resting Before the Sear: Once the roast reaches the pre-sear temperature, remove it from the oven. This is a crucial mini-rest. Loosely tent it with foil and let it rest on the counter for 30-60 minutes. During this time, the internal temperature will continue to rise slightly (carryover cooking), and the juices will begin to redistribute. This rest also allows the oven to preheat to a much higher temperature for the final sear.
- The High-Heat Sear: About 15-20 minutes before you’re ready to sear, preheat your oven to a very high temperature, typically 450-500°F (230-260°C). Once the oven is fully preheated, remove the foil from the roast and place it back into the hot oven. Roast for 10-15 minutes, or until a deep brown, crispy crust forms on the exterior. Keep a close eye on it to prevent burning. This final blast of high heat rapidly caramelizes the surface, creating that irresistible crunch and deepening the flavor through the Maillard reaction.
Traditional High-Heat Roasting (Alternative Method)
While the reverse sear is our top pick, the traditional high-heat roasting method is also a viable option, especially if you’re short on time or prefer a more classic approach.
- Concept: This method starts with a short burst of very high heat to create an initial crust, then the oven temperature is lowered to finish cooking the interior more gently.
- Benefits: Can develop a crust more quickly at the start.
- Step-by-step Traditional Roasting Process:
- Initial High Temperature: Preheat your oven to a high temperature, around 450°F (230°C). Place your prepared rib roast, fat-cap side up, on the rack in your roasting pan. Insert your meat thermometer. Roast for 15-20 minutes at this high temperature to get a good initial sear and crust.
- Lower Temperature Roasting: After the initial high-heat period, reduce the oven temperature to 325°F (160°C). Continue roasting until the internal temperature reaches your desired doneness (see chart below). This phase will take significantly longer than the initial sear.
- Monitoring Internal Temperature: As with the reverse sear, rely on your meat thermometer. The total cooking time will vary greatly depending on the size of your roast.
Doneness Levels and Target Temperatures for Your Christmas Prime Rib
Understanding internal temperatures is paramount for achieving your preferred doneness. Remember that carryover cooking will cause the internal temperature of the roast to rise by 5-10°F (3-6°C) after it’s removed from the oven. Always pull the roast when it’s slightly below your target temperature to account for this.
Here’s a guide to doneness levels:
- Rare:
- Target Temperature (when to pull from oven): 120-125°F (49-52°C)
- Final Temperature (after resting): 125-130°F (52-54°C)
- Appearance: Cool red center.
- Medium-Rare (Recommended for Prime Rib):
- Target Temperature (when to pull from oven): 130-135°F (54-57°C)
- Final Temperature (after resting): 135-140°F (57-60°C)
- Appearance: Warm red center, juicy. This is generally considered the ideal doneness for prime rib, balancing tenderness, juiciness, and flavor.
- Medium:
- Target Temperature (when to pull from oven): 135-140°F (57-60°C)
- Final Temperature (after resting): 140-145°F (60-63°C)
- Appearance: Warm pink center.
- Medium-Well:
- Target Temperature (when to pull from oven): 145-150°F (63-66°C)
- Final Temperature (after resting): 150-155°F (66-68°C)
- Appearance: Slightly pink center.
- Well-Done:
- Target Temperature (when to pull from oven): 150-155°F (66-68°C)
- Final Temperature (after resting): 155-160°F (68-71°C)
- Appearance: Little to no pink. While some prefer this, it’s generally not recommended for prime rib as it can become dry and tough.
Always trust your meat thermometer over estimated cooking times. Every oven is different, and every roast is unique.
The Critical Resting Period: Don’t Skip This Step!
You’ve cooked your magnificent rib roast to perfection, the aroma is filling your kitchen, and your guests are eagerly awaiting. But hold on! Before you grab that carving knife, there’s one absolutely critical step that can make or break your roast: the resting period. Skipping this step is the fastest way to turn a perfectly cooked roast into a dry, disappointing one.
Why Resting is Non-Negotiable for a Juicy Rib Roast
When meat cooks, especially at high temperatures, the muscle fibers contract and squeeze out moisture, pushing it towards the center of the roast. This is a natural physical process. If you were to slice into the roast immediately after taking it out of the oven, all those precious juices, which are concentrated in the center, would simply gush out onto your cutting board. The result? A dry roast and a puddle of wasted flavor.
Resting the roast allows these contracted muscle fibers to relax. As they relax, they reabsorb the juices that were pushed to the center, distributing them evenly throughout the entire roast. This process, known as reabsorption of fluids, ensures that every slice of meat is incredibly juicy and tender. It’s a simple act of patience that yields dramatic improvements in texture and moisture. The internal temperature will also continue to rise slightly during this time due to carryover cooking, as the residual heat from the exterior moves towards the cooler center.
How Long to Rest and How to Tent
The general rule of thumb for resting a large roast like a prime rib is 15 to 30 minutes, or even up to an hour for very large roasts (over 10 pounds). A good guideline is to rest it for about 10 minutes per pound. So, a 5-pound roast would rest for around 50 minutes.
To rest your rib roast properly:
- Once you remove the roast from the oven (after the reverse sear or traditional roast), immediately transfer it to a clean cutting board. Do not slice into it yet.
- Loosely tent the roast with aluminum foil. “Loosely” is key here; you don’t want to tightly wrap it, as that would trap steam and soften your beautiful crust. The loose tent allows some steam to escape while still keeping the roast warm and facilitating the redistribution of juices.
- Let it sit undisturbed for the recommended resting time. Resist the urge to peek or slice! This is the hardest part, but also the most rewarding.
During this resting period, you can focus on making your au jus, finishing up side dishes, or simply enjoying a moment of peace before the carving begins. When the resting time is up, you’ll be rewarded with a rib roast that is incredibly tender, moist, and flavorful throughout.
Crafting the Perfect Accompaniments: Au Jus and More
While the rib roast is undoubtedly the star, the right supporting cast can elevate your Christmas feast to an unforgettable culinary experience. A rich au jus is essential, and traditional pairings like Yorkshire pudding truly complete the meal.
Classic Au Jus: The Essential Sauce for Your Rib Roast
“Au jus” (pronounced “oh zhoo”) is a French term meaning “with juice.” It’s a light, flavorful sauce made from the natural pan drippings of the roasted meat. It’s the perfect savory complement to the rich beef, adding moisture and intensifying the beefy flavor. It’s far less heavy than a traditional gravy, allowing the taste of the prime rib to shine through.
Using Pan Drippings and Roasted Aromatics: The foundation of a great au jus lies in the flavorful drippings left in your roasting pan. If you added optional aromatics like chopped onions, carrots, and celery to the pan during roasting, they will have caramelized and contributed immense depth of flavor to these drippings.
Classic Au Jus Recipe:
Ingredients:
- Pan drippings from your roasted rib roast (including any caramelized bits and roasted vegetables from the bottom of the pan)
- 1-2 cups beef broth or beef stock (low sodium is best, so you can control saltiness)
- 1/2 cup red wine (optional, but adds depth)
- 1 tablespoon all-purpose flour or cornstarch (for thickening, optional)
- Salt and freshly ground black pepper to taste
Instructions:
- Deglazing the Pan: After removing the rib roast to rest, carefully pour off most of the fat from the roasting pan, leaving behind the flavorful brown bits (fond) and any roasted vegetables. Place the roasting pan over two burners on your stovetop (or transfer the drippings and fond to a saucepan).
- Add Liquid: Add the red wine (if using) to the hot pan. Use a wooden spoon or spatula to scrape up all the browned bits from the bottom of the pan. This process is called deglazing, and it’s crucial for capturing all the concentrated flavor. Let the wine simmer for a minute or two to reduce slightly.
- Add Stock and Simmer: Pour in the beef broth or stock. Bring the mixture to a simmer, stirring constantly to ensure all the flavorful bits are incorporated. Let it simmer gently for 5-10 minutes, allowing the flavors to meld and the liquid to reduce slightly.
- Thickening (Optional): If you prefer a slightly thicker au jus, you can make a slurry: whisk together 1 tablespoon of flour or cornstarch with 2 tablespoons of cold water until smooth. Slowly whisk this slurry into the simmering au jus until it reaches your desired consistency. Continue to simmer for another 1-2 minutes to cook out any raw flour taste.
- Straining: For a smooth au jus, pour the mixture through a fine-mesh sieve into a clean saucepan or serving vessel. Press down on any solids (roasted vegetables, herbs) to extract all their liquid. Discard the solids.
- Season and Serve: Taste the au jus and season with salt and freshly ground black pepper as needed. Keep it warm until ready to serve alongside your carved rib roast.
Yorkshire Pudding: A Traditional Pairing
Yorkshire pudding is a classic British accompaniment to roast beef, and for good reason. These savory, airy puddings are made from a simple batter (flour, eggs, milk) and cooked in very hot fat (often beef drippings) in a hot oven. They puff up dramatically, creating a crispy exterior and a soft, slightly custardy interior, perfect for soaking up au jus.
While we won’t provide a full recipe here, the concept is straightforward: a thin batter is poured into muffin tins or a shallow pan containing smoking hot beef fat (you can use some of the rendered fat from your rib roast). The high heat causes the batter to rapidly expand and crisp, resulting in those iconic puffy shapes. They’re a delightful, traditional addition to your Christmas feast.
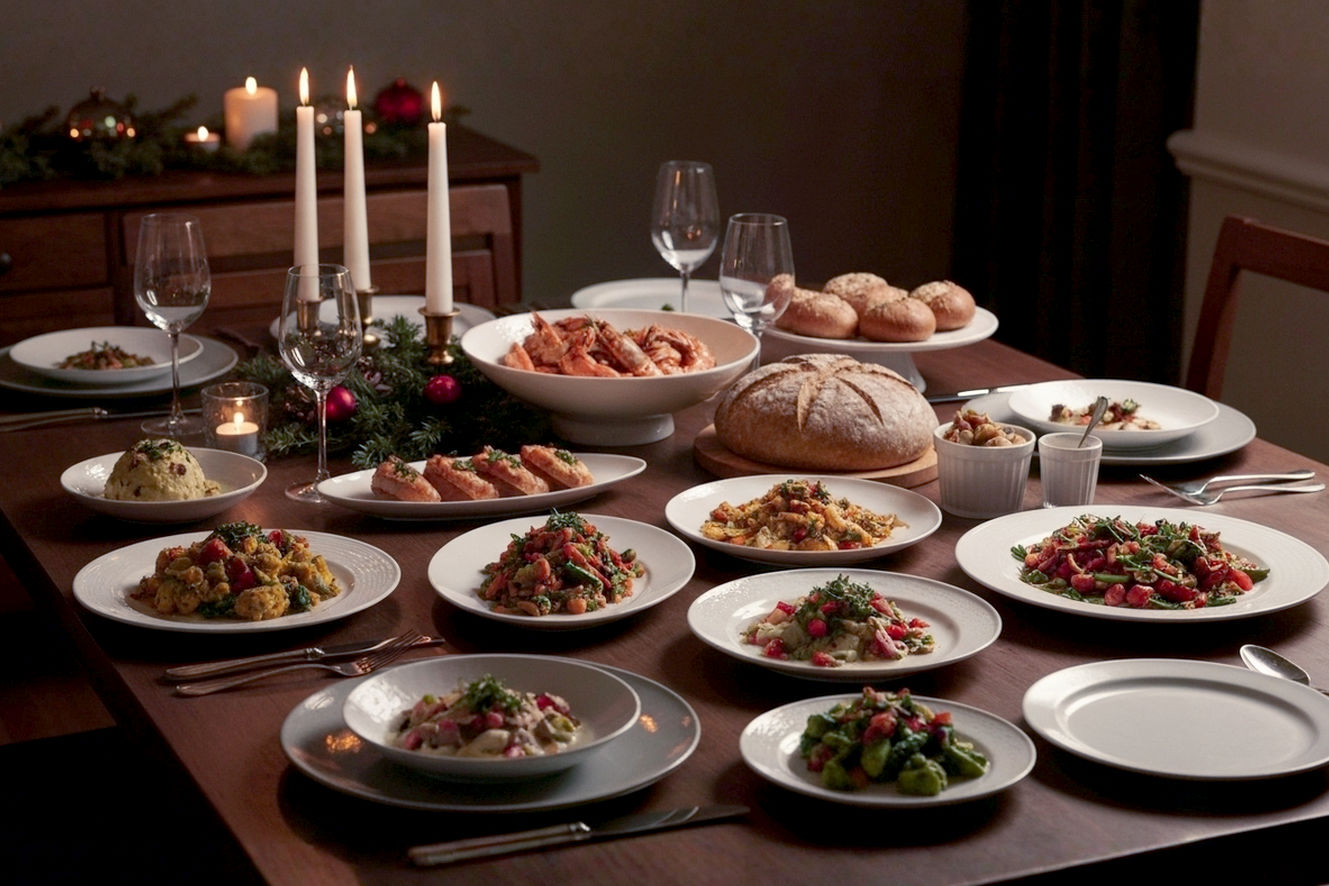
Complementary Side Dishes for Your Holiday Feast
To complete your Christmas dinner, choose side dishes that balance the richness of the rib roast.
- Roasted Vegetables: Simple roasted potatoes, carrots, parsnips, or Brussels sprouts tossed with olive oil, salt, pepper, and fresh herbs are always a hit. They can often roast alongside the prime rib (if using the traditional method) or be cooked in a separate oven.
- Creamed Spinach or Mashed Potatoes: These creamy, comforting sides offer a smooth contrast to the roast. Creamed spinach adds a touch of green and richness, while fluffy mashed potatoes are a classic vehicle for au jus.
- Green Bean Casserole: For a touch of comforting tradition, a homemade green bean casserole with crispy fried onions is a beloved holiday staple.
- Fresh Salads: A light, crisp green salad with a simple vinaigrette can provide a refreshing counterpoint to the rich meal, cutting through the richness and adding a vibrant element.
By pairing your perfectly cooked rib roast with these thoughtful accompaniments, you’ll create a truly unforgettable Christmas feast.
Carving Your Christmas Rib Roast Like a Pro
After all your hard work and patience, the moment of truth arrives: carving the rib roast. This final step is crucial for presentation and ensuring every guest gets a beautiful, tender slice. Don’t let a clumsy carve diminish your masterpiece!
Tools and Setup for Carving
Having the right tools and a proper setup will make carving much easier and safer.
- Stable Cutting Board with a Well for Juices: A large, sturdy cutting board is essential. Look for one with a channel or well around the perimeter to catch any escaping juices. This prevents a mess and allows you to collect those precious drippings for your au jus. A non-slip mat or damp towel underneath the board will keep it from sliding around.
- Sharp Carving Knife: As mentioned earlier, a long (8-10 inch), thin-bladed carving knife is ideal. A sharp knife is not only more efficient but also safer, as it requires less force and is less likely to slip. If your knife isn’t razor-sharp, take a few minutes to hone it with a sharpening steel or stone before you begin.
- Sturdy Carving Fork: A two-pronged carving fork helps stabilize the roast while you slice. It allows you to hold the meat firmly without touching it directly, ensuring clean, even cuts.
Step-by-Step Carving Instructions
Approach carving with confidence and a steady hand.
- Transfer the Roast: Once the roast has finished its crucial resting period, carefully transfer it from the roasting pan to your prepared cutting board.
- Removing Bones (if Bone-in): If you cooked a bone-in rib roast (and didn’t have your butcher tie the bones back on for easy removal), your first step is to separate the meat from the bones.
- Stand the roast upright on the cutting board, with the bones facing away from you.
- Using your sharp carving knife, carefully slice along the curve of the bones, separating the entire piece of meat from the bone section. Try to get as close to the bones as possible to maximize your yield.
- Once the meat is separated, you can slice the bones into individual ribs (often called “chef’s treats”) and offer them to guests who enjoy gnawing on them, or save them for stock.
- Slicing Against the Grain for Tenderness: This is the most important rule for carving any roast. Slicing against the grain means cutting perpendicular to the direction of the muscle fibers. If you look closely at the meat, you’ll see lines running in one direction; these are the muscle fibers. Cutting across them shortens these fibers, making each slice much more tender and easier to chew. If you cut with the grain, the fibers remain long, resulting in a chewier, tougher slice.
- Position the roast so that you can easily slice across the grain.
- Begin slicing from one end of the roast.
- Thickness of Slices: The ideal thickness for rib roast slices is typically 1/2 to 3/4 inch thick. This thickness allows for a good balance of tender meat, flavorful crust, and juicy interior. Aim for consistent slices for an appealing presentation.
- Presentation on a Platter: As you slice, arrange the pieces neatly on a warm serving platter. Overlap them slightly to create an attractive fan shape. You can pour some of the collected au jus over the slices to keep them moist and add extra flavor. Garnish with a few sprigs of fresh rosemary or thyme for a festive touch.
Carving a rib roast is a moment of pride. With these tips, you’ll present a perfectly sliced, juicy, and impressive centerpiece for your Christmas feast.
Troubleshooting Common Rib Roast Challenges
Even with the best intentions, things can sometimes go awry in the kitchen. Knowing how to identify and prevent common rib roast problems can save your Christmas dinner from disaster.
My Rib Roast is Dry/Tough: What Went Wrong?
This is perhaps the most common and disappointing outcome when cooking a rib roast. A dry or tough roast usually points to one of a few key issues:
- Overcooking: The Most Common Culprit: The primary reason a rib roast turns out dry and tough is simply cooking it for too long or to too high an internal temperature. As meat cooks past its optimal doneness, the muscle fibers contract excessively, squeezing out moisture and becoming rigid. The collagen within the connective tissues, which would normally break down into gelatin at lower temperatures over longer periods, instead tightens up, leading to a tough texture. This is why a reliable meat thermometer is absolutely essential. Pulling the roast even 5-10 degrees too late can make a noticeable difference. Always aim for the lower end of your desired doneness range, accounting for carryover cooking.
- Not Resting Enough: As discussed, the resting period is crucial. If you slice into the roast too soon, all the internal juices, which are under pressure from the heat, will escape. This leaves the meat dry, even if it was cooked to the perfect temperature. The technical explanation is that during cooking, muscle proteins denature and lose their ability to hold water. Resting allows the temperature gradient within the roast to equalize, and as the muscle fibers relax, they reabsorb the free-flowing moisture, distributing it throughout the meat.
- Poor Quality Meat: While less common if you’re buying from a reputable source, a roast with very little marbling (intramuscular fat) can also contribute to dryness. Marbling melts during cooking, basting the meat from within and contributing to its juiciness. If the initial cut lacked sufficient marbling, it will be harder to achieve a moist result, regardless of your cooking technique. This is why choosing USDA Prime or well-marbled USDA Choice is so important.
My Crust Isn’t Crispy: How to Fix It
A perfectly crispy, deeply browned crust is one of the hallmarks of a great rib roast. If yours is lacking that satisfying crunch, here’s why:
- Not Enough Fat Rendering: The fat cap is key to a crispy crust. If it’s not scored properly or if the oven temperature isn’t high enough during the searing phase (in reverse sear) or initial phase (in traditional roast), the fat won’t render sufficiently. Instead of crisping, it might remain flabby or chewy. Scoring the fat increases its surface area, allowing more efficient heat transfer and fat rendering.
- Oven Temperature Too Low for Sear: For both reverse sear and traditional methods, the final high-heat blast (or initial high heat) is critical for crust development. If your oven isn’t hot enough (e.g., below 450°F / 230°C for the sear), or if you open the oven door too frequently, the surface won’t reach the temperature required for the Maillard reaction to occur effectively. The Maillard reaction is a complex chemical process between amino acids and reducing sugars that gives browned food its distinctive flavor and color. It requires high heat and a relatively dry surface.
- Too Much Moisture on the Surface: Moisture is the enemy of crispiness. If the roast isn’t thoroughly patted dry before seasoning, or if it’s tightly tented during resting (trapping steam), the surface won’t be able to crisp up properly. The steam will prevent the surface from reaching the necessary temperatures for the Maillard reaction and dehydration needed for crispness. This is why dry brining uncovered and patting dry before cooking are so important.
Uneven Cooking: Why Some Parts Are More Done
An unevenly cooked roast means some slices are perfect medium-rare, while others are medium or even medium-well. This can be frustrating, but it’s usually preventable:
- Not Bringing to Room Temperature: As discussed earlier, a very cold roast going into a hot oven will heat from the outside in, creating a significant temperature gradient. The outer layers will cook much faster than the inner core, leading to a “bullseye” effect with an overcooked exterior and a less cooked center. Allowing the roast to come closer to room temperature minimizes this initial temperature difference, promoting more even heat penetration.
- Oven Hot Spots: Ovens often have hot spots—areas that are significantly hotter than others. If you don’t rotate your roasting pan occasionally (e.g., halfway through the low-and-slow phase of a reverse sear), one side of the roast might cook faster than the other. Using an oven thermometer to verify your oven’s actual temperature can also help identify if your oven runs hotter or colder than its setting.
- Not Using a Reliable Meat Thermometer: Relying solely on cooking time charts is a gamble. The size, shape, and initial temperature of your roast, as well as your oven’s calibration, all affect cooking time. A leave-in probe thermometer inserted into the thickest part of the meat (avoiding bone) provides real-time, accurate data, allowing you to pull the roast precisely when it’s reached the correct internal temperature, ensuring even doneness throughout.
By understanding these common pitfalls and their solutions, you can confidently tackle your Christmas rib roast and ensure it turns out perfectly every time.
Repurposing Leftovers: Beyond the Holiday Feast
One of the great joys of a holiday rib roast is the promise of delicious leftovers. While a cold slice straight from the fridge is a treat in itself, there are many creative ways to transform leftover prime rib into exciting new meals. Don’t let a single precious bite go to waste!
Creative Ideas for Leftover Prime Rib
Leftover rib roast is incredibly versatile due to its rich flavor and tender texture. Here are some ideas to inspire you:
- Prime Rib Sandwiches (Hot or Cold): This is perhaps the most classic use for leftover prime rib.
- Cold Sandwiches: Thinly slice the cold roast and layer it on crusty bread or a soft roll with horseradish sauce, caramelized onions, or a simple Dijon mustard. Add some arugula or watercress for freshness.
- Hot Sandwiches (French Dip Style): Gently warm thinly sliced prime rib in a pan with a little beef broth or leftover au jus. Pile it onto a toasted hoagie roll and serve with a small bowl of warm au jus for dipping. This is a wonderfully comforting meal.
- Prime Rib Hash: A fantastic breakfast or brunch option. Dice the leftover prime rib into small cubes. Sauté it with diced potatoes, onions, and bell peppers until everything is tender and slightly crispy. Top with a fried egg for a hearty and flavorful meal. The rich beef pairs beautifully with the earthy potatoes and sweet onions.
- Tacos or Quesadillas: Give your leftovers a Tex-Mex twist. Shred or thinly slice the prime rib and warm it gently. Use it as a filling for tacos with your favorite toppings like salsa, avocado, cilantro, and a squeeze of lime. For quesadillas, layer the meat with cheese between tortillas and cook until golden and melted.
- Stroganoff or Stew: Transform your prime rib into a comforting, saucy dish. Cut the leftover meat into bite-sized pieces. For a stroganoff, quickly sauté the beef with mushrooms and onions, then add a creamy sauce made with beef broth and sour cream. Serve over egg noodles. For a stew, add the beef to a rich, simmering vegetable stew towards the end of cooking, just long enough to warm through, to prevent it from becoming tough.
Remember, the key to reheating leftover prime rib is to do it gently and quickly to avoid drying it out. Thin slices warm up best.
Storage Tips for Cooked Rib Roast
Proper storage ensures your leftovers remain safe and delicious for as long as possible.
- Airtight Containers: Once the roast has cooled completely (within two hours of cooking), slice any remaining large portions into smaller, manageable pieces, or even individual servings if you plan to use them for specific recipes. Store the cooked prime rib in airtight containers. This prevents exposure to air, which can lead to drying out and flavor degradation.
- Refrigeration Guidelines: Cooked prime rib can be safely stored in the refrigerator for 3 to 4 days. Make sure your refrigerator is set to 40°F (4°C) or below.
- Freezing Guidelines: For longer storage, you can freeze cooked prime rib. Wrap individual portions tightly in plastic wrap, then again in aluminum foil, or place them in freezer-safe bags, removing as much air as possible. This double-layer protection helps prevent freezer burn. Frozen prime rib will maintain its quality for 2 to 3 months. Thaw frozen prime rib overnight in the refrigerator before gently reheating.
By planning for and properly storing your leftovers, the joy of your Christmas rib roast can extend well beyond the holiday feast itself, providing delicious meals for days or even weeks to come.
Conclusion: A Christmas Feast to Remember
Bringing a perfectly cooked rib roast to your Christmas table is more than just serving a meal; it’s creating a cherished memory. We’ve walked through every essential step, from understanding the cut and choosing the right size to mastering the reverse sear technique, ensuring that critical resting period, and even crafting those perfect accompaniments like a rich au jus. You now have the knowledge and confidence to tackle this impressive centerpiece.
Remember, the key to success lies in preparation, patience, and most importantly, trusting your meat thermometer. Don’t be intimidated by the size or reputation of the rib roast; with these guidelines, you’re well-equipped to achieve a result that’s beautifully rosy, incredibly juicy, and boasts a magnificent, crispy crust.
So, gather your ingredients, sharpen your knives, and embrace the joy of cooking for your loved ones this holiday season. The aroma filling your home, the delighted faces around your table, and the delicious flavors of your perfectly roasted rib roast will make this Christmas feast truly unforgettable. We wish you a delicious and joyful Christmas, filled with good food and great company!