This post may contain affiliate links. If you make a purchase through these links, we may earn a commission at no additional cost to you.
Christmas is a magical time, but let’s be honest, it can also be a bit overwhelming. The pressure to create a picture-perfect holiday home often leads to stress, not joy. What if you could transform your space into a festive wonderland without spending hours or breaking the bank? You absolutely can! This guide is all about embracing simplicity and discovering how DIY simple Christmas decorations can bring immense joy with minimal effort.
The Magic of Simplicity: Why Less is More This Christmas
The holiday season often comes with a long to-do list: gift shopping, meal planning, party attending, and, of course, decorating. It’s easy to get caught up in the idea that more decorations mean more festive cheer. But often, the opposite is true. Embracing simplicity can actually amplify the magic.
Embracing the “Less Stress, More Joy” Philosophy
Many of us feel the pressure to replicate elaborate holiday displays seen in magazines or on social media. This pursuit can quickly turn fun into a chore.
The Overwhelm of Traditional Decorating
Think about it: hauling out boxes of fragile ornaments, untangling miles of lights, and spending an entire weekend decking the halls. It’s a huge time commitment, and it can be quite expensive too. The sheer volume of decorations can feel daunting, leading to decision fatigue and a sense of being perpetually behind schedule. We often forget that the true spirit of Christmas isn’t about perfect aesthetics; it’s about connection, warmth, and shared experiences.
The Appeal of Quick DIY
This is where quick Christmas crafts come in. Imagine creating beautiful, personalized decorations in just minutes. This approach isn’t about cutting corners; it’s about focusing on what truly matters. It’s about finding joy in the process, using what you have, and making your home feel cozy and inviting without the added stress. These aren’t just decorations; they’re small acts of creativity that contribute to a more relaxed and enjoyable holiday season.
Benefits of Simple DIY Decorations
Choosing to go the DIY route for your holiday decor offers a surprising number of advantages beyond just saving time.
Saving Time and Money
This is perhaps the most obvious benefit. Store-bought decorations can be pricey, especially if you’re buying new items every year. By using materials you already own, foraging for natural elements, or making small, inexpensive purchases, you’ll significantly reduce your holiday spending. Plus, the “10-minute” aspect means you free up precious time for other festive activities, like baking cookies or watching holiday movies. You won’t be sacrificing your entire Saturday to decorating.
Reducing Environmental Impact
In an age where sustainability is increasingly important, eco-friendly Christmas decorations made from natural or recycled materials are a fantastic choice. Think about the amount of plastic and non-biodegradable items that get thrown away after the holidays. By choosing to craft with pinecones, dried oranges, paper, or old fabrics, you’re actively reducing waste and making a more environmentally conscious choice. It’s a small step that contributes to a healthier planet.
Fostering Creativity and Family Fun
DIY projects are inherently creative. They allow you to personalize your decor, making your home truly unique. This process can also be a wonderful family activity. Kids Christmas crafts easy to manage can involve even the youngest family members. Gathering natural elements, cutting paper shapes, or tying ribbons together becomes a shared experience, creating lasting memories and fostering a sense of togetherness. It’s a chance to unplug and connect.
The 10-Minute Mindset: Your DIY Toolkit and Approach
Adopting the “10-minute mindset” means approaching your decorating with efficiency and a touch of ingenuity. It’s about making the most of readily available resources and simple techniques.
Essential Supplies for Speedy Decorating
You don’t need a craft store full of expensive gadgets to create stunning DIY decorations. Many of the best materials are likely already in your home or backyard.
Common Household Items
Before you head to the store, take a look around your house. You might be surprised what you find. Scissors, glue (craft glue or a hot glue gun), string, twine, ribbon, old buttons, fabric scraps, and even aluminum foil can be transformed into festive elements. Mason jars, wine bottles, and old newspapers are also excellent candidates for repurposing. This approach emphasizes resourcefulness and reduces the need for new purchases.
Basic Craft Supplies
While the goal is simplicity, a few basic craft supplies can elevate your creations. A small bottle of craft paint (white, red, green, gold), glitter, and perhaps some pipe cleaners or googly eyes (especially if kids are involved) can add a lot of sparkle and fun. These items are generally inexpensive and can be used for multiple projects throughout the year, making them a wise investment for any crafter.
Foraging for Natural Elements
Nature provides some of the most beautiful and free decorating materials. A walk in your local park or even your backyard can yield a treasure trove. Look for pinecones, evergreen sprigs (fir, pine, cedar), berries (non-toxic ones like holly or juniper, if safe for your household), bare branches, and even interesting leaves. Always be mindful of local regulations and private property when foraging. These natural elements bring an organic, rustic charm to your decor.
The “Batch and Go” Strategy
The secret to quick DIY decorating isn’t just about simple projects; it’s also about how you approach them. The “batch and go” strategy maximizes your efficiency.
Preparing Your Workspace
Before you start, gather all your materials for a specific project. Lay out newspaper or a protective mat. Have your scissors, glue, and chosen embellishments within easy reach. This preparation, known as mise en place in culinary terms, minimizes interruptions and helps you stay focused. A tidy workspace leads to a more enjoyable and productive crafting session.
Assembling Materials Efficiently
Instead of making one ornament at a time, prepare multiple pieces simultaneously. For example, if you’re making pinecone ornaments, gather all your pinecones, have your paint ready, and cut all your ribbon pieces in advance. Then, work through each step for all the ornaments at once: paint all the tips, then glue all the ribbons. This assembly-line approach drastically cuts down on transition time between tasks, allowing you to create several decorations in a short burst.
Safety First: Tips for DIY Decorating
While simple DIY projects are generally safe, a few precautions are always wise, especially when involving children or using tools.
- Hot Glue Gun Safety: If using a hot glue gun, always supervise children closely. The nozzle and melted glue can cause burns. Use low-temperature glue guns for younger crafters.
- Sharp Tools: Keep scissors and other sharp tools out of reach of very young children. Guide older children on proper handling.
- Natural Elements: Ensure any foraged berries or plants are non-toxic if they will be within reach of children or pets. Some common holiday plants can be harmful if ingested.
- Ventilation: If using spray paint or strong adhesives, ensure you work in a well-ventilated area to avoid inhaling fumes.
- Fire Safety: When using candles or string lights, always follow manufacturer instructions. Never leave lit candles unattended, and ensure lights are not overloaded or placed near flammable materials.
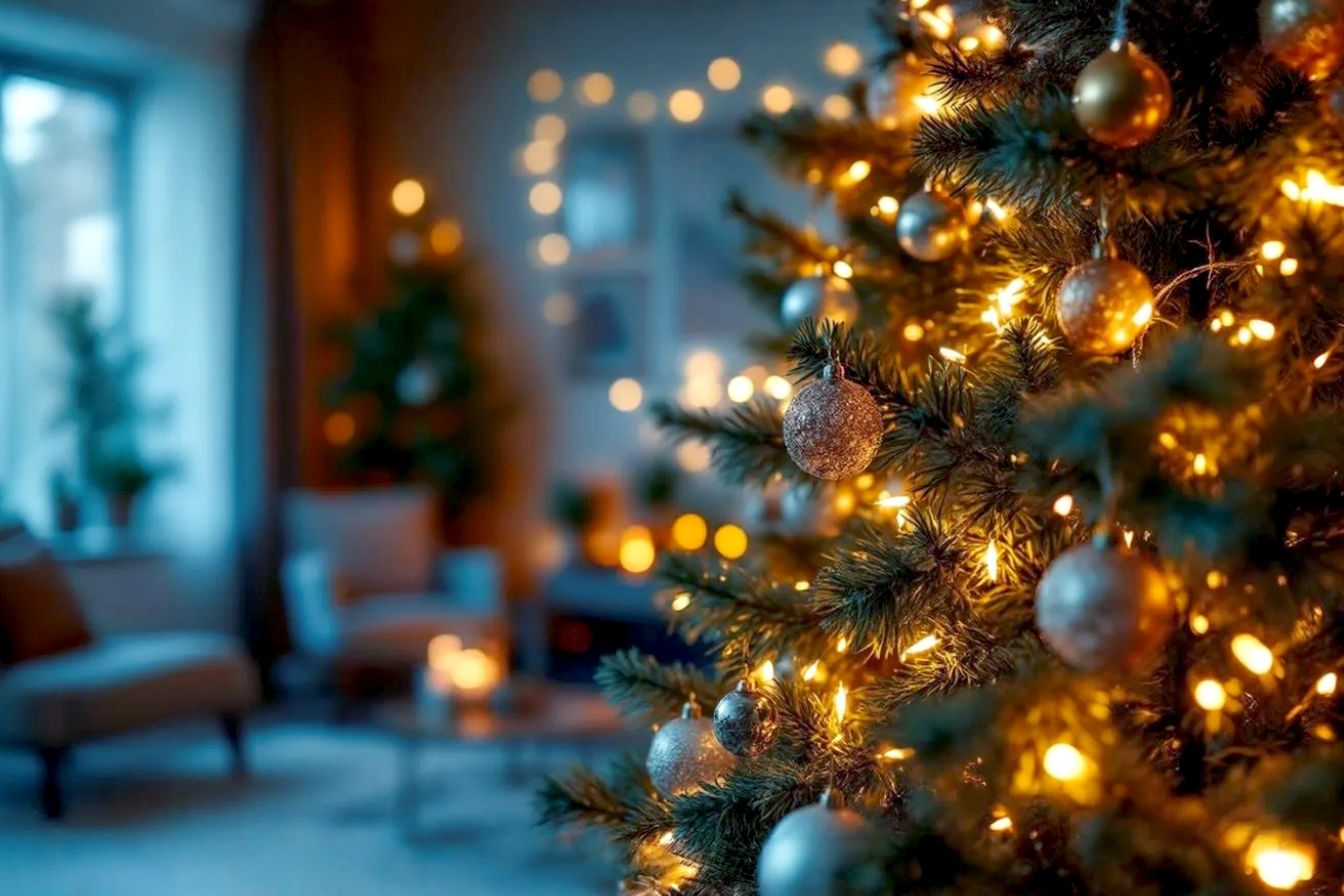
Instant Festive Flair: Quick & Easy Ornament Ideas
Ornaments are the heart of Christmas decor. They hang on trees, adorn garlands, and add sparkle to any corner. These ideas are designed to be completed in a flash.
Nature-Inspired Ornaments
Bringing the outdoors in creates a cozy, rustic, and incredibly charming holiday atmosphere. These ornaments celebrate the beauty of natural elements.
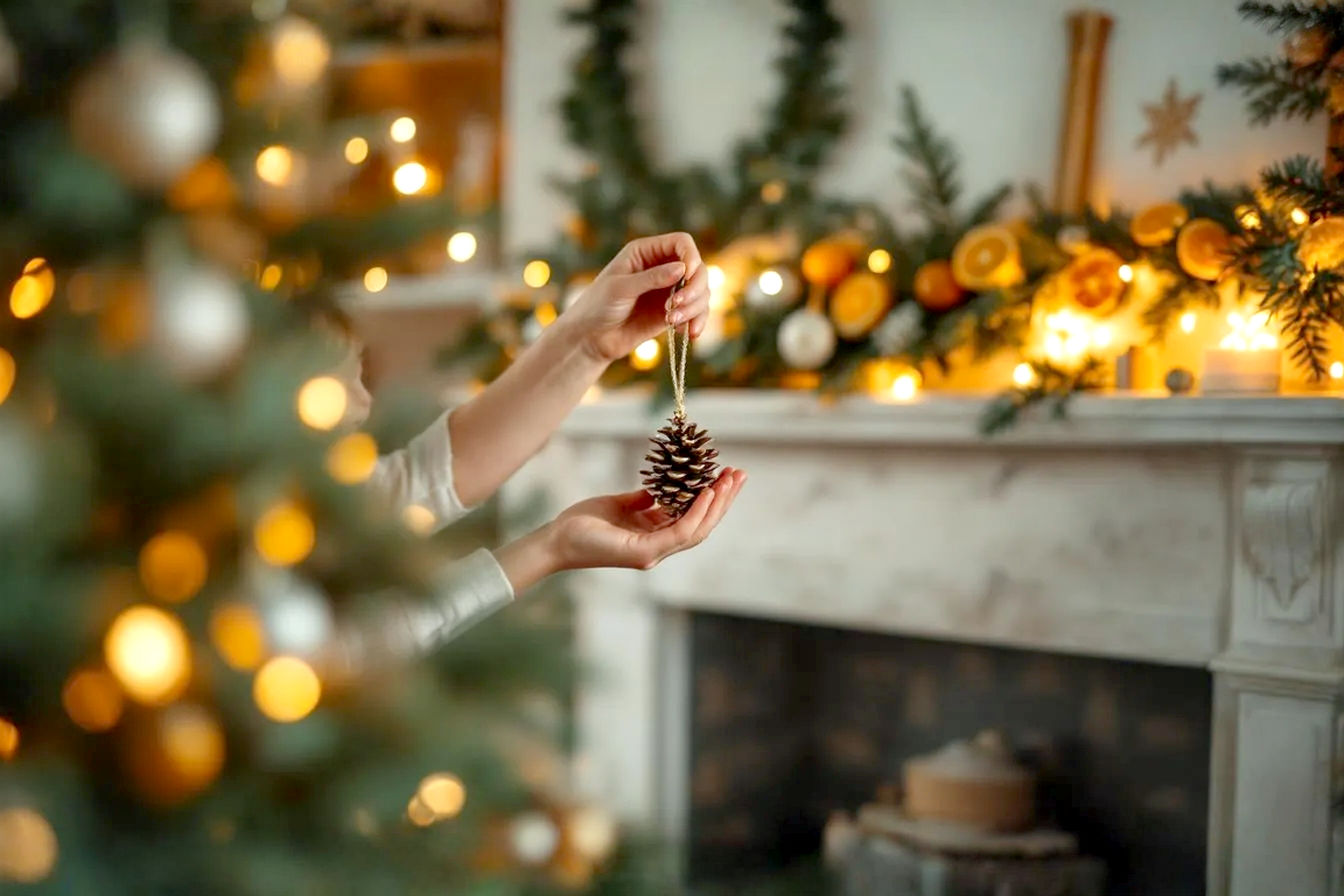
Rustic Pinecone Delights
Pinecones are perhaps the easiest and most versatile natural decoration. They’re free, abundant, and inherently beautiful.
Gathering and Preparing Pinecones
First, collect pinecones of varying sizes. Look for ones that are fully open and free of excessive debris. To prepare them, you can simply brush off loose dirt. For a more thorough cleaning and to ensure they’re bug-free, you can bake them on a foil-lined baking sheet at a low temperature (around 200°F or 95°C) for about 30 minutes to an hour. This also helps them open up fully. Let them cool completely before decorating. This heat treatment, a form of thermal sterilization, ensures any lingering insects or moisture are removed, preventing future issues.
Simple Embellishments: Paint, Glitter, Ribbon
Once clean, the fun begins. For a snowy effect, dip the tips of the pinecone scales in white craft paint or spray them lightly with white spray paint. You can also add a touch of sparkle by sprinkling glitter onto wet paint or applying craft glue and then glitter. For a rustic look, simply tie a loop of twine or burlap ribbon around the top scales. If you want a more traditional feel, use red or green satin ribbon. The beauty of pinecones is that they look great with minimal adornment.
Hanging Techniques
The simplest way to hang a pinecone is to tie a loop of string or ribbon around one of the top scales. For a more secure method, you can carefully screw a small eye hook into the base of the pinecone (the flat part where it detached from the branch) and then thread your string through the hook. This method is particularly good for heavier pinecones or those you plan to reuse year after year.
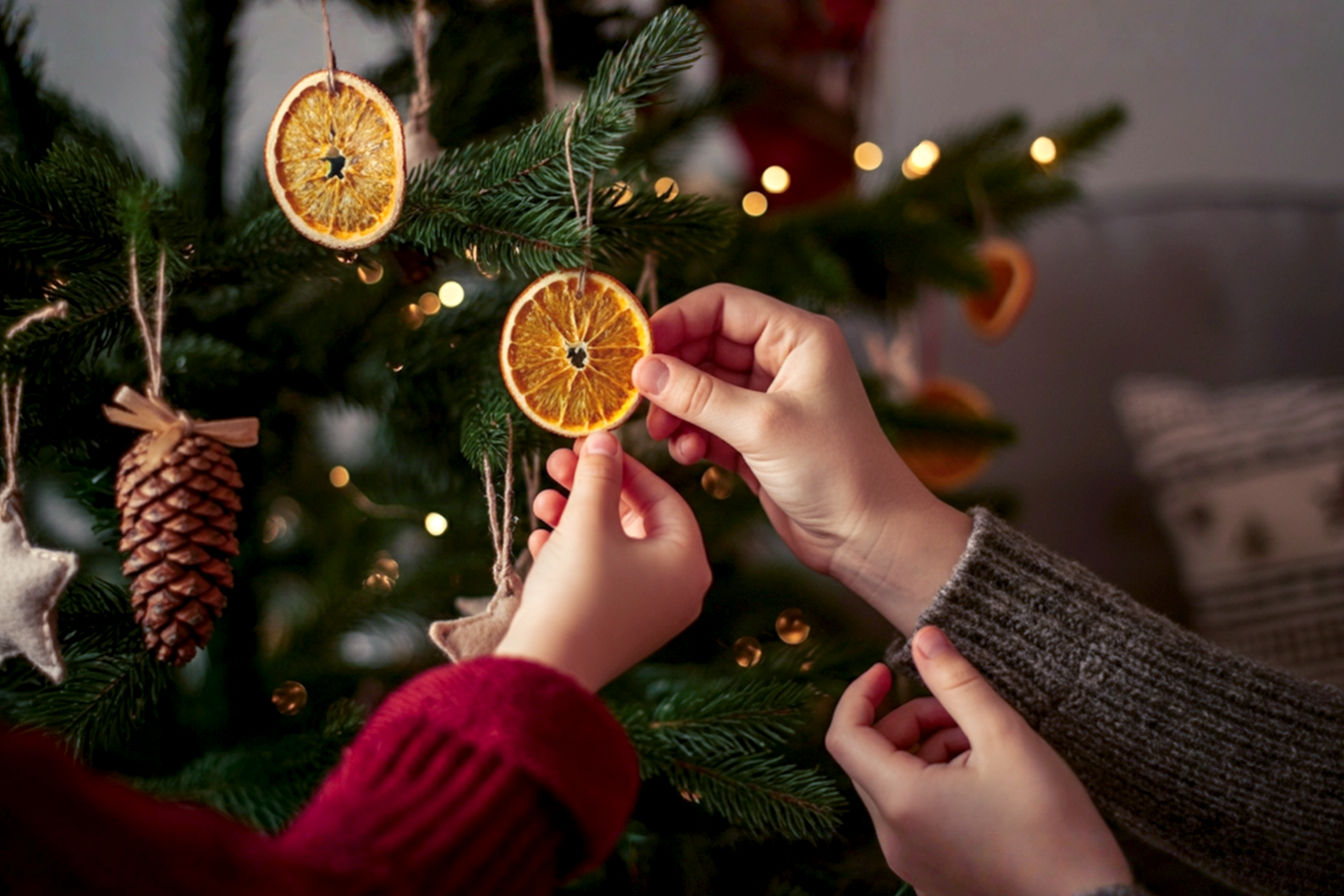
Dried Orange Slice Wonders
Dried orange slices offer a beautiful, translucent, and naturally fragrant decoration. They add a touch of old-world charm.
Slicing and Drying Techniques (Oven vs. Dehydrator)
To make these, slice oranges (or other citrus like lemons or grapefruits) about 1/4 inch thick. Pat them dry with paper towels to remove excess moisture.
- Oven Method (Faster): Arrange slices on a wire rack placed over a baking sheet. Bake at a very low temperature (around 175-200°F or 80-95°C) for 3-6 hours, flipping every hour or so, until they are dry and translucent but not burnt. The low temperature and long drying time are crucial to dehydrate the fruit without cooking it, preserving its color and shape.
- Dehydrator Method (Best Results): If you have a food dehydrator, arrange slices on trays and dehydrate at 135°F (57°C) for 8-12 hours, or until completely dry. This method provides more even drying.
Adding Spices and Finishing Touches
Once dry, they’ll be firm and slightly leathery. You can leave them as is, or enhance their natural beauty. For extra fragrance and visual appeal, you can glue whole cloves or small cinnamon sticks to the center or edges of the slices. A light spray of clear sealant can help preserve them, though it’s optional. The natural oils in the citrus will continue to release a subtle, pleasant aroma.
Versatile Uses: Ornaments, Garlands, Potpourri
Thread a loop of twine or fishing line through a small hole poked near the top of each slice to create ornaments for your tree. You can also string multiple slices together with cranberries or wooden beads to create a fragrant and beautiful garland. When the season is over, these slices can be added to a potpourri mix for continued enjoyment. Their versatility makes them a fantastic DIY project.
Cinnamon Stick Bundles
These tiny bundles are incredibly simple, smell amazing, and add a rustic touch.
Tying with Twine or Ribbon
Gather 3-5 cinnamon sticks. Arrange them neatly and then wrap them tightly with twine, raffia, or a festive ribbon. Tie a secure knot, leaving a loop at the top for hanging. You can experiment with different ribbon colors to match your decor theme. The natural scent of the cinnamon sticks will gently diffuse into the air, adding to your home’s festive aroma.
Adding Small Embellishments
For extra charm, tuck a small sprig of evergreen, a few dried berries (like red pepper berries), or a tiny jingle bell into the bundle before tying. These small additions elevate the simple cinnamon sticks into a more refined decoration. The act of bundling and tying is a quick, repetitive motion that allows you to create several of these in under ten minutes.
Scented Decor for Trees and Gifts
Hang these scented decor bundles on your Christmas tree branches, tie them onto gift packages as a fragrant tag, or simply place them in a decorative bowl. They’re also perfect for hanging on doorknobs or drawer pulls, subtly infusing holiday cheer throughout your home. The warmth of your home will help release their natural fragrance.
Paper & Cardboard Creations
Paper and cardboard are incredibly versatile, inexpensive, and readily available. They’re perfect for light, whimsical, and customizable decorations.
Geometric Paper Ornaments
Simple folds and cuts can create surprisingly intricate-looking ornaments.
Simple Folds and Cuts
Think about classic paper snowflakes, but with a modern twist. Use heavier paper or cardstock for more durability. You can cut out simple shapes like stars, circles, or diamonds, and then fold them in half or quarters to create a 3D effect. For a more advanced but still quick design, cut several identical shapes (e.g., circles) and glue them together along their folds to create a paper sphere or fan. This technique leverages basic origami principles to create depth from a flat material.
Using Recycled Cardboard
Don’t throw away those empty cereal boxes or shipping cartons! Cut them into shapes like stars, trees, or reindeer. Cardboard is sturdy and takes paint well. This is a fantastic way to upcycle materials and reduce waste. You can even layer different thicknesses of cardboard for added dimension.
Adding Sparkle
Once your paper or cardboard shapes are cut, they’re a blank canvas. Paint them with metallic gold or silver paint, or brush on craft glue and sprinkle liberally with glitter. You can also use markers, stamps, or even attach small sequins or beads for extra sparkle. A hole punch and some string complete the ornament.
Personalized Photo Ornaments
These are incredibly sentimental and make wonderful keepsakes or gifts.
Printing and Cutting Photos
Select favorite family photos, perhaps from past Christmases or special moments. Print them at home or at a local print shop. You’ll want to print them slightly larger than your desired ornament size. Carefully cut out the photos into circles, squares, or even irregular shapes. For a vintage look, consider printing them in black and white or sepia tone.
Mounting on Cardboard or Wood Slices
To give your photo ornaments structure, glue the cut-out photos onto sturdy cardboard circles, small wood slices, or even old CDs/DVDs. Use a strong craft glue or Mod Podge to ensure they adhere well. Smooth out any air bubbles. The backing provides stability and a base for further decoration. This process is a simple form of decoupage, adhering paper to a surface.
Decorating Edges
Once mounted, you can decorate the edges. Use a glitter pen, metallic marker, or even small beads glued around the perimeter. Drill a small hole at the top (if using wood) or punch a hole (if using cardboard) and thread a festive ribbon or twine for hanging. These ornaments are not only beautiful but also tell a story.
Paper Chain Garlands with a Twist
The classic paper chain is a childhood favorite, but you can elevate it with modern materials and techniques.
Classic Technique, Modern Materials
Instead of just construction paper, try using scrapbook paper with festive patterns, old sheet music, newspaper comics, or even pages from old books. Cut strips about 1 inch wide and 6-8 inches long. Form a loop, secure with glue or tape, then thread the next strip through the first loop and secure. Repeat. This simple interlocking loop structure creates a continuous chain.
Adding Textures and Patterns
Mix and match different papers for visual interest. You could alternate plain colored paper with patterned paper, or use different textures like glitter paper or vellum. For a quick upgrade, use pinking shears to give the edges a decorative zig-zag cut. You can also add small jingle bells or tiny ornaments every few links.
Fabric & Yarn Embellishments
Fabric and yarn offer warmth, texture, and a cozy feel to your Christmas decor. Many projects require no sewing at all.
No-Sew Felt Ornaments
Felt is a fantastic material for quick crafts because it doesn’t fray when cut, meaning no hemming or sewing is needed.
Simple Shapes and Cut-outs
Purchase felt sheets in festive colors like red, green, white, and brown. Use cookie cutters or stencils to trace shapes like stars, trees, hearts, or gingerbread men onto the felt. Cut them out with sharp scissors. You can make them single-layered or double-layered for extra thickness. The simplicity of felt allows for rapid production of multiple identical shapes.
Gluing and Layering
For multi-layered designs, simply glue felt pieces together using craft glue. For example, cut a larger green tree shape and a smaller white star shape, then glue the star onto the tree. You can also glue on small felt circles for “ornaments” or felt strips for “garlands.”
Adding Buttons or Beads
Embellish your felt ornaments with buttons, beads, sequins, or even small jingle bells. Use craft glue to attach them securely. Punch a small hole at the top and thread a ribbon or string for hanging. These ornaments are soft, durable, and perfect for homes with small children or pets, as they won’t shatter if dropped.
Yarn-Wrapped Stars or Shapes
This project is wonderfully tactile and creates a soft, textured look.
Cardboard Base Technique
Cut sturdy cardboard into desired shapes like stars, trees, or circles. Make a small slit or notch on one edge to secure the beginning of your yarn. Wrap the yarn tightly and neatly around the cardboard shape, covering it completely. You can wrap in one direction or crisscross for different effects. This technique is a form of textile application onto a rigid base.
Different Yarn Textures and Colors
Experiment with different types of yarn: chunky yarn for a cozy look, metallic yarn for sparkle, or even multi-colored yarn for a vibrant effect. You can also use different colors on the same shape by tying off one color and starting another. This adds visual interest and allows for customization.
Quick Hanging Loops
Once the shape is fully wrapped, secure the end of the yarn with a dab of glue. Create a hanging loop by tying a small piece of matching yarn or ribbon to the top of the wrapped shape. These ornaments are lightweight and add a lovely soft texture to your tree or garlands.
Ribbon Bows and Clusters
Ribbon is an instant transformer. A well-placed bow can elevate almost anything.
Creating Various Bow Styles
- Simple Bow: Form two loops and tie them as you would a shoelace.
- Double Loop Bow: Create two loops on each side before tying for a fuller look.
- Layered Bow: Use two different widths or colors of ribbon, layering them before tying, to create a more luxurious effect.
- Wired Ribbon: If using wired ribbon, you can easily shape the loops and tails for a more structured bow.
Attaching to Branches or Gifts
Use floral wire, pipe cleaners, or even a dab of hot glue to attach bows directly to tree branches, garland, or wreaths. They can also be tied onto gift packages for an elegant finish. A cluster of small bows can also be tied together to create a mini ornament.
Combining Colors and Textures
Don’t be afraid to mix and match. Combine a wide velvet ribbon with a thin metallic one, or a patterned ribbon with a plain solid color. The contrast in texture and pattern adds depth and visual appeal, making your simple additions look more sophisticated.
Transforming Spaces: Quick Decor for Every Room
Christmas decor isn’t just for the tree. Spreading festive cheer throughout your home can be done quickly and effectively with these simple ideas.
Entryway & Hallway Welcome
The entryway sets the tone for your home. Make it inviting and festive in minutes.
Festive Door Hangings (Beyond the Wreath)
While wreaths are lovely, there are quicker alternatives.
Simple Swags with Greenery and Berries
Gather a few sprigs of fresh evergreen (pine, cedar, or fir). Tie them together at the top with twine or ribbon. Tuck in a few faux berries or small pinecones. Hang this simple swag on your door using an over-the-door hanger or a command hook. It offers a natural, welcoming scent and look without the fuss of a full wreath.
Ribbon and Bell Clusters
Take several lengths of different festive ribbons (red, green, gold, plaid). Tie them together at one end, allowing the tails to hang down. Attach a few small jingle bells to the ends of some of the ribbons. Hang this cluster from your doorknob or a hook. The sound of the bells will add a cheerful note every time the door opens.
Console Table Vignettes
If you have a console table or small shelf in your entryway, it’s a perfect spot for a quick festive display.
Grouping Candles and Natural Elements
Arrange a few pillar candles or flameless LED candles of varying heights on a small tray. Scatter some pinecones, evergreen sprigs, and perhaps a few dried orange slices around the base of the candles. The soft glow of the candles combined with the natural elements creates an instant cozy ambiance. This is a classic still life arrangement technique.
Adding Fairy Lights
Drape a short strand of battery-operated fairy lights among the candles and natural elements. The tiny, warm lights add a magical sparkle without needing an outlet nearby. This simple addition makes the vignette feel more enchanting and festive.
Living Room Comfort & Joy
The living room is often the heart of holiday gatherings. Make it feel extra special with minimal effort.
Mantelpiece Magic in Minutes
If you have a fireplace mantel, it’s a prime spot for holiday decor.
Greenery and Pinecone Arrangements
Lay a simple garland of fresh or faux evergreen across the mantel. Tuck in clusters of pinecones, either plain or lightly frosted with paint. You can also add a few large, decorative ornaments. The natural flow of the greenery instantly creates a festive focal point.
Staggered Candles and Lights
Place candles of different heights along the mantel, interspersing them with the greenery. Add a strand of battery-operated LED lights woven through the garland. The varying heights and soft illumination create a dynamic and inviting display. Remember to use flameless candles if you have pets or small children.
Cozy Corner Accents
Even small corners can be transformed into festive nooks.
Throw Pillows and Blankets
Swap out your everyday throw pillows for ones with holiday-themed covers (red, green, plaid, or winter scenes). Drape a cozy chunky knit blanket over a chair or sofa. These textile changes instantly add warmth and a festive touch without needing any crafting.
Simple Garland Drapes
Take a short length of bead garland, popcorn garland, or a simple string of fairy lights and drape it casually over a bookshelf, around a mirror, or along the top of a window frame. The light shimmer or texture adds a subtle hint of holiday cheer.
Dining Room Delights
The dining room is where many holiday meals are shared. Make it inviting for festive feasts.
Effortless Table Centerpieces
A beautiful centerpiece doesn’t have to be elaborate.
Fruit and Nut Bowls
Fill a large, decorative bowl with fresh apples, oranges, pomegranates, and a mix of walnuts, pecans, and chestnuts. The vibrant colors and natural textures create a stunning and edible centerpiece. You can also tuck in a few evergreen sprigs for a touch of green. This is a simple cornucopia-inspired display.
Mason Jar Lanterns with Greens
Place a small votive candle or LED tea light inside several mason jars. Tie a simple ribbon or twine around the neck of each jar, and tuck in a small sprig of evergreen or a few cranberries. Arrange these jars down the center of your table for a warm, flickering glow.
Chair Back Decor
Don’t forget the chairs! A simple touch can make a big difference.
Ribbon and Ornament Ties
Tie a festive ribbon (perhaps a wide satin or burlap one) around the back of each dining chair. You can then tie a single small ornament, a mini pinecone, or a tiny jingle bell onto the ribbon. This adds a consistent decorative element around the table.
Small Greenery Sprigs
Tuck a small sprig of fresh evergreen or holly into the ribbon tie on each chair back. The fresh scent and vibrant green will add a natural elegance to your dining space.
Bedroom Retreats
Even your private spaces can benefit from a touch of holiday magic. Keep it subtle and serene.
Subtle Touches for Serenity
The bedroom should remain a calm sanctuary.
Fairy Lights Around the Headboard
Drape a strand of battery-operated fairy lights around your headboard or along a curtain rod. The soft, warm glow creates a peaceful and dreamy atmosphere, perfect for winding down during the busy holiday season.
Small Potted Plants with Ornaments
Place a small potted plant, like a mini poinsettia or a small evergreen, on your nightstand or dresser. Add one or two small, simple ornaments (like a tiny pinecone or a felt star) to its branches. This brings a touch of living green and holiday cheer without overwhelming the space.
Window Sill Wonders
Your window sills are perfect for small, impactful displays.
Mini Pinecone Displays
Arrange a few mini pinecones on your window sill. You can spray them with a light dusting of fake snow or glitter for an extra festive touch. Their simple, natural form is elegant and understated.
Simple Paper Snowflakes
Cut out a few classic paper snowflakes from white paper. Tape them to the window pane or hang them from the top of the window frame with clear fishing line at varying heights. They create a beautiful, delicate winter scene, especially when backlit by outdoor light.
Beyond the Basics: Creative Touches & Eco-Friendly Tips
Once you’ve mastered the 10-minute basics, you might want to explore ways to make your decor even more unique and sustainable.
Upcycling & Repurposing for a Greener Christmas
Giving old items new life is a fantastic way to be creative and eco-conscious. Upcycling transforms discarded materials into something new and valuable.
Old Sweaters to Stockings or Ornaments
Don’t throw out that old, worn-out wool sweater! Cut the sleeves off to create instant mini-stockings for gifts or ornaments. You can cut out shapes like stars or trees from the sweater fabric and use them as no-sew felt ornaments. The cozy texture of the sweater adds a lovely warmth. This reduces textile waste and gives a unique, handmade feel.
Glass Jars to Luminaries
Empty jam jars, pickle jars, or sauce jars can be transformed into beautiful luminaries. Clean them thoroughly. You can paint them with frosted glass spray paint, wrap them in lace or twine, or fill them with epsom salts (to mimic snow) and a small LED tea light. These repurposed glass containers create a soft, inviting glow.
Newspaper/Book Pages to Garlands
Old newspapers, phone books, or discarded book pages can be folded, cut, or rolled into various shapes for garlands. Roll pages into cones and glue them together to form a wreath, or cut out circles and string them together. The monochromatic text creates a sophisticated, vintage look. This is an excellent example of material transformation for decorative purposes.
Scented Sensations: Engaging All the Senses
Decorating isn’t just about what you see; it’s also about what you smell. Adding festive scents enhances the holiday atmosphere.
DIY Potpourri Mixes
Create your own potpourri using dried orange slices, cinnamon sticks, whole cloves, star anise, and dried cranberries. You can also add a few drops of festive essential oils like frankincense or peppermint. Place the mix in decorative bowls around your home. This natural aromatic blend is far more pleasant than artificial air fresheners.
Essential Oil Diffusers with Festive Scents
If you have an essential oil diffuser, use holiday-themed essential oils. Popular choices include pine, frankincense, myrrh, cinnamon, clove, and sweet orange. Diffusing these oils creates a continuous, natural fragrance that permeates your home with the spirit of the season. This leverages aromatherapy principles for holiday ambiance.
Involving the Family: Making Memories Together
DIY decorating is a fantastic opportunity to bond and create new family traditions.
Age-Appropriate Tasks for Kids
Even very young children can participate. They can help gather pinecones, tear paper for garlands, or glue cotton balls onto shapes for “snow.” Older children can handle scissors for cutting felt or paper shapes, or help tie ribbons. Assigning age-appropriate tasks ensures everyone feels involved and contributes to the festive preparations.
Creating New Traditions
Make DIY decorating a yearly event. Perhaps you dedicate one afternoon to foraging for natural elements, followed by a crafting session with hot cocoa and holiday music. These shared activities become cherished memories, shifting the focus from perfect decor to joyful experiences. It’s about the process, not just the product.
Troubleshooting & Maintenance: Keeping Your Decor Merry & Bright
Even simple decorations need a little care to last through the season and beyond.
Quick Fixes for Common DIY Decor Issues
Sometimes, things don’t go exactly as planned, or decorations need a refresh.
Loose Ornaments
If an ornament’s hanging loop comes undone, simply re-tie it with a fresh piece of twine or ribbon. For more permanent fixes, a dab of hot glue can re-secure elements that have come loose. For example, if a pinecone scale detaches, a small amount of hot glue will reattach it quickly.
Fading Scents
Natural scents from dried oranges or cinnamon sticks will eventually fade. To refresh them, you can gently mist them with a diluted essential oil spray (water mixed with a few drops of festive essential oil). For potpourri, simply add a few more drops of essential oil directly to the mix.
Storing Your Simple Creations
One of the benefits of simple DIY decor is that it’s often easier to store.
Organizing for Next Year
Use clear plastic bins or cardboard boxes to store your DIY creations. Label each box clearly (e.g., “Pinecone Ornaments,” “Paper Garlands”). Store fragile items like dried orange slices in layers separated by tissue paper. This systematic storage makes next year’s decorating a breeze.
Preserving Natural Elements
For natural elements like pinecones and dried orange slices, ensure they are completely dry before storing to prevent mold. Store them in a cool, dry place, ideally with some air circulation (e.g., a paper bag inside a plastic bin, or a bin with small ventilation holes). This careful preservation technique allows you to reuse these beautiful elements for several seasons.
Conclusion: Your Simplified, Joyful Christmas
This holiday season, ditch the stress and embrace the beauty of simplicity. You don’t need to spend a fortune or countless hours to create a festive and inviting home. With just 10 minutes here and there, and a few common materials, you can craft beautiful, meaningful decorations that truly reflect the spirit of the season.
Recap of Benefits
Remember, opting for DIY simple Christmas decorations offers numerous advantages: you’ll save time and money, reduce your environmental footprint, and create wonderful memories with your loved ones. These quick and easy projects are accessible to everyone, regardless of crafting experience.
Encouragement for a Stress-Free Holiday
The true magic of Christmas lies not in elaborate displays, but in the warmth of your home and the joy shared with family and friends. By simplifying your decor, you free up mental and physical space to truly enjoy the holidays. Let go of the pressure to be perfect and instead focus on being present.
A Call to Embrace the Spirit of DIY Simplicity
So, grab some pinecones, dig out that old ribbon, and let your creativity flow. This year, make your Christmas decor a reflection of joy, not stress. Embrace the “10-minute mindset” and discover how beautifully simple your season can be. Happy crafting, and have a truly merry and bright Christmas!