This post may contain affiliate links. If you make a purchase through these links, we may earn a commission at no additional cost to you.
The holiday season brings a special kind of magic, a time when our homes transform into cozy, festive havens. While store shelves glitter with countless decorations, there’s an undeniable charm that comes with homemade Christmas decorations. Imagine a twinkling tree adorned with ornaments crafted by your own hands, or a mantelpiece displaying unique accents that tell a story. This isn’t just about saving money; it’s about infusing your celebrations with a personal touch, creating cherished memories, and embracing a more sustainable holiday spirit.
This comprehensive guide will walk you through a delightful array of easy DIY Christmas decorations that are both quick to make and utterly charming. Whether you’re a seasoned crafter or just starting out, you’ll discover simple projects using readily available materials, many of which you might already have around the house. We’ll explore everything from delightful tree ornaments to festive garlands and welcoming home accents, ensuring your holiday decor is filled with warmth, creativity, and a touch of handmade magic. Get ready to transform your home into a festive wonderland, one charming DIY project at a time!
The Magic of Making: Why DIY Christmas Decor?
Embracing easy DIY Christmas decorations offers far more than just a creative outlet; it brings a unique depth and meaning to your holiday celebrations. The act of making something with your own hands imbues it with a special kind of magic that store-bought items simply can’t replicate. It’s a return to tradition, a way to slow down during a busy season, and an opportunity to create truly one-of-a-kind pieces that reflect your personal style and family history.
Personal Touch and Cherished Memories
One of the most compelling reasons to delve into personalized Christmas decorations is the ability to create items that are truly unique. Unlike mass-produced ornaments, your homemade creations carry the imprint of your effort, your creativity, and your specific aesthetic. You can tailor colors, themes, and materials to perfectly match your home’s decor or to celebrate a specific family milestone.
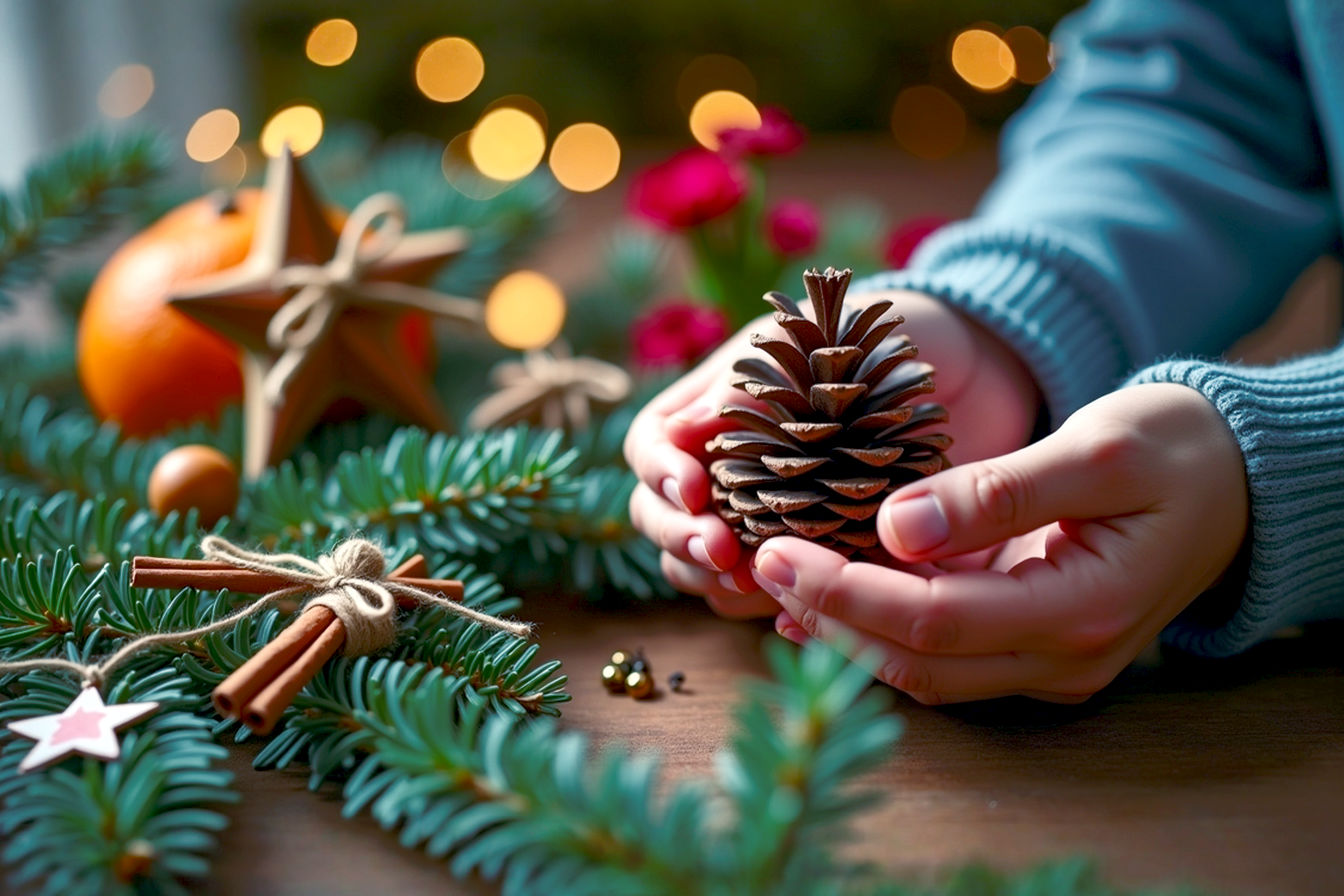
Beyond aesthetics, the process of crafting together fosters incredible family bonding activities. Imagine spending an afternoon with your children or grandchildren, surrounded by glitter and glue, laughing as you create a whimsical ornament. These shared moments become part of the decoration itself, transforming a simple craft into a tangible memory. Each year, as you unpack these handmade treasures, you’re not just pulling out a decoration; you’re reliving those precious moments, making the holidays even more meaningful. These family Christmas crafts become heirlooms, passed down through generations, carrying stories and love with them.
Budget-Friendly Brilliance: Saving Money
The holiday season can often strain our wallets, but budget-friendly Christmas decor offers a smart and stylish solution. By opting for DIY projects, you can significantly reduce the amount you spend on decorations. Many of the most charming projects rely on inexpensive or even free materials. Think about items you might already have in your craft bin, or natural elements found right in your backyard.
For instance, instead of buying a costly designer wreath, you can craft a stunning one using pinecones, branches, and berries collected during a nature walk. Repurposing old items, like turning empty mason jars into glowing luminaries or cardboard into festive signs, is another fantastic way to create cheap Christmas crafts without sacrificing style. This approach not only saves money but also encourages resourcefulness and creativity, proving that beautiful holiday decor doesn’t have to come with a hefty price tag.
Sustainable Celebrations: Eco-Conscious Decor
In an era where environmental consciousness is increasingly important, sustainable Christmas decorations provide a wonderful way to celebrate responsibly. The mass production of holiday decor often involves significant resource consumption and generates considerable waste. By choosing to make your own decorations, you actively participate in reducing this environmental impact.
This often involves repurposing materials that would otherwise end up in landfills. Old sweaters can become cozy stockings, discarded cardboard boxes can transform into festive gift displays, and newspaper can be sculpted into unique ornaments. Furthermore, incorporating natural elements like pinecones, dried orange slices, and evergreen branches minimizes the use of new, manufactured goods. These eco-friendly holiday decor choices not only look beautiful but also align with a commitment to a greener planet, making your celebrations both joyful and responsible.
Unleashing Creativity: Therapeutic Benefits
Beyond the tangible results, engaging in DIY Christmas crafts offers significant therapeutic benefits. The act of creating can be incredibly stress-relieving, providing a mindful activity that allows you to focus on the present moment and escape the hustle and bustle of daily life. It’s a chance to quiet your mind, channel your energy into something positive, and experience the calming rhythm of repetitive tasks like cutting, gluing, or painting.
There’s also an immense sense of accomplishment that comes with seeing a project through from start to finish. Holding a finished ornament or admiring a handmade garland fills you with pride, knowing you created something beautiful and meaningful. This boost in self-esteem and the sheer joy of creative expression make DIY decorating a truly rewarding experience, transforming holiday preparations from a chore into a delightful pursuit.
Essential Tools & Materials for DIY Success
Before you dive into the exciting world of easy DIY Christmas decorations, it’s helpful to gather some basic tools and materials. Having a well-stocked craft kit will make your projects smoother and more enjoyable. You don’t need a professional studio; many of these items are common household staples or inexpensive finds from a craft store.
The Basic Toolkit: What You’ll Need
Every successful DIY project starts with the right equipment. For most DIY Christmas craft supplies, you’ll want to have these essential craft tools on hand:
- Sharp Scissors: For precise cutting of paper, fabric, and string. A good pair makes all the difference.
- Hot Glue Gun and Glue Sticks: This is a crafter’s best friend! A hot glue gun provides a quick, strong bond for a variety of materials, from fabric to wood to plastic. It’s perfect for attaching embellishments, securing elements, and assembling structures.
- Craft Knife (X-Acto knife): Useful for intricate cuts on paper, cardboard, or foam board where scissors might be too cumbersome. Always use a cutting mat underneath to protect your surfaces.
- Ruler: For measuring and ensuring straight lines, especially for projects involving paper or fabric.
- Pencils and Erasers: For marking cutting lines or drawing designs before committing with permanent markers or paint.
- Paintbrushes: A variety of sizes for applying paint, glitter glue, or sealants. Include a fine-tipped brush for details and a wider brush for larger areas.
- Cutting Mat: Protects your work surface when using a craft knife.
- Wire Cutters and Pliers: If you plan on working with floral wire or small gauge wire for ornaments.
Common Crafting Materials: Your Go-To Stash
Beyond the tools, certain common craft materials form the backbone of many inexpensive DIY supplies. These are versatile and can be transformed into countless festive creations:
- Paper and Cardstock: From construction paper for paper chains to cardstock for sturdy ornaments and gift tags, paper is incredibly versatile. Look for festive patterns, glitter paper, or even plain white paper you can decorate yourself.
- Felt: Easy to cut, doesn’t fray, and comes in a wide array of colors. Perfect for soft ornaments, garlands, or appliques.
- Fabric Scraps: Don’t throw away those leftover bits of fabric! They can be torn into strips for garlands, used for small stuffed ornaments, or as accents.
- Yarn and Twine: Essential for hanging ornaments, stringing garlands, or creating cozy textures. Cotton twine, jute twine, and various weights of yarn are all useful.
- Buttons, Beads, and Sequins: These small embellishments add sparkle, texture, and visual interest to almost any project. Raid your sewing kit or pick up assortments at a craft store.
- Glitter and Glitter Glue: For adding that essential festive sparkle. Glitter glue is less messy than loose glitter.
- Pompoms: Available in various sizes and colors, perfect for adding a soft, playful touch to ornaments or garlands.
Nature’s Bounty: Found Materials
One of the most charming aspects of natural Christmas decorations is their accessibility and rustic beauty. Take a walk in your local park or even your backyard to discover a treasure trove of nature-inspired decor:
- Pinecones: Collect various sizes. They can be painted, glittered, or left natural for a rustic look.
- Branches and Twigs: Look for interesting shapes and sizes. They can be arranged in vases, hung with ornaments, or used as bases for wreaths.
- Leaves: Dried leaves can be painted, glittered, or used in collages.
- Dried Fruit Slices: Oranges, lemons, and apples can be dried to create beautiful, aromatic ornaments and garland elements.
- Cinnamon Sticks and Star Anise: Not only beautiful but also provide a wonderful festive scent.
- Acorns and Walnuts: Can be painted or gilded for small, charming accents.
Upcycling Treasures: Repurposed Items
Embrace the spirit of upcycled Christmas decor by giving new life to items you might otherwise discard. This approach is fantastic for creating repurposed holiday crafts that are unique and eco-friendly:
- Old Jars and Bottles: Mason jars, jam jars, and wine bottles can be transformed into luminaries, vases, or snow globes.
- Cardboard Boxes and Tubes: Cereal boxes, toilet paper rolls, and paper towel rolls are excellent for building structures, making ornaments, or creating festive scenes.
- Newspaper and Magazines: Can be rolled, folded, or cut to create paper ornaments, wreaths, or even sculptural elements.
- Old Sweaters or Fabric Clothing: Cut into strips for garlands, used as material for no-sew pillows, or crafted into cozy ornaments.
- Bottle Caps and Tin Cans: Cleaned and painted, these can become unique ornaments or small decorative containers.
Having these tools and materials ready will ensure your DIY Christmas decorating journey is smooth, fun, and filled with creative possibilities!
Quick & Charming Ornaments for Your Tree
The Christmas tree is often the centerpiece of holiday decor, and filling it with easy DIY Christmas decorations makes it truly special. These quick and charming ornaments add personality, warmth, and a touch of handmade magic to your festive display.
Paper Power: Simple Folded & Cut Ornaments
Paper is one of the most versatile and affordable materials for crafting, making it perfect for paper Christmas ornaments. You can create stunning effects with just a few simple cuts and folds.
- Snowflakes: The classic paper snowflake is a timeless craft. For a simple version, fold a square piece of paper multiple times into a triangle, then snip small shapes from the edges. Unfold to reveal a unique design. For more intricate patterns, you can find templates online that guide you through precise cuts, resulting in delicate, symmetrical snowflakes that look beautiful hanging from branches or taped to windows.
- Paper Chains: These are incredibly simple and a fantastic easy paper craft for all ages. Cut strips of colored paper (about 1 inch wide and 8-10 inches long). Form the first strip into a loop and glue or staple the ends. Thread the next strip through the first loop, form it into a loop, and secure. Continue this process, alternating colors, to create a festive garland that can drape across your tree, mantel, or doorway.
- 3D Paper Stars: These add a lovely dimension to your tree. Start by cutting out two identical star shapes from cardstock. Fold each star down the middle of each point and then along the lines connecting the inner angles. This creates creases. Glue the two stars together along one half of each point, creating a three-dimensional effect. You can add glitter or paint for extra sparkle.
Salt Dough Delights: Timeless Keepsakes
Salt dough ornaments are a beloved tradition, offering a simple way to create durable, paintable keepsakes that last for years. They’re especially popular for capturing handprints or footprints of little ones, turning them into cherished homemade keepsakes.
Recipe and Baking Instructions: To make salt dough, you’ll need:
- 1 cup all-purpose flour
- 1/2 cup salt
- 1/2 cup water (adjust as needed)
Mix the flour and salt in a bowl. Gradually add water, mixing until a firm, non-sticky dough forms. Knead for 5-10 minutes until smooth. Roll out the dough to about 1/4 inch thick. Use cookie cutters to cut out festive shapes like stars, trees, or gingerbread men. For handprints, gently press a child’s hand into the dough. Use a straw or skewer to poke a hole at the top of each ornament for hanging.
Bake the ornaments on a parchment-lined baking sheet at a low temperature (around 200°F or 95°C) for 2-4 hours, or until completely hard and dry. The exact time depends on the thickness of your ornaments. Flip them halfway through to ensure even drying.
Painting and Sealing: Once cooled, the salt dough ornaments are ready for decorating. Use acrylic paints to add vibrant colors and details. Once the paint is dry, seal the ornaments with a clear acrylic spray sealant or Mod Podge. This protects the paint and makes them more durable, ensuring your homemade keepsakes last for many Christmases to come.
Pinecone Perfection: Rustic Charm
Pinecone Christmas crafts offer a wonderful way to bring the beauty of nature indoors. These natural elements are perfect for creating rustic ornaments that add warmth and texture to your tree.
Cleaning and Preparing Pinecones: Before crafting, it’s important to clean your collected pinecones. Gently brush off any dirt or debris. To open them fully and kill any potential bugs, bake them on a foil-lined baking sheet at 200°F (95°C) for about 30 minutes to an hour, or until they are fully open and dry. Let them cool completely.
Adding Embellishments: Once prepared, pinecones are a blank canvas.
- Glitter: Apply craft glue to the tips of the pinecone scales, then sprinkle generously with glitter for a frosted, sparkling effect.
- Paint: Use white acrylic paint to dry-brush the tips, creating a “snow-dusted” look. Or, paint the entire pinecone a festive color like gold, silver, or red.
- Small Pompoms or Beads: Hot glue tiny pompoms or colorful beads into the crevices of the pinecone for a playful touch.
- Hanging: Hot glue a loop of twine or ribbon to the top of the pinecone for easy hanging on your tree.
Yarn & Felt Wonders: Soft and Cozy
For soft, tactile ornaments, yarn Christmas ornaments and felt holiday crafts are excellent choices. They add a cozy, handmade feel to your tree.
- Yarn-Wrapped Ornaments: This is a simple yet effective technique. You can use styrofoam balls, cardboard shapes (like stars or circles), or even old plastic ornaments as your base. Apply a small dot of craft glue to the base, then begin tightly wrapping yarn around it, ensuring each new layer slightly overlaps the previous one. Continue until the entire shape is covered. Secure the end with another dot of glue. You can use different colors of yarn, create stripes, or add small felt embellishments.
- Felt Cut-Outs: Felt is incredibly easy to work with because it doesn’t fray when cut. Simply cut out festive shapes like stars, trees, stockings, or gingerbread men. For added interest, you can layer different colors of felt, gluing smaller shapes onto larger ones (e.g., a white felt snowflake on a red felt circle). Use embroidery floss to add simple stitches or hot glue small beads or sequins for extra detail. Attach a loop of thread or ribbon for hanging.
Button & Bead Bling: Sparkle and Texture
For a touch of sparkle and unique texture, button Christmas crafts and beaded ornaments are surprisingly simple to make and look fantastic.
- Gluing Buttons onto Shapes: Cut out sturdy shapes from cardboard or felt (e.g., a Christmas tree, a star, or a circle). Using a hot glue gun or strong craft glue, start attaching buttons of various sizes and colors to completely cover the shape. You can create a monochromatic look with all white buttons for a snowy effect, or a vibrant, eclectic design with a mix of colorful buttons. This technique adds wonderful dimension and visual interest.
- Beaded Wire Ornaments: For elegant, shimmering ornaments, you can use craft wire and beads. Cut a length of flexible craft wire (e.g., 20 or 22 gauge). Thread various beads onto the wire – glass beads, plastic beads, or even small wooden beads. Once you have enough beads, shape the wire into a festive form like a star, a heart, or a simple loop. Twist the ends of the wire together to secure the shape. Add a small loop at the top for hanging. These beaded ornaments catch the light beautifully.
These quick and charming ornaments will transform your Christmas tree into a personalized masterpiece, filled with stories and love.
Festive Flair: Easy DIY Garlands & Banners
Garlands and banners are fantastic for adding a continuous flow of festive cheer throughout your home. They can adorn staircases, mantelpieces, doorways, or even your Christmas tree. These easy DIY Christmas decorations are often simple to assemble but create a significant visual impact.
Popcorn & Cranberry Strands: Classic & Edible
The popcorn & cranberry garland is a timeless and charming edible Christmas garland that evokes a sense of nostalgia. It’s a classic holiday decor item that’s surprisingly easy to make and looks wonderfully rustic and festive.
Technique for Stringing: You’ll need plain, air-popped popcorn (avoid butter or salt), fresh cranberries, and a long needle with sturdy thread or fishing line. The key is to use a strong thread that won’t break easily. Begin by tying a knot at one end of the thread. Then, carefully thread alternating pieces of popcorn and cranberries onto the needle. The popcorn can be delicate, so push the needle through the fluffiest part. The cranberries are firmer and provide a lovely pop of color. Continue until your garland reaches the desired length. This simple process creates a beautiful, natural garland that can be draped over a tree, mantel, or doorway. Just be aware that if left outdoors, it might attract local wildlife!
Dried Orange Slices: Aromatic & Beautiful
For a truly sensory experience, dried orange garland offers both visual beauty and a delightful, natural fragrance. These aromatic Christmas decor pieces are elegant and simple to create.
Slicing and Drying Process: Slice oranges (or lemons, limes, or grapefruits) into thin, even rounds, about 1/4 inch thick. Pat them dry with a paper towel to remove excess moisture.
- Oven Method: Arrange the slices on a wire rack placed over a baking sheet (this allows air to circulate). Bake at a low temperature (around 200°F or 95°C) for 3-6 hours, or until completely dry and firm. Flip them every hour or so to ensure even drying.
- Dehydrator Method: Follow your dehydrator’s instructions for fruit slices, typically at 135°F (57°C) for 6-12 hours. The slices should be firm and translucent when done. Let them cool completely.
Stringing with Spices: Once dried, use a needle and twine to string the orange slices. You can alternate them with other aromatic elements like cinnamon sticks, bay leaves, or star anise for an even richer scent and visual appeal. These garlands look stunning strung across windows, draped on a tree, or hung vertically.
Felt Ball & Pom-Pom Garlands: Soft & Colorful
Pom-pom garlands and felt ball garlands add a soft, playful, and colorful touch to your holiday decor. They are incredibly versatile and can be customized to any color scheme.
Making Pom-Poms:
- Fork Method: For small, dense pom-poms, wrap yarn around the tines of a fork multiple times. Slide the wrapped yarn off the fork, tie a piece of yarn tightly around the middle, and then snip the loops on both sides. Fluff and trim to shape.
- Pom-Pom Maker: These plastic tools make it easy to create perfectly round pom-poms of various sizes. Follow the manufacturer’s instructions.
Stringing Felt Balls or Pom-Poms: Once you have your desired number of felt balls (which can be purchased pre-made) or handmade pom-poms, use a large needle and strong thread or fishing line. Simply thread the needle through the center of each ball/pom-pom, spacing them out as desired. You can add a knot on either side of each ball to keep them in place, or just let them slide freely. These felt Christmas decorations are wonderfully tactile and add a whimsical touch.
Burlap & Fabric Scraps: Rustic & Repurposed
For a charmingly rustic and eco-friendly garland, turn to burlap garland or fabric scrap garland. This project is all about repurposing and creating texture.
Tearing/Cutting Fabric Strips: Gather old fabric scraps (flannel, cotton, burlap, even old t-shirts) in festive colors or patterns. Tear or cut them into strips about 1-2 inches wide and 6-10 inches long. The torn edges add to the rustic appeal. For burlap, you can cut neat strips or fray the edges for a more natural look.
Tying onto Twine: Take a long piece of sturdy twine or rope. Simply tie each fabric strip onto the twine using a simple knot, pushing them close together to create a full, fluffy garland. You can mix and match colors and patterns for an eclectic look, or stick to a specific color palette for a more cohesive design. This method is incredibly quick and requires no sewing, making it a perfect fabric scrap garland project.
Personalized Photo Banners: Memory Lane
A personalized photo banner is a heartwarming way to incorporate cherished memories into your holiday decor. It transforms a simple garland into a journey down memory lane, making it a truly unique personalized holiday decor piece.
Printing Small Photos: Select your favorite family photos from throughout the year or past Christmases. Print them in small sizes, perhaps 3×3 inches or 4×6 inches, either at home or at a photo center. You can print them on regular photo paper or even on cardstock for a matte finish.
Attaching to String: Take a length of festive ribbon or twine. Use small wooden mini clothespins to clip each photo onto the string. You can space them out evenly or cluster them together. Add small embellishments like glitter, small bows, or tiny felt cut-outs to the clothespins or photos if desired. This banner looks lovely strung across a mantel, a wall, or even as a unique addition to your Christmas tree. It’s a wonderful conversation starter and a beautiful way to celebrate your family’s journey.
These garlands and banners will effortlessly elevate your home’s festive atmosphere, adding a touch of handmade charm to every corner.
Deck the Halls: Simple DIY Home Accents
Beyond the tree, your home offers countless opportunities to infuse holiday cheer with easy DIY Christmas decorations. These simple home accents can transform everyday spaces into festive showcases, adding warmth, light, and personalized style.
Mason Jar Magic: Versatile Luminaries & Vases
Mason jar Christmas decor is incredibly versatile and can be adapted to create a variety of charming accents, from twinkling lights to rustic vases. They are perfect for crafting DIY luminaries that cast a warm, inviting glow.
- Painting and Glitter: Clean and dry your mason jars thoroughly. You can paint them with acrylic craft paint in festive colors like red, green, gold, or silver. For a “snow effect,” dab white paint onto the outside with a sponge, or apply spray adhesive and roll the jar in Epsom salts for a frosty texture. You can also apply glue in patterns and sprinkle glitter for a sparkling finish.
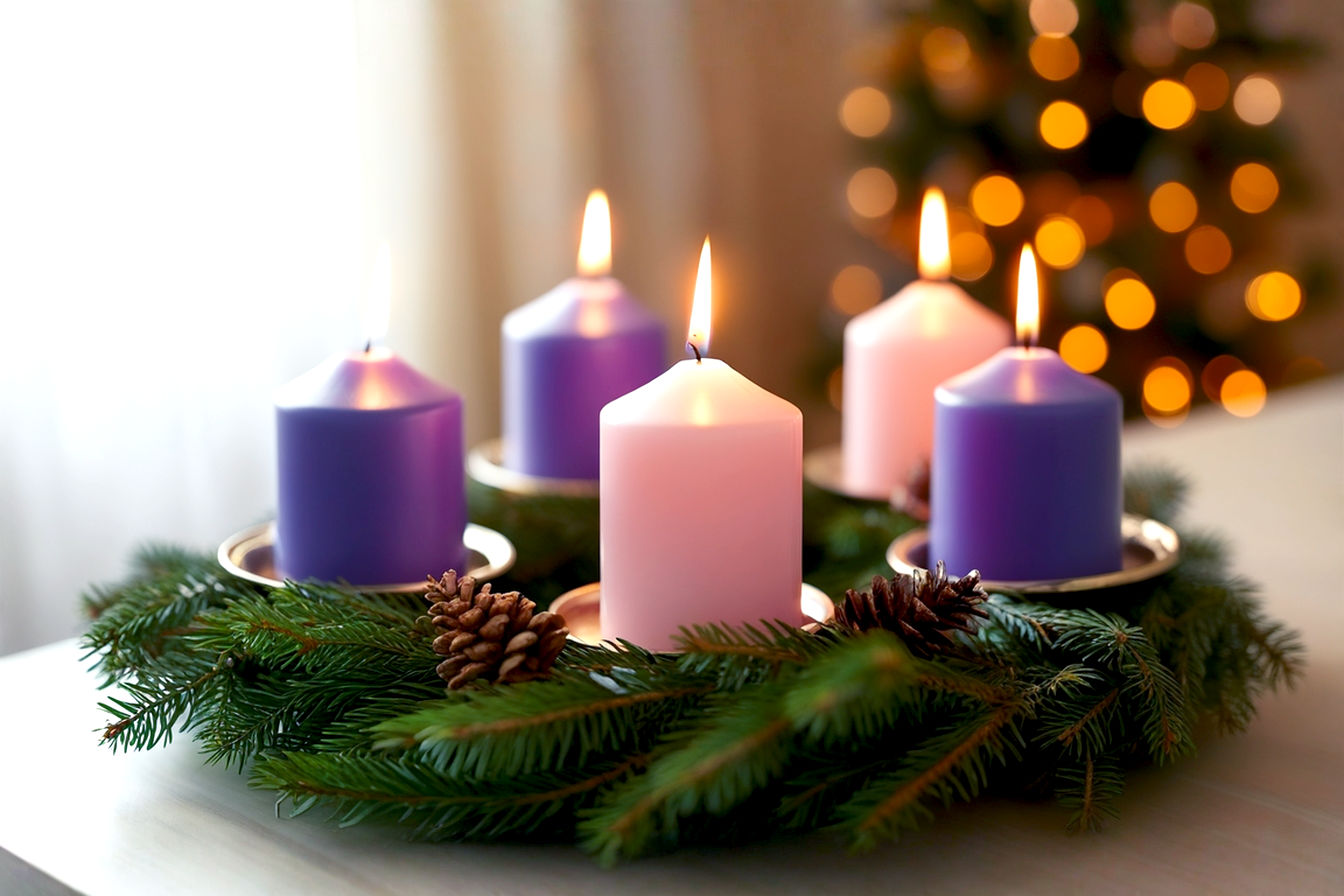
- Adding Fairy Lights or Candles: Once decorated, place battery-operated fairy lights inside the jars for a magical, safe glow. Alternatively, small LED pillar candles or tea lights create a warm, inviting ambiance. Avoid using real flame candles unless the jar is completely clear and placed on a heat-resistant surface, and always monitor them closely.
- Using as Vases for Greenery: For a natural touch, simply fill decorated or plain mason jars with water and arrange fresh evergreen branches, holly, or berries. Add a few pinecones or cinnamon sticks for extra rustic home accents. These make beautiful centerpieces or mantel decorations.
Branch & Twig Displays: Natural Elegance
Bringing elements of the outdoors in creates a serene and elegant holiday atmosphere. Natural branch decor offers a minimalist yet impactful way to decorate, emphasizing the beauty of simplicity.
- Collecting and Cleaning Branches: Take a walk in your yard or a local park and look for interesting branches and twigs. Choose pieces with unique shapes or textures. Once collected, brush off any loose dirt or debris. You can bake them at a low temperature (200°F/95°C) for about 30 minutes to an hour to ensure they are dry and free of insects, then let them cool.
- Arranging in Vases: Place taller, more substantial branches in a sturdy vase or urn. You can leave them natural or spray-paint them white, silver, or gold for a more refined look. Hang lightweight ornaments, dried orange slices, or small paper snowflakes from the branches. This creates a striking, rustic home accent that can serve as an alternative to a traditional tree or a beautiful corner display.
- Creating a Minimalist “Tree”: For a truly unique display, gather several long, straight branches of varying lengths. Arrange them vertically in a heavy base or bucket filled with sand/pebbles to mimic the shape of a Christmas tree. You can connect them horizontally with twine if desired. Then, adorn this minimalist structure with delicate ornaments, fairy lights, or small garlands.
Pillow Covers & Throws: Cozy Comfort
Adding festive textiles is a quick way to make your living space feel cozy and inviting. You don’t need to be a sewing expert to create DIY Christmas pillows or holiday throw covers.
- No-Sew Techniques: The easiest way to update pillows is with no-sew methods. Purchase plain pillow covers in a solid color. Use fabric glue or iron-on adhesive (like HeatnBond) to attach felt cut-outs (e.g., a reindeer silhouette, a snowflake, or simple stripes). You can also use stencils and fabric paint to create designs directly onto the fabric.
- Adding Stenciled Designs or Appliques: For a more polished look, find Christmas-themed stencils. Secure the stencil to the pillow cover with painter’s tape, then use fabric paint to fill in the design. Let it dry completely before removing the stencil. Alternatively, cut out shapes from contrasting fabric (like plaid or glitter fabric) and use fabric glue or iron-on adhesive to attach them as appliques. These holiday throw covers instantly transform your sofa or armchair into a festive spot.
DIY Wreaths: Welcoming Entrances
A homemade wreath is a quintessential easy DIY Christmas wreath that adds a warm welcome to your front door or a festive touch to an interior wall.
- Grapevine Wreath Base: Start with a plain grapevine wreath base, available at craft stores. These provide a natural, sturdy foundation.
- Attaching Natural Elements: Use floral wire or a hot glue gun to attach pinecones, faux berries, dried orange slices, and fresh or faux evergreen branches. Layer the elements, starting with the greenery as a base, then adding larger items like pinecones, and finally smaller accents. You can add a festive bow made from burlap or plaid ribbon.
- Fabric Strip Wreaths: For a softer, fuller wreath, use a wire wreath frame. Cut strips of festive fabric (e.g., red and green plaid, solid red, white with snowflakes) about 1-2 inches wide and 6-8 inches long. Tie each fabric strip onto the wire frame using a simple knot, pushing them close together to create a dense, fluffy wreath. This method requires no glue and is very forgiving, making it a perfect homemade front door decor project.
Gift Box Stacks: Festive Focal Points
Empty gift boxes can be transformed into charming decorative gift boxes that serve as festive focal points in any room. This is a simple yet effective way to add height and visual interest to your holiday displays.
- Wrapping Empty Boxes: Gather empty cardboard boxes of various sizes (e.g., shoe boxes, shipping boxes). Wrap each box individually with festive wrapping paper. Choose coordinating patterns or colors for a cohesive look.
- Stacking and Tying with Ribbon: Stack the wrapped boxes from largest to smallest, creating a tiered effect. Use a long, wide piece of festive ribbon to tie around the entire stack, as if it were one giant present. Tie a large, beautiful bow at the top.
- Adding Bows and Ornaments: Embellish the stack further by hot gluing smaller bows, faux berries, or lightweight ornaments onto the ribbon or directly onto the boxes. You can place these festive display ideas next to your tree, on a console table, or even in an entryway to create an immediate sense of holiday cheer.
These simple DIY home accents prove that you don’t need to buy expensive decor to create a beautiful and festive home. With a little creativity and a few basic materials, your halls will be truly decked!
Crafting with Kids: Fun & Easy Projects
Involving children in creating easy DIY Christmas decorations is a fantastic way to make the holidays even more special. These projects are simple, engaging, and result in cherished keepsakes that kids will be proud to display. They’re not just about the final product, but about the joy of the process and the memories made together.
Popsicle Stick Creations: Simple Shapes
Popsicle stick crafts are a classic for a reason: they’re incredibly versatile and easy for little hands to manage. With just a few craft sticks and some glue, kids can create a variety of easy kids Christmas crafts.
- Snowflakes: Arrange three or four popsicle sticks into a star or snowflake shape, gluing them at the center. Once dry, kids can paint them white, blue, or silver, and then add glitter, small pompoms, or sequins to the tips of the sticks for a sparkling snowflake effect.
- Stars: Glue two popsicle sticks together in an “X” shape, then add a third stick horizontally across the middle to form a star. Paint and decorate as desired.
- Reindeer: Glue two popsicle sticks together to form a “V” for the antlers. Glue a larger stick horizontally below the “V” for the head. Add googly eyes and a red pompom for Rudolph’s nose. This simple structure allows for lots of creative decoration.
Cotton Ball Snowmen: Fluffy Fun
Cotton ball crafts are wonderfully tactile and perfect for creating soft, fluffy snowman DIY decorations. This project is great for developing fine motor skills.
- Gluing Cotton Balls: Provide a piece of blue or black construction paper or a cardboard cut-out of a snowman shape. Kids can then glue cotton balls onto the paper to create the snowman’s body, building up layers for a fluffy effect.
- Adding Features: Once the cotton balls are glued down, use markers to draw on eyes, a carrot nose, and a button mouth. Small buttons can be glued on for the snowman’s “coal” buttons, and a strip of felt can be added as a scarf. This simple activity results in an adorable, textured snowman.
Handprint/Footprint Art: Cherished Mementos
Handprint Christmas art and keepsake crafts are incredibly popular for a reason: they capture a moment in time and become invaluable mementos as children grow.
- Salt Dough: As mentioned earlier, salt dough is perfect for this. Roll out the dough, press a child’s hand or foot firmly into it, cut around the print, poke a hole, and bake. Once cooled, paint the print and seal it. You can paint the handprint green to look like a Christmas tree, or add details to turn a footprint into a reindeer.
- Painted Canvas/Paper: Use non-toxic acrylic paint to coat a child’s hand or foot, then press it onto a piece of paper or a small canvas. Once dry, add details with markers or paint to transform the print into a Christmas character (e.g., a Santa beard from a white handprint, or a reindeer from a brown footprint). Frame these for beautiful keepsake crafts.
Cereal Box Gingerbread Houses: Edible or Decorative
Building a cereal box gingerbread house DIY is a fantastic way to repurpose materials and engage in a larger, more involved craft project. These can be purely decorative or serve as a base for an edible masterpiece.
- Using Cereal Boxes as Structure: Gather empty cereal boxes or other small cardboard boxes. Dismantle them and reassemble them into house shapes, using tape or hot glue to secure the walls and roof. You can cut out window and door shapes.
- Decorating:
- Decorative Version: Cover the entire house with brown construction paper or paint it brown to resemble gingerbread. Then, use white paint pens, glitter glue, pompoms, and felt cut-outs to decorate it with “icing” details, candy canes, gumdrops, and other festive elements. This version is durable and can be displayed year after year.
- Edible Version (with adult supervision): Once the cardboard structure is stable, you can use royal icing to “glue” actual gingerbread cookies or graham crackers to the outside of the box, creating an edible facade. Then, use icing and real candies to decorate, just like a traditional gingerbread house. This combines the fun of crafting with the joy of holiday treats.
These kid-friendly projects provide wonderful opportunities for family fun, fostering creativity and creating lasting memories during the festive season.
Tips for a Stress-Free DIY Christmas
Embarking on a journey of easy DIY Christmas decorations should be a joyful experience, not a source of stress. With a few simple strategies, you can ensure your crafting sessions are relaxing, productive, and truly enhance your holiday spirit.
Start Small & Simple
It’s easy to get carried away with ambitious ideas, but for a truly stress-free experience, especially if you’re new to crafting, remember to start small and simple. Don’t feel pressured to transform your entire home in one go. Choose just one or two simple DIY Christmas projects that genuinely excite you. Perhaps it’s a new garland for the mantel, or a set of personalized ornaments for the tree.
Focusing on achievable goals prevents overwhelm and allows you to enjoy the process. As you gain confidence and see your charming creations come to life, you might feel inspired to tackle more projects next year. The goal is enjoyment, not perfection or exhaustion.
Gather Materials in Advance
There’s nothing more frustrating than being mid-project and realizing you’re missing a crucial item. To avoid last-minute dashes to the store, engage in some thoughtful Christmas craft preparation. Before you begin any project, take a few minutes to read through the instructions and make a comprehensive list of all the materials you’ll need.
Then, gather everything in one place. Check your existing craft stash, look for natural elements outdoors, and make a single trip to the craft store for anything you’re missing. This proactive approach ensures you have everything at your fingertips when inspiration strikes, making your holiday crafting tips session smooth and uninterrupted.
Embrace Imperfection
One of the most beautiful aspects of handmade holiday decor is its inherent charm and unique character. Unlike mass-produced items, your DIY creations will have slight variations, perhaps a slightly crooked cut or a smudge of glitter in an unexpected place. And that’s perfectly okay! In fact, it’s what makes them special.
Learn to embrace imperfection. These small quirks are what give your decorations personality and tell the story of their creation. They are a testament to the fact that they were made with love and care, not by a machine. This mindset shift is crucial for a truly stress-free crafting experience, allowing you to appreciate the unique beauty of your unique Christmas crafts.
Involve the Family
Christmas crafting can be a wonderful opportunity for family Christmas activities. Turn it into a shared experience, not just a solo endeavor. Assign age-appropriate tasks to everyone. Younger children can help with simpler tasks like gluing cotton balls, sorting materials, or choosing colors. Older children and adults can handle cutting, hot gluing, or more intricate designs.
Collaborating on projects not only speeds up the process but also creates lasting memories and strengthens family bonds. It’s a chance to laugh, share stories, and work together towards a common festive goal. These collaborative crafts become even more meaningful when everyone has had a hand in their creation.
Storage Solutions for Next Year
Once the holidays are over, you’ll want to carefully pack away your beautiful DIY Christmas decorations so they’re ready for next year. Proper storing DIY decorations is essential to maintain their integrity and keep them looking fresh.
- Delicate Ornaments: Wrap fragile ornaments (like salt dough or paper creations) individually in tissue paper or bubble wrap.
- Organized Containers: Use clear plastic storage bins so you can easily see what’s inside. Label each bin clearly (e.g., “Tree Ornaments,” “Garlands,” “Mantel Decor”).
- Prevent Tangling: For garlands, loosely coil them and place them in a separate bag or box to prevent tangling.
- Dry Environment: Store all decorations in a cool, dry place to prevent mold, mildew, or damage from extreme temperatures.
By taking a little time to properly store your creations, you’ll save yourself time and effort next year, ensuring your organizing holiday decor is a breeze and your handmade treasures remain beautiful for many Christmases to come.
Conclusion
As you’ve seen, creating easy DIY Christmas decorations is a wonderfully rewarding way to celebrate the holiday season. It’s a journey that goes beyond simply adorning your home; it’s about infusing your space with personal stories, fostering cherished family memories, and embracing a more sustainable approach to festive cheer. From the rustic charm of pinecone ornaments to the cozy comfort of handmade garlands, each project you undertake adds a unique layer of warmth and character to your celebrations.
The beauty of homemade holiday magic lies in its authenticity. These aren’t just decorations; they are tangible expressions of your creativity, your love, and your commitment to making the holidays truly special. So, gather your materials, invite your loved ones, and allow your imagination to take flight. Embrace the imperfections, cherish the process, and delight in the unique charm of your handcrafted holiday haven. May your home be filled with joy, laughter, and the undeniable magic of a truly handmade Christmas!