This post may contain affiliate links. If you make a purchase through these links, we may earn a commission at no additional cost to you.
I. Introduction: Embracing the Timeless Tradition of Fruit Cake
A. The Enduring Appeal of Fruit Cake
For many, the mention of fruit cake brings to mind a dense, often misunderstood confection. Yet, this baked good boasts a rich history, deeply woven into cultural celebrations around the globe. Far from being just a holiday staple, traditional fruit cake is a testament to patience, quality ingredients, and the art of preservation. It’s a dessert that defies quick consumption, instead inviting you to savor its complex flavors over time.
Historically, fruit cakes were practical creations. They offered a way to preserve fruits using sugar and alcohol, making them perfect for long journeys or as provisions during colder months. Over centuries, they evolved from simple fruit and nut breads into the elaborate, spice-laden masterpieces we recognize today. They became symbols of prosperity and celebration, often gracing tables during Christmas, weddings, and other significant events.
Despite its storied past, fruit cake sometimes gets a bad rap. People might associate it with being dry, heavy, or just plain unappetizing. However, these misconceptions usually stem from experiences with mass-produced versions that cut corners on ingredients and preparation. A true traditional fruit cake is anything but dry; it’s wonderfully moist, incredibly flavorful, and surprisingly nuanced. It’s a rich, dense cake, yes, but its weight comes from the abundance of fruits and nuts, not from a heavy, stodgy batter.
B. What Makes a Fruit Cake “Traditional”?
So, what defines a traditional fruit cake? It’s more than just a recipe; it’s a method and a philosophy. A traditional fruit cake is characterized by its:
- Richness: It’s packed with a high proportion of dried and candied fruits, often more fruit than batter.
- Density: The cake has a firm, substantial texture, allowing it to hold up well over time.
- Longevity: Designed to last, often improving with age, especially when “fed” with alcohol.
- Alcohol Infusion: Typically, traditional fruit cakes are soaked in brandy, rum, or whiskey, which acts as a preservative and deepens the flavor profile significantly.
- Patient Preparation: It’s not a quick bake. From soaking the fruits to slow baking and extended aging, patience is a key ingredient.
The emphasis is always on quality ingredients and meticulous preparation. You won’t find artificial flavors or cheap fillers in an authentic fruit cake. Instead, it relies on the natural sweetness of fruits, the warmth of spices, and the depth provided by good spirits. This careful approach ensures that each slice delivers a burst of concentrated flavor and a tender, moist crumb.
C. Your Journey to Fruit Cake Mastery
This guide will take you on a journey to master the traditional fruit cake recipe. We’ll cover everything from selecting the perfect medley of dried fruits and aromatic spices to the critical steps of soaking, baking, and the essential “feeding” process that makes these cakes so special. You’ll learn the secrets to achieving a moist, flavorful cake that truly embodies the spirit of a timeless classic.
Whether you’re looking to start a new family tradition, impress your friends, or simply enjoy a truly exceptional baked good, this comprehensive guide provides all the knowledge you need. Get ready to transform your perception of fruit cake and discover the joy of creating a culinary masterpiece that improves with every passing day.
II. The Heart of the Matter: Essential Ingredients for an Authentic Fruit Cake
Crafting a truly exceptional traditional fruit cake begins with understanding its core components. Each ingredient plays a vital role, contributing to the cake’s unique flavor, texture, and longevity. Don’t skimp on quality here; it makes all the difference.
A. The Dried Fruit Medley: A Symphony of Flavors
The backbone of any great fruit cake is its dried fruit medley. This isn’t just a random assortment; it’s a carefully chosen blend that creates a symphony of flavors and textures.
- Raisins: These are non-negotiable. Use a variety for complexity:
- Dark Raisins: Offer a deep, classic sweetness.
- Golden Raisins (Sultanas): Provide a lighter, tangier note.
- Currants: Tiny and intensely flavored, they add a delightful chewiness and tartness.
- Mixed Peel (Candied Citrus Peel): Often overlooked, this ingredient is crucial for that authentic, slightly bitter citrus counterpoint. Look for good quality mixed peel, ideally without excessive sugar coating. It usually contains candied orange, lemon, and sometimes citron peel.
- Glacé Cherries (Candied Cherries): These vibrant red and green cherries add bursts of color and a distinct, sweet-tart flavor. They are often called “candied cherries.”
- Optional Enhancements: To add even more depth and complexity, consider including:
- Dried Apricots: Their tartness balances the sweetness.
- Dried Figs: Offer a rich, earthy sweetness and a chewy texture.
- Dates: Provide a caramel-like sweetness and softness.
Preparation of Dried Fruits: Why and How to Chop, Wash, and Dry
Before soaking, most dried fruits benefit from a little preparation.
- Chopping: Larger dried fruits like apricots, figs, and dates should be chopped into smaller, uniform pieces, roughly the size of raisins. This ensures even distribution throughout the cake and prevents large, unwieldy chunks.
- Washing: Some commercially dried fruits, especially mixed peel and glacé cherries, can have a slightly sticky or overly sweet coating. A quick rinse under cold water can remove excess sugar and any surface impurities. After rinsing, it’s crucial to pat the fruits thoroughly dry with paper towels. This step is important because excess moisture can dilute your soaking liquid or lead to a soggy cake. The goal is to hydrate them with your chosen spirit, not with plain water.
B. The Candied Fruit Conundrum: Sweetness and Texture
It’s important to differentiate between dried fruits (like raisins and apricots) and candied fruits (like glacé cherries and mixed peel). Candied fruits have been preserved by cooking them in sugar syrup until they are translucent and saturated with sugar. They contribute a different kind of sweetness and a distinct chewy texture.
When selecting candied fruits, quality matters immensely. Avoid overly bright, artificially colored options that taste more like sugar than fruit. Seek out brands that offer a more natural color and a genuine fruit flavor. These higher-quality candied fruits will integrate seamlessly into your cake, adding depth rather than an overpowering sweetness.
C. The Aromatic Spices: The Soul of Fruit Cake
Spices are the soul of a traditional fruit cake, infusing it with warmth, fragrance, and complexity. The classic blend provides a comforting, festive aroma.
- Classic Spice Blend:
- Cinnamon: Warm, sweet, and woody.
- Nutmeg: Pungent, sweet, and slightly woody.
- Cloves: Strong, sweet, and pungent.
- Allspice: Tastes like a blend of cinnamon, nutmeg, and cloves.
- Optional Additions:
- Ground Ginger: Adds a zesty, spicy kick.
- Mace: A delicate, more subtle version of nutmeg.
- Cardamom: Aromatic, with a unique citrusy, floral note.
Grinding Your Own Spices: Benefits for Flavor
For the most intense and fresh flavor, grinding your own whole spices just before baking is highly recommended. Pre-ground spices lose their potency quickly once exposed to air. Using freshly ground spices means the volatile oils are at their peak, translating to a much more aromatic and flavorful fruit cake. You can use a dedicated spice grinder or a clean coffee grinder for this task.
D. The Flour Foundation: Structure and Density
Flour provides the necessary structure to hold the dense array of fruits and nuts together.
- All-Purpose Flour: This is typically the best choice for traditional fruit cake. It provides enough gluten to create a sturdy crumb without making the cake tough.
- Self-Rising Flour: Generally not recommended unless the recipe specifically calls for it and adjusts other leavening agents.
- The Role of Gluten: Gluten, a protein formed when flour is mixed with liquid, develops a network that gives the cake its structure. In fruit cake, you want enough gluten to support the heavy fruits, but not so much that the cake becomes rubbery. This is why gentle mixing is important later on.
E. The Fat and Sweetness: Butter, Sugar, and Molasses
These ingredients contribute to the cake’s richness, moisture, and characteristic dark color.
- Unsalted Butter: Use unsalted butter for the best flavor and control over the salt content. Butter contributes to the cake’s tender crumb and rich taste.
- Brown Sugar vs. Granulated Sugar:
- Brown Sugar: Essential for fruit cake. Its molasses content adds moisture, a deeper caramel-like flavor, and contributes to the cake’s dark color.
- Granulated Sugar: Can be used in smaller amounts, but brown sugar is preferred for its moisture-retaining properties.
- Molasses or Treacle: This is the secret ingredient for achieving that truly dark, rich, and moist traditional fruit cake. Molasses (or golden syrup/treacle in some regions) adds a distinctive depth of flavor and helps keep the cake incredibly moist. Don’t skip it if you want an authentic dark fruit cake.
F. The Liquid Element: Eggs and Alcohol
Liquids bind the ingredients and contribute to the cake’s texture and longevity.
- Eggs: Act as a binder, helping to hold the ingredients together. They also contribute to the cake’s structure and provide some leavening, making the cake slightly lighter.
- Alcohol Infusion: This is a hallmark of traditional fruit cake and serves multiple purposes:
- Brandy, Rum, Whiskey: These are the most common choices.
- Brandy: Often preferred for its sophisticated, fruity notes.
- Dark Rum: Adds a rich, caramel-like sweetness.
- Whiskey: Can provide a smoky or robust flavor, depending on the type.
- Choosing Your Spirit: Select a spirit you enjoy drinking, as its flavor will permeate the cake.
- Non-Alcoholic Alternatives: If you prefer a non-alcoholic fruit cake, you can substitute the spirits with:
- Orange Juice: Adds a bright citrus note.
- Strong Brewed Tea: Provides a subtle tannic depth.
- Coffee: Can add a rich, dark flavor.
- The Role of Alcohol: Beyond flavor, alcohol acts as a natural preservative, inhibiting mold growth and extending the cake’s shelf life significantly. It also helps to keep the cake incredibly moist over time, as it slowly evaporates, leaving behind its flavor. This process is crucial for the “aging” of the cake.
- Brandy, Rum, Whiskey: These are the most common choices.
G. Nuts and Other Enhancements (Optional but Recommended)
While not always present in every traditional recipe, nuts and citrus zest can elevate your fruit cake.
- Nuts:
- Walnuts: Earthy and slightly bitter, they complement the sweet fruits.
- Pecans: Buttery and rich.
- Almonds: Offer a delicate crunch and subtle flavor.
- Preparation: Lightly toast nuts before adding them to enhance their flavor. Chop them to a size similar to your dried fruits.
- Zest: The finely grated peel of oranges or lemons adds a bright, aromatic lift that cuts through the richness of the cake. Use organic, unwaxed citrus for the best results.
III. Pre-Baking Perfection: Preparing Your Ingredients for Success
The success of your traditional fruit cake hinges significantly on thorough preparation before it even enters the oven. These steps ensure a moist, evenly baked cake with perfectly distributed fruits.
A. Soaking the Fruits: The Cornerstone of Moist Fruit Cake
This is arguably the most critical step for a truly moist and flavorful fruit cake. Don’t skip it!
Why Soak? Hydration, Flavor Infusion, Preventing Sinking
- Hydration: Dried fruits, by their nature, are dry. If you add them directly to the batter, they will absorb moisture from the cake during baking, leading to a dry cake. Soaking them pre-hydrates them, ensuring they remain plump and juicy.
- Flavor Infusion: Soaking fruits in alcohol or other liquids allows them to absorb those flavors deeply. This infuses the entire cake with a richer, more complex taste profile that develops further during aging.
- Preventing Sinking: Properly hydrated fruits are less likely to sink to the bottom of the cake during baking. Their density becomes closer to that of the batter, allowing them to suspend more evenly.
What to Soak In: Alcohol (Brandy, Rum) or Non-Alcoholic Liquids
The choice of soaking liquid directly impacts the final flavor.
- Alcohol:
- Brandy: A classic choice, offering a sophisticated, fruity aroma.
- Dark Rum: Provides a rich, caramel-like sweetness that pairs beautifully with dried fruits.
- Whiskey: Can add a robust, slightly smoky note.
- Port or Sherry: Less common but can offer unique, sweet undertones.
- The Technical Process: The alcohol molecules penetrate the fruit cells, replacing some of the water lost during drying. This process, known as osmosis, helps to rehydrate the fruit while imparting the alcohol’s flavor. The alcohol also acts as a mild solvent, helping to release some of the fruit’s natural sugars and flavors.
- Non-Alcoholic Alternatives:
- Strong Brewed Tea: Adds a subtle earthy depth.
- Orange Juice: Provides bright citrus notes.
- Apple Juice or Cider: Offers a mild sweetness.
- Coffee: Can create a darker, more robust flavor.
Soaking Time: Short Soak vs. Overnight vs. Multiple Days
The duration of soaking varies based on preference and time available.
- Short Soak (4-8 hours): This is the minimum for basic hydration and some flavor absorption. It’s suitable if you’re in a hurry, but the cake won’t develop as much depth.
- Overnight (12-24 hours): A good balance. The fruits will be well-hydrated, and the flavors will begin to meld. This is a common and effective approach.
- Multiple Days (2-7 days): For the most intense flavor and ultimate plumpness. This extended soak allows the fruits to fully absorb the liquid, resulting in a deeply infused and incredibly moist cake. Some traditionalists even soak their fruits for weeks!
The Technical Process: Combining Fruits and Liquid, Stirring, Covering
- Combine: Place all your chosen dried and candied fruits in a large, non-reactive bowl (glass or ceramic).
- Pour Liquid: Pour your chosen alcohol or non-alcoholic liquid over the fruits. Ensure the liquid generously covers all the fruit. You might need to add more liquid than you think, as the fruits will expand significantly.
- Stir: Stir well to ensure all fruits are coated and submerged.
- Cover: Cover the bowl tightly with plastic wrap or a lid. This prevents evaporation and keeps the fruits moist.
- Rest: Let the mixture sit at room temperature (if soaking for up to a few days) or in the refrigerator (for longer soaks). Stir occasionally if soaking for more than a day to redistribute the liquid.
B. Preparing Your Baking Pan: Ensuring an Even Bake
Proper pan preparation is crucial for a fruit cake, which bakes for a long time at a low temperature. This prevents burning and ensures easy removal.
- Choosing the Right Pan:
- Size: A deep, round cake pan (8-9 inches or 20-23 cm) or a square pan of similar volume is ideal. The depth is important to accommodate the dense batter and long baking time.
- Material: Heavy-gauge aluminum or non-stick pans work well.
- Greasing and Lining: This is more involved than for a typical cake.
- Grease: Lightly grease the inside of the pan with butter or baking spray.
- Parchment Paper: Cut a circle of parchment paper for the bottom of the pan and a long strip for the sides, allowing it to extend about 2-3 inches (5-7.5 cm) above the rim. This extra height helps prevent the top of the cake from over-browning.
- The Double-Lining Method: For ultimate protection against burning, especially for dark fruit cakes, consider double-lining the pan. This involves using two layers of parchment paper, or even an outer layer of brown paper (like a brown paper bag, cut to size and greased). The extra insulation helps to shield the edges and bottom of the cake from direct heat, promoting a slow, even bake. Secure the paper with kitchen twine around the outside of the pan if needed.
C. Bringing Ingredients to Room Temperature: The Science of Emulsification
This seemingly small step has a significant impact on the final texture of your cake.
- Why it Matters:
- Butter: Room temperature butter is soft enough to cream easily with sugar, allowing it to trap air efficiently. This aeration is crucial for a light, tender crumb, even in a dense fruit cake. Cold butter won’t cream properly, leading to a dense, heavy cake.
- Eggs: Room temperature eggs emulsify (mix smoothly) more easily with the creamed butter and sugar. Cold eggs can cause the mixture to curdle, resulting in a lumpy batter and a less uniform texture in the final cake.
- Achieving a Smooth, Well-Combined Batter: When all ingredients are at the same temperature, they combine more readily and evenly, creating a smooth, homogenous batter. This consistency is essential for the even distribution of fruits and for a consistent bake. Plan ahead and take your butter and eggs out of the refrigerator at least 1-2 hours before you start baking.
IV. The Traditional Baking Process: Step-by-Step Mastery
Baking a traditional fruit cake is a methodical process that rewards patience and precision. Follow these steps carefully to achieve a perfectly baked, moist, and flavorful cake.
A. Creaming Butter and Sugar: Creating the Base
This initial step is fundamental for incorporating air into the batter, which contributes to the cake’s texture.
- Achieving a Light, Fluffy Texture: In a large mixing bowl, combine the softened, room-temperature butter and brown sugar. Using an electric mixer (stand mixer with paddle attachment or a hand mixer) on medium speed, beat them together until the mixture becomes light, fluffy, and pale in color. This process, known as creaming, can take 5-7 minutes.
- Importance of Proper Aeration: As the butter and sugar are creamed, tiny air pockets are incorporated into the mixture. These air pockets expand during baking, contributing to the cake’s rise and creating a more tender, less dense crumb, even in a fruit-heavy cake. Don’t rush this step; it’s crucial for the final texture.
B. Incorporating Eggs Gradually: Emulsification for Stability
Adding eggs correctly is vital to maintain the smooth, aerated base you just created.
- Preventing Curdling: Crack your room-temperature eggs into a separate bowl and lightly whisk them. Add the eggs to the creamed butter and sugar mixture one at a time, beating well after each addition.
- Ensuring a Smooth Batter: The key here is to allow each egg to fully incorporate and emulsify with the fat before adding the next. If you add them too quickly, or if your eggs are cold, the mixture might look curdled or separated. If this happens, don’t panic. Add a tablespoon of the measured flour to the mixture and continue beating; this often helps bring it back together. The goal is a smooth, homogenous batter that holds its structure.
C. Adding Dry Ingredients and Soaked Fruits: The Gentle Fold
This is where the fruit cake truly comes together. The technique here is crucial to prevent overmixing.
- Alternating Dry and Wet Ingredients: In a separate bowl, whisk together your flour and spices. Begin by adding about one-third of the flour mixture to the wet ingredients, mixing on low speed until just combined. Then, add half of your soaked fruits (drained from excess liquid, but don’t squeeze them dry) and nuts (if using), mixing gently. Repeat with another third of the flour, the remaining fruits and nuts, and finally the last third of the flour.
- Folding Technique: Once the last of the dry ingredients and fruits are added, switch from an electric mixer to a large spatula or wooden spoon. Gently fold the ingredients together until just combined. Do not overmix!
- The Technical Explanation: Overmixing develops the gluten in the flour too much, leading to a tough, chewy cake rather than a tender one. The folding technique involves cutting down through the center of the batter, scraping the bottom of the bowl, and folding it over the top. Rotate the bowl as you go. This ensures even distribution of ingredients without excessive agitation.
- Ensuring Even Distribution of Fruits: Continue folding until the fruits and nuts are evenly dispersed throughout the batter. It’s okay if a few clumps remain; the goal is distribution, not perfection.
D. Filling the Pan: The Art of Even Distribution
Properly filling the prepared pan ensures an even rise and bake.
- Leveling the Batter: Spoon the thick fruit cake batter into your meticulously prepared, double-lined baking pan. Use the back of a spoon or a spatula to gently spread and level the batter evenly across the bottom of the pan.
- Creating a Slight Dip in the Center: This is a clever trick to prevent the cake from doming excessively in the middle. Use the back of your spoon to create a slight depression or well in the center of the batter, making the edges slightly higher. As the cake bakes, the center will rise to meet the edges, resulting in a flatter, more even top. This is especially helpful if you plan to decorate with marzipan or royal icing later.
E. The Low and Slow Bake: Patience is a Virtue
Fruit cake requires a long, slow bake to cook through evenly without burning the exterior.
- Oven Temperature: Preheat your oven to a low temperature, typically around 275∘F (135∘C). This low heat is crucial. A higher temperature would cause the exterior to bake and brown too quickly, while the dense interior remains raw. The low temperature allows the heat to penetrate slowly and thoroughly, gently cooking the cake from the inside out.
- Baking Time: Traditional fruit cakes have a long baking duration, often ranging from 2.5 to 4 hours or even longer, depending on the size and depth of your pan. Don’t be alarmed by the time; it’s necessary for the cake to cook completely.
- Testing for Doneness:
- Skewer Test: Insert a long wooden skewer or a thin metal cake tester into the very center of the cake. When it comes out clean, with no wet batter attached, the cake is done. You might see some sticky fruit residue, which is fine, but no raw batter.
- Appearance: The top of the cake should be deep golden brown, and the edges should appear set and slightly pulled away from the sides of the pan.
- Internal Temperature: For the most accurate assessment, use an instant-read thermometer. The internal temperature of a fully baked fruit cake should register between 200−210∘F (93−99∘C). This ensures the cake is cooked through without being overbaked.
- Troubleshooting During Baking:
- Cracking: If the top of your cake starts to crack excessively, it might indicate your oven is a little too hot, or the batter was too stiff. You can try lowering the temperature slightly or placing a shallow pan of water on the bottom rack of the oven to create steam, which can help prevent cracking.
- Over-browning: If the top or edges are browning too quickly before the center is cooked, loosely tent the cake with aluminum foil. This acts as a shield, deflecting direct heat and allowing the interior to catch up.
V. The Art of “Feeding” and Aging: Developing Flavor and Moisture
Baking the fruit cake is only half the journey. The true magic happens during the “feeding” and aging process, where flavors deepen and the cake becomes incredibly moist.
A. Cooling the Cake: The Initial Rest
Proper cooling is essential to prevent condensation and ensure the cake sets properly.
- Cooling in the Pan: Once baked, leave the fruit cake in its prepared pan for at least 30 minutes to an hour. This allows the cake to firm up and prevents it from breaking when transferred. The residual heat in the pan continues to cook the cake gently, a process known as carryover cooking.
- Cooling on a Wire Rack: After the initial cooling in the pan, carefully remove the cake (still wrapped in its parchment/brown paper lining) and transfer it to a wire cooling rack. Allow it to cool completely to room temperature before proceeding to the feeding and wrapping stages. This can take several hours.
- Preventing Condensation: Cooling on a wire rack allows air to circulate around the entire cake, preventing steam from getting trapped underneath, which could lead to a soggy bottom.
B. The Alcohol “Feed”: Nourishing Your Fruit Cake
This is the ritual that transforms a good fruit cake into a truly exceptional one. “Feeding” involves regularly moistening the cake with alcohol.
Why Feed? Enhancing Flavor, Moisture, and Preservation
- Enhancing Flavor: As the alcohol slowly penetrates the cake, it carries its own complex flavors into every crumb. Over time, the alcohol interacts with the cake’s ingredients, creating new, more nuanced flavor compounds. This is a form of flavor maturation.
- Moisture: The alcohol helps to keep the cake incredibly moist. While some alcohol evaporates, its presence helps to retain the cake’s internal moisture, preventing it from drying out over weeks or months. The alcohol acts as a humectant, drawing and holding moisture.
- Preservation: Alcohol is a natural antiseptic and preservative. Its presence inhibits the growth of mold and bacteria, allowing the fruit cake to last for an extended period, often months, without refrigeration. This is a key reason why traditional fruit cakes were ideal for long storage.
What to Use: Same Alcohol Used for Soaking or Fresh Spirit
- It’s best to use the same type of alcohol you used for soaking the fruits (brandy, rum, or whiskey) for feeding. This maintains a consistent flavor profile.
- You can use a fresh bottle of the spirit, or the remaining liquid from the fruit soaking (if it’s clean and hasn’t been contaminated).
Feeding Method: Pricking Holes, Brushing, or Pouring
There are a few effective ways to feed your fruit cake:
- Pricking Holes and Pouring: This is the most common and effective method. Use a skewer, toothpick, or a thin knitting needle to prick numerous small holes over the entire top surface of the cooled cake. Don’t go all the way through to the bottom. Then, slowly pour or spoon a tablespoon or two of alcohol over the top, allowing it to seep into the holes.
- Brushing: Alternatively, you can simply brush the alcohol generously over the top and sides of the cake using a pastry brush. This method is good for lighter feeding.
- Soaking Cloth: For very long-term storage and intense infusion, some traditionalists wrap the cake in cheesecloth or muslin soaked in alcohol before wrapping it in foil.
Frequency of Feeding: Weekly or Bi-weekly
- The frequency depends on how long you plan to age the cake and how moist you want it to be.
- For optimal flavor development and moisture, aim to feed your fruit cake once a week or every two weeks for the first month or two. After that, you can reduce the frequency to once a month if storing for longer.
- Always allow the cake to absorb the previous feeding before adding more alcohol.
C. Wrapping and Storing: The Maturation Process
Proper wrapping and storage are crucial for the cake’s maturation and preservation.
- Proper Wrapping: Once the cake is completely cool and has had its first feeding:
- Parchment Paper: Wrap the cake tightly in a fresh layer of parchment paper.
- Foil: Then, wrap it tightly in at least two layers of aluminum foil. Ensure there are no gaps or exposed areas.
- Airtight Container: Place the wrapped cake in an airtight container (a large plastic container or a cake tin with a tight-fitting lid). This triple layer of protection prevents the cake from drying out and keeps external odors from affecting its flavor.
- Storage Location: Store the wrapped, contained fruit cake in a cool, dark place. A pantry, cellar, or cool cupboard is ideal. Avoid storing it in the refrigerator unless your home is very warm, as the cold can sometimes dry out the cake.
- Aging Time: This is where the magic truly happens.
- Minimum Aging: A traditional fruit cake benefits from a minimum aging period of 2-4 weeks. Even this short period allows the flavors to begin melding.
- Ideal Aging: For truly complex and rich flavors, aim to age your fruit cake for 2-3 months, or even longer. Some fruit cakes are aged for a year or more! The longer it ages, the deeper and more harmonious the flavors become.
- The Science of Aging: During aging, several chemical reactions occur. The alcohol slowly permeates the cake, breaking down some of the complex carbohydrates and proteins, which contributes to a softer texture. More importantly, the volatile compounds from the alcohol, fruits, and spices interact and meld. This process, similar to how wine or spirits age, creates new aromatic compounds and mellows harsh notes, resulting in a more integrated, sophisticated flavor profile. The moisture content also stabilizes, making the cake incredibly tender and moist.
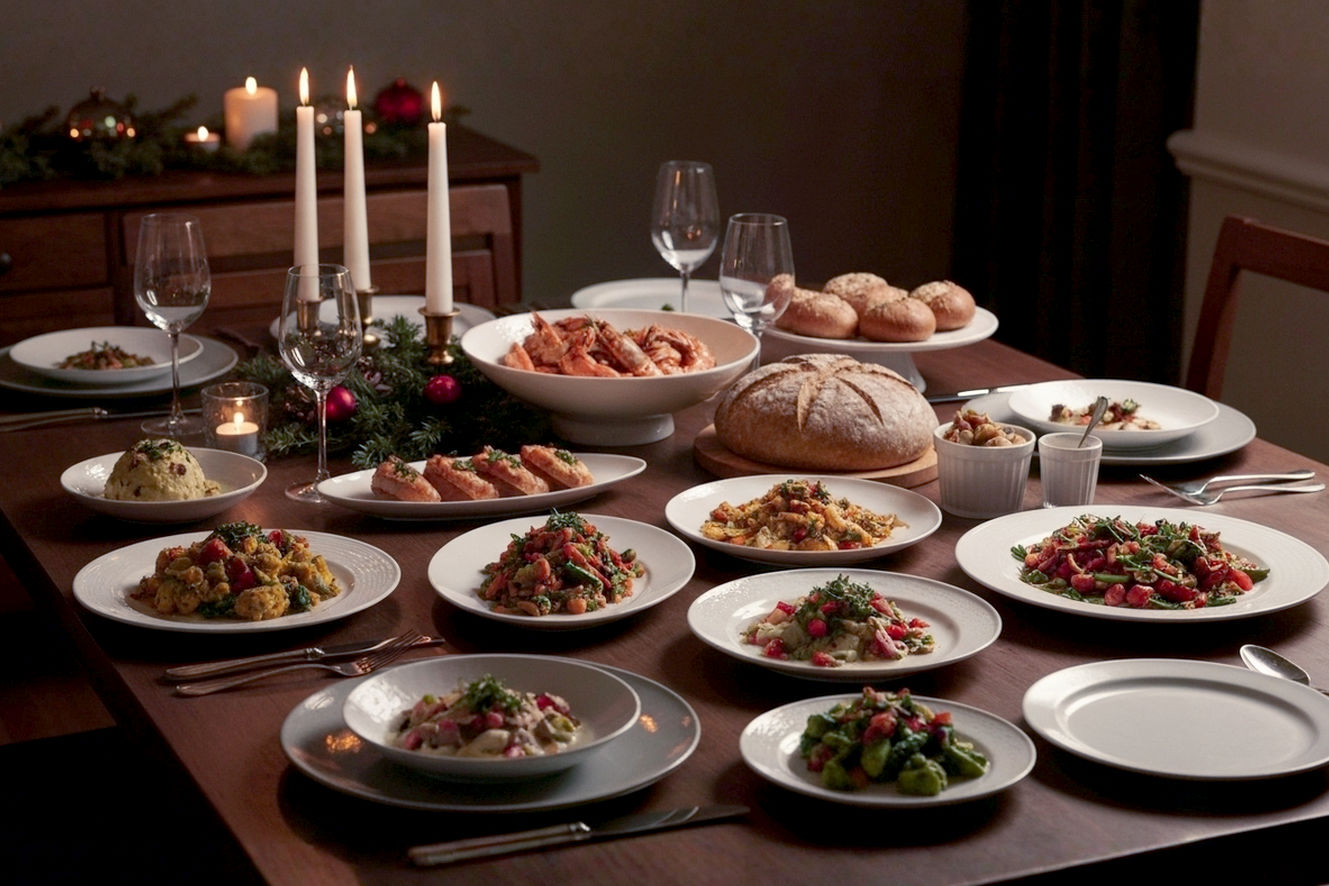
VI. Serving Your Masterpiece: Presentation and Pairing
After weeks or months of patient waiting and diligent feeding, it’s time to unveil and enjoy your traditional fruit cake. Presentation and thoughtful pairings can elevate the experience.
A. Traditional Glazing and Decoration
While a plain, well-aged fruit cake is delicious on its own, traditional decorations add a festive touch, especially for holiday celebrations.
- Simple Sugar Glaze: For a quick and easy finish, you can make a simple glaze by mixing powdered sugar with a small amount of water or lemon juice until it reaches a pourable consistency. Drizzle it over the cooled cake just before serving.
- Marzipan and Royal Icing: These are the classic, elaborate decorations for fruit cakes, particularly for Christmas or weddings.
- Marzipan: A paste made from ground almonds and sugar. It’s rolled out and draped over the cake, providing a smooth, sweet layer. It also helps to seal in moisture.
- Royal Icing: A hard, decorative icing made from egg whites, powdered sugar, and lemon juice. It’s typically piped onto the marzipan layer to create intricate designs, snow scenes, or festive patterns.
- Application: If using marzipan, apply it a few days before the royal icing to allow it to dry slightly. Apply royal icing only a day or two before serving, as it dries quickly.
- Candied Fruit and Nut Garnishes: For a simpler yet elegant look, arrange some extra glacé cherries, mixed peel, or whole nuts (like pecans or almonds) on top of the cake. A dusting of powdered sugar can also add a beautiful finish.
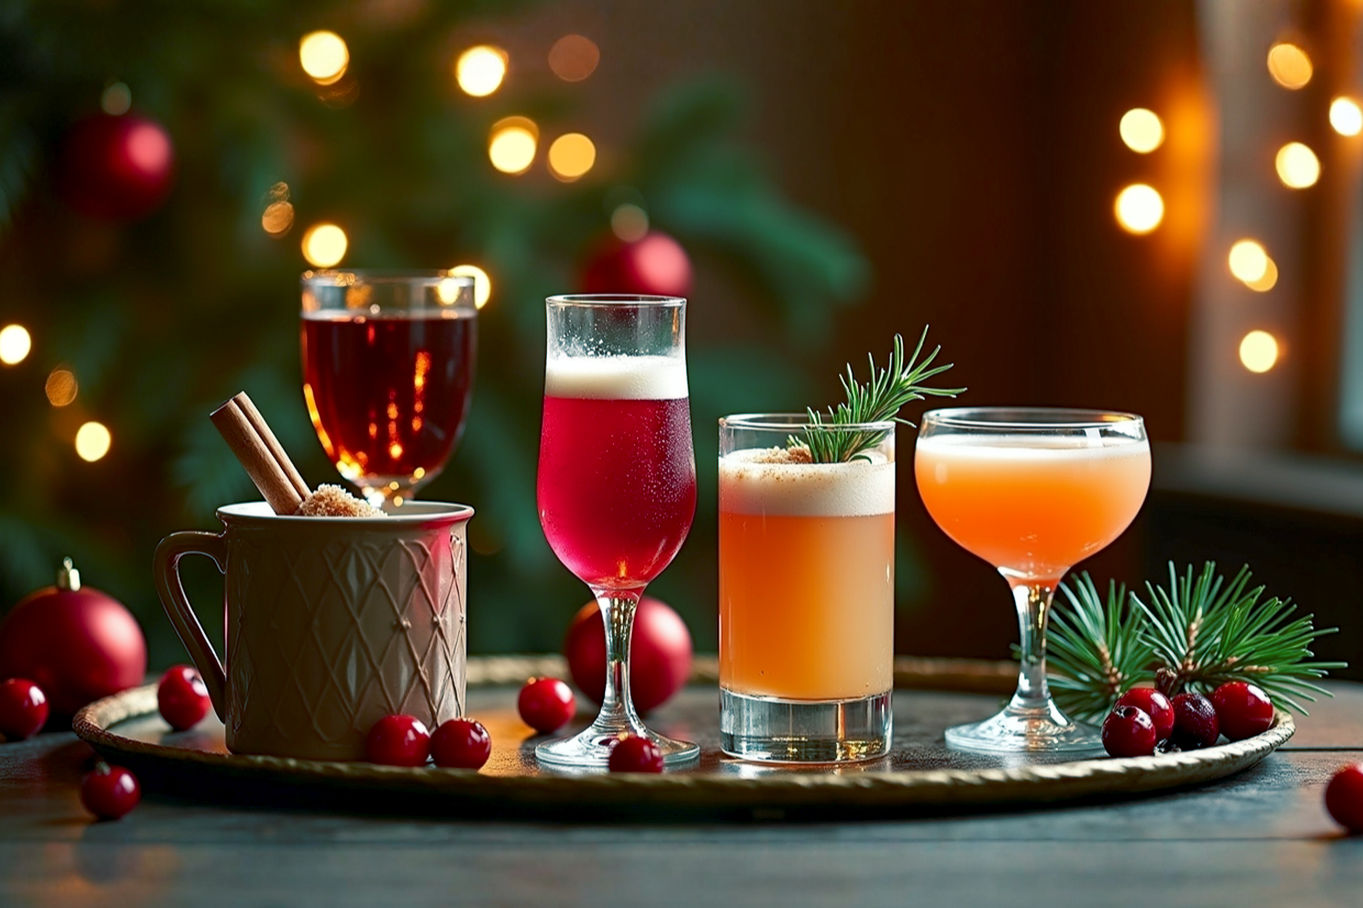
B. Pairing Suggestions: What to Serve with Fruit Cake
The rich, dense nature of fruit cake makes it a versatile companion for a variety of beverages and accompaniments.
- Tea, Coffee: A classic pairing. The warmth and slight bitterness of a strong black tea or a rich coffee beautifully complement the cake’s sweetness and spice.
- Sweet Dessert Wines, Port: For an indulgent experience, pair fruit cake with a sweet dessert wine like a late-harvest Riesling, a rich Port, or a robust Sherry. The wine’s sweetness and complexity will echo and enhance the cake’s flavors.
- Cheese: This might sound unusual, but a slice of fruit cake paired with a sharp, mature cheddar cheese or a creamy blue cheese is a surprisingly delightful combination. The savory, tangy notes of the cheese cut through the richness of the cake, creating a balanced and sophisticated bite. This is a very traditional British pairing.
- Custard or Clotted Cream: For a truly decadent dessert, serve a slice of fruit cake warmed slightly and topped with a dollop of warm vanilla custard, crème anglaise, or rich clotted cream. The creamy texture and subtle sweetness provide a wonderful contrast.
- A Small Glass of the Same Spirit: If your fruit cake is alcohol-infused, a small glass of the same brandy, rum, or whiskey used in the cake can be a perfect accompaniment, intensifying the aromatic experience.
VII. Troubleshooting Common Fruit Cake Challenges
Even experienced bakers can encounter issues. Here’s how to address common fruit cake problems and ensure your next bake is a success.
A. My Fruit Cake is Dry!
This is the most common complaint about fruit cake, but it’s entirely preventable.
- Causes:
- Overbaking: The most frequent culprit. Baking too long at too high a temperature will evaporate moisture.
- Insufficient Soaking: If your dried fruits weren’t properly hydrated before baking, they’ll draw moisture from the batter, leaving the cake dry.
- Too Much Flour: An imbalance in the wet-to-dry ingredient ratio can lead to a dry crumb.
- Solutions:
- Feed More Frequently: If your cake is already baked and dry, you can try to rescue it by feeding it more aggressively with alcohol (or non-alcoholic liquid). Prick more holes and pour or brush on more liquid every few days until it regains moisture.
- Re-soaking Dried Fruits: For future cakes, ensure your fruits are adequately soaked for the recommended time (overnight or longer).
- Accurate Measuring: Always measure flour precisely, preferably by weight (1 cup=approximately 120 grams).
B. My Fruits Sunk to the Bottom!
This is a common frustration, resulting in an unevenly distributed cake.
- Causes:
- Fruits Not Properly Dried After Soaking: If the soaked fruits are too wet, their added weight can cause them to sink.
- Batter Too Thin: A batter that is too liquidy won’t be able to suspend the heavy fruits.
- Overmixing: Overmixing can break down the batter’s structure, making it too weak to hold the fruits.
- Solutions:
- Dusting Fruits with Flour: After soaking and draining, toss the fruits lightly with a tablespoon or two of the measured flour (taken from the total amount in the recipe). The flour coating creates a barrier that helps the fruits adhere to the batter and prevents them from sinking.
- Adjusting Batter Consistency: Ensure your batter is thick enough to hold the fruits. If it seems too thin, you might have added too much liquid or not enough flour.
- Gentle Folding: Always use a gentle folding technique when incorporating fruits and dry ingredients to maintain the batter’s structure.
C. My Fruit Cake is Cracking on Top!
A crack on top isn’t necessarily a disaster, but it can be avoided.
- Causes:
- Oven Too Hot: If the oven temperature is too high, the outside of the cake will set and dry out before the inside has fully risen, causing the top to crack.
- Batter Too Stiff: A very stiff batter has less flexibility to expand during baking, leading to cracks.
- Solutions:
- Lower Oven Temperature: Ensure your oven is calibrated correctly and maintain the recommended low baking temperature (275∘F or 135∘C).
- Add a Pan of Water: Placing a shallow pan of hot water on the bottom rack of your oven can create a steamy environment, which helps keep the cake’s surface pliable and less prone to cracking.
- Cover with Foil: If you notice cracking early, loosely tent the cake with aluminum foil to protect the top from direct heat.
D. My Fruit Cake is Too Dense/Heavy!
While fruit cake is naturally dense, it shouldn’t be like a brick.
- Causes:
- Overmixing: As mentioned, overmixing develops gluten too much, resulting in a tough, dense texture.
- Too Much Fruit: While fruit is key, an excessive amount relative to the batter can make it overly heavy.
- Insufficient Leavening: Not enough baking powder or soda (if called for) can lead to a flat, dense cake.
- Solutions:
- Gentle Folding: Always fold in the dry ingredients and fruits gently until just combined.
- Proper Ingredient Ratios: Stick to the recipe’s specified amounts for fruits and batter.
- Check Leavening Agents: Ensure your baking powder/soda is fresh and active.
E. My Fruit Cake is Burning on the Edges!
This indicates uneven heat distribution or insufficient pan protection.
- Causes:
- Pan Not Properly Lined: Inadequate lining allows the direct heat of the oven to scorch the edges.
- Oven Hot Spots: Ovens often have areas that are hotter than others.
- Solutions:
- Double-Lining: Always use the double-lining method for your pan (parchment paper plus an outer layer of brown paper or extra foil) to provide maximum insulation.
- Rotate Pan: Rotate the cake pan halfway through the long baking time to ensure even exposure to heat.
- Tent with Foil: If edges start to brown too quickly, tent the entire cake with foil.
VIII. Variations and Adaptations: Making It Your Own
The traditional fruit cake recipe is a fantastic starting point, but it’s also wonderfully adaptable. Once you’ve mastered the classic, feel free to experiment and tailor it to your preferences or dietary needs.
A. Non-Alcoholic Fruit Cake
If you prefer to avoid alcohol, you can still create a delicious and moist fruit cake.
- Substitutions for Spirits: Instead of brandy, rum, or whiskey, you can use:
- Orange Juice: Provides a bright, fruity flavor.
- Apple Juice or Cider: Offers a milder sweetness.
- Strong Brewed Black Tea: Adds a subtle tannic depth that can mimic some of the complexity of alcohol.
- Coffee: For a darker, richer flavor profile.
- Fruit Purees: A small amount of apricot or prune puree can add moisture and sweetness.
- Feeding: For non-alcoholic cakes, “feed” them with the same juice or tea used for soaking, or a simple sugar syrup (equal parts sugar and water, simmered until dissolved and cooled). This will help maintain moisture, though it won’t offer the same preservative qualities as alcohol, so storage times may be shorter.
B. Gluten-Free Fruit Cake
Making fruit cake gluten-free is entirely possible with the right flour substitutes.
- Flour Alternatives:
- Almond Flour: Adds moisture and a rich, nutty flavor. It’s often used in combination with other flours.
- Gluten-Free All-Purpose Blends: Look for blends specifically designed for baking. These often contain a mix of rice flour, potato starch, tapioca starch, and sometimes xanthan gum (which helps with structure).
- Oat Flour: Can be used, but ensure it’s certified gluten-free if cross-contamination is a concern.
- Adjusting Liquid Content: Gluten-free flours can absorb liquids differently than wheat flour. You might need to slightly increase the liquid (alcohol or non-alcoholic substitute) in the recipe to achieve the correct batter consistency. Start with the recipe amount and add more liquid a tablespoon at a time if the batter seems too stiff.
C. Nut-Free Fruit Cake
For those with nut allergies, a delicious fruit cake can still be made.
- Omitting Nuts: Simply leave out the walnuts, pecans, or almonds.
- Increasing Fruit: To compensate for the missing bulk and texture, you can increase the amount of dried or candied fruit by about 10-20%. This will make the cake even more fruit-laden and moist.
- Seed Alternatives: If desired and safe for your specific allergy, you could consider adding seeds like sunflower seeds or pumpkin seeds for a textural crunch, though this deviates from traditional recipes.
D. Dark vs. Light Fruit Cake
The color and flavor profile of fruit cake can be adjusted based on your preference.
- Ingredients that Influence Color and Flavor:
- Dark Fruit Cake: Achieved by using molasses or dark treacle, dark brown sugar, and a higher proportion of dark dried fruits like dark raisins, currants, and dried figs. Dark rum or brandy also contributes to the depth of color and flavor.
- Light Fruit Cake: Uses lighter ingredients such as golden syrup (light treacle), light brown sugar, golden raisins, glacé cherries, and dried apricots. Lighter spirits like white rum or even orange liqueur can be used for soaking. The absence of molasses results in a paler, often less intensely flavored cake.
E. Mini Fruit Cakes or Loaves
For gifting or individual portions, baking smaller fruit cakes is a great option.
- Adjusting Baking Times: Smaller cakes will bake much faster than a large, deep cake.
- Mini Loaf Pans: Typically take 1.5 to 2 hours.
- Muffin Tins (for individual cakes): Can bake in as little as 30-45 minutes.
- Testing for Doneness: Always use the skewer test for smaller cakes, as their internal temperature will reach the target (200−210∘F or 93−99∘C) much faster.
- Feeding: Mini cakes can still be fed with alcohol, but they will absorb it more quickly, so adjust the feeding frequency and amount accordingly.
IX. The Rich History and Cultural Significance of Fruit Cake
Beyond a mere recipe, fruit cake carries a fascinating history, reflecting centuries of culinary evolution and cultural traditions. Understanding its origins adds another layer of appreciation to this timeless classic.
A. Ancient Origins: From Roman Times to Medieval Europe
The concept of preserving fruits in bread is remarkably ancient.
- Early Forms: The earliest known precursor to fruit cake dates back to ancient Rome. Roman bakers would mix barley mash, raisins, pine nuts, and pomegranate seeds into a simple bread. This was more of an energy bar for soldiers and travelers than a dessert, but it laid the groundwork for fruit-infused baked goods.
- Medieval Europe: As sugar became more widely available (though still expensive), and trade routes brought new spices and dried fruits from the East, these fruit-laden breads became more sophisticated. In medieval Europe, dried fruits, honey, and spices were added to bread dough, often baked for special occasions or as a way to use up surplus fruit. These early versions were dense and hearty, designed to provide sustenance.
B. The Victorian Era: A Symbol of Wealth and Celebration
The Victorian era (mid-19th century) truly saw fruit cake rise to prominence, particularly in Britain.
- Popularity During Christmas and Weddings: Fruit cake became synonymous with Christmas celebrations. Its rich ingredients—expensive dried fruits, exotic spices, and alcohol—made it a symbol of wealth, abundance, and festivity. Families would bake large fruit cakes weeks or even months in advance, allowing them to mature and deepen in flavor, ready for the holiday season.
- The Tradition of Saving Wedding Cake: A unique Victorian tradition emerged where a portion of the wedding fruit cake was saved and aged for a year, to be eaten at the birth of the couple’s first child, or even for their first anniversary. This practice was possible due to the cake’s high alcohol content and dense structure, which acted as natural preservatives. It underscored the cake’s longevity and its symbolic connection to enduring love and future prosperity.
C. Global Traditions: Fruit Cake Around the World
While often associated with British traditions, variations of fruit cake are found in many cultures, each with its own unique ingredients and customs.
- Stollen (Germany): A bread-like fruit cake, typically made with candied peel, raisins, and often a marzipan core, dusted with powdered sugar. It’s a traditional Christmas bread.
- Panettone (Italy): A tall, dome-shaped sweet bread loaf, usually containing candied orange, citron, and lemon peel, as well as raisins. It’s traditionally eaten at Christmas and New Year.
- Christmas Pudding (UK): While distinct from fruit cake, it shares many similarities in its rich, fruit-laden, and alcohol-soaked nature. It’s steamed rather than baked and often served with brandy butter.
- Regional Variations and Ingredients: Many countries have their own versions:
- In the Caribbean, black cake is a dark, rum-soaked fruit cake, often made with fruits macerated in rum for a year.
- In India, fruit cake is a popular Christmas treat, often less alcohol-heavy.
- In Australia and New Zealand, fruit cake is a common staple year-round, not just for holidays.
These global variations highlight the universal appeal of combining preserved fruits with a rich, spiced batter.
D. Fruit Cake Today: A Resurgence of Appreciation
Despite its occasional humorous reputation, fruit cake is experiencing a resurgence of appreciation, particularly for homemade, high-quality versions.
- Moving Beyond the Stereotypes: More and more people are discovering that a well-made fruit cake is a far cry from the dry, bland, or overly sweet versions that gave it a bad name. The focus is shifting back to the artisanal process and the depth of flavor that only time and care can create.
- The Joy of a Homemade Classic: Baking a traditional fruit cake is a rewarding experience. It’s a labor of love that results in a truly special treat, perfect for sharing with loved ones or savoring slowly. It connects us to culinary history and the satisfaction of creating something enduring and delicious.
X. Conclusion: The Legacy of a Timeless Classic
A. A Reward for Your Patience and Effort
You’ve embarked on a journey to master the traditional fruit cake recipe, and the reward for your patience and effort is immense. From carefully selecting your dried fruit medley and aromatic spices to the meticulous process of soaking, low-and-slow baking, and the essential “feeding” ritual, each step contributes to a truly exceptional outcome. This isn’t just a cake; it’s a testament to the beauty of slow food, where time and care transform simple ingredients into something extraordinary.
B. Sharing the Tradition
A homemade traditional fruit cake is more than just a dessert; it’s a gift. Its longevity and rich flavor make it an ideal present for friends and family during the holidays or any special occasion. Sharing a slice of your meticulously prepared fruit cake is a way to share a piece of history, a labor of love, and a delicious tradition that spans generations. It’s an invitation to slow down, savor the moment, and appreciate the craftsmanship involved.
C. Your Newfound Mastery
By following this comprehensive guide, you’ve gained the knowledge and confidence to create a fruit cake that will impress even the most discerning palates. You’ve learned the technical nuances, from the science of fruit hydration to the art of aging. Don’t be afraid to experiment with variations, making this timeless classic truly your own. Embrace your newfound mastery, and let the rich aroma and exquisite taste of your traditional fruit cake become a cherished part of your culinary repertoire for years to come.