This post may contain affiliate links. If you make a purchase through these links, we may earn a commission at no additional cost to you.
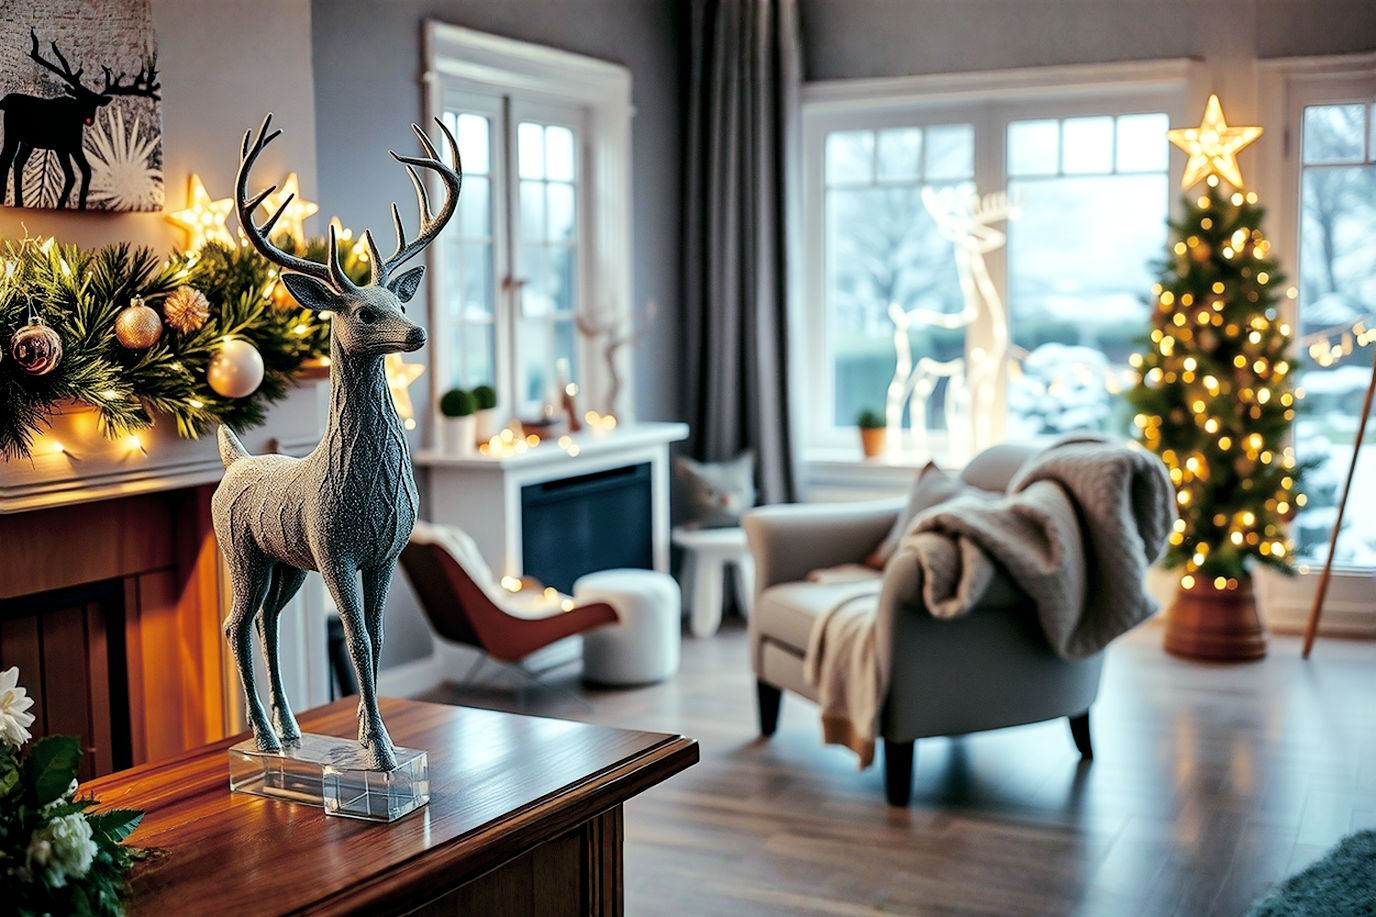
A 4-foot prelit Christmas tree might seem small, but don’t let its size fool you. With the right approach, this compact holiday centerpiece can pack a powerful decorative punch, bringing immense joy and festive cheer to any space. Whether it’s gracing a cozy apartment corner, adding sparkle to a child’s bedroom, or serving as an elegant secondary tree in a larger home, a well-styled 4-foot prelit tree can become a true focal point.
Many people underestimate the potential of smaller trees, thinking they can’t achieve the same grandeur as their larger counterparts. However, the beauty of a 4-foot prelit tree lies in its versatility and manageability. Its pre-strung lights save you time and effort, allowing you to focus purely on the creative aspects of decoration. The challenge, and the fun, comes from maximizing its visual impact within its modest dimensions. This comprehensive guide will walk you through every step, from initial setup to the final, dazzling touches, ensuring your 4-foot prelit Christmas tree shines brighter than ever. We’ll cover everything from proper fluffing techniques to strategic ornament placement, helping you create a festive masterpiece that truly stands out.
The Foundation: Preparing Your Prelit Tree for Success
Before you even think about hanging the first ornament, proper preparation is crucial. A well-prepared tree provides the ideal canvas for your decorating vision, ensuring your efforts result in a stunning display. Skipping these initial steps can lead to a less-than-impressive outcome, even with the most beautiful decorations.
Unboxing and Assembly: First Steps to a Grand Display
Your 4-foot prelit Christmas tree arrives compactly packaged, designed for easy storage and shipping. The first step is to carefully remove it from its box. Handle the tree gently during this process to avoid damaging the pre-attached lights or bending the branches improperly. Most 4-foot prelit trees come in two or three sections, making assembly straightforward.
Start by placing the base on a flat, stable surface. Then, insert the bottom section of the tree into the stand, ensuring it’s securely seated. Next, connect the middle section, aligning the pole with the one below it. Finally, add the top section. As you assemble each part, connect any electrical cords that link the sections together. These connections are typically simple plug-in mechanisms designed to power the prelit lights throughout the tree. Double-check that all connections are firm to ensure consistent illumination.
Fluffing and Shaping: Unlocking the Tree’s Full Potential
This is arguably the most critical step in preparing any artificial Christmas tree, especially a prelit one. Fluffing involves spreading out and shaping each individual branch to fill any gaps and create a full, natural-looking silhouette. When trees are packed for storage or shipping, their branches are compressed, making them look sparse and unnatural when first unboxed. Proper fluffing can add significant volume and realism.
Start at the bottom of the tree and work your way up. For each branch, begin with the wires closest to the trunk (the “inner” branches) and gently pull them outward and slightly upward. Then, move to the middle wires, fanning them out. Finally, extend and shape the outer tips of the branches. The goal is to create a full, conical shape with no visible gaps. Think of it like arranging flowers in a vase; you want each element to contribute to the overall fullness. Don’t be afraid to bend the wires; they’re designed for this. This process can be time-consuming, but the effort pays off immensely in the final appearance of your tree. A well-fluffed tree will appear denser, allowing ornaments to sit better and lights to shine more effectively.
Assessing the Prelit Lights: Are They Enough?
One of the main advantages of a prelit tree is the convenience of built-in lighting. However, it’s essential to assess if these lights provide sufficient illumination for your desired impact. After assembly and fluffing, plug in your tree and check that all light strands are working. Look for any sections that are dark or flickering. Many prelit trees use series wiring for their light strands, meaning if one bulb goes out, a whole section might go dark. Modern trees often feature “continuous-on” technology, where individual bulb failures don’t affect the entire strand, but it’s still wise to check.
Consider the density of the lights. Does the tree have enough sparkle for your taste, or does it look a bit dim? For a 4-foot tree, a good rule of thumb is around 100-150 lights per foot, so a 4-foot tree might ideally have 400-600 lights. If your tree has fewer, or if you prefer a brighter, more dramatic effect, you might want to add supplementary light strands. When adding lights, consider the light type and color temperature. Most prelit trees use either traditional incandescent bulbs, which emit a warm, yellowish glow, or LED lights, which can be warm white (similar to incandescent), cool white (bluer), or multi-colored. If you add more lights, try to match the existing light type and color temperature for a cohesive look. For example, mixing warm white LEDs with cool white LEDs can create an inconsistent visual effect.
Crafting Your Vision: Theme and Color Palette Selection
Before you start hanging ornaments haphazardly, take a moment to envision the overall look you want to achieve. A clear theme and a well-chosen color palette are the blueprints for a cohesive and impactful design, especially for a smaller tree where every element counts.
Why a Theme Matters for Small Trees
For a 4-foot tree, a defined theme is incredibly important. Without one, your tree can quickly look cluttered and disorganized, losing its visual appeal. A theme provides a guiding principle for all your decorating choices, from the ornaments you select to the ribbon and topper. It helps create a sense of cohesion, making the tree feel intentional and thoughtfully designed rather than a random collection of decorations.
A theme also helps you make a statement with limited space. Instead of trying to fit every ornament you own onto a small tree, a theme allows you to curate your decorations, focusing on pieces that truly contribute to the desired aesthetic. This selectivity can make a small tree feel grander and more impactful, as each element works together to tell a story or evoke a specific mood. For instance, a “Winter Wonderland” theme might focus on icy blues, silvers, and whites, creating a serene and elegant display that feels expansive despite the tree’s size.
Popular Theme Ideas for 4-Foot Trees
The beauty of a 4-foot tree is its adaptability to various themes. Here are a few popular ideas that work exceptionally well for smaller dimensions:
- Traditional Elegance: This timeless theme uses classic Christmas colors like rich reds, deep greens, and shimmering golds. Think velvet ribbons, glass ball ornaments, and perhaps a touch of plaid. It evokes a sense of nostalgia and warmth, perfect for a cozy living room.
- Winter Wonderland: Embrace the beauty of a snowy landscape with a palette of silvers, icy blues, crisp whites, and iridescent accents. Ornaments might include snowflakes, icicles, frosted berries, and glittery branches. This theme creates a serene, sophisticated, and often magical feel.
- Rustic Charm: For a more natural and cozy vibe, consider a rustic theme. This involves incorporating natural elements like pinecones, burlap, wooden ornaments, and warm earth tones (browns, creams, muted reds). It’s perfect for a farmhouse-style home or a cabin retreat.
- Whimsical & Fun: If you love playful and colorful decor, a whimsical theme is for you. This could involve character-based ornaments (e.g., Santa, elves, animals), bright, unexpected color combinations (pinks, teals, lime greens), and quirky accents like candy canes or oversized glitter balls. It’s especially popular for children’s rooms or playful family spaces.
- Minimalist Chic: For a modern, understated look, a minimalist theme focuses on simplicity and clean lines. This often means a monochromatic color scheme (e.g., all white, all silver, or all gold) with very few, carefully selected ornaments. The emphasis is on texture and form rather than excessive decoration, creating a sophisticated and uncluttered aesthetic.
Choosing Your Color Palette: Harmony and Contrast
Once you have a theme, selecting your color palette becomes much easier. A well-defined palette ensures visual harmony and prevents your tree from looking chaotic. Think about primary, secondary, and accent colors. Your primary color will be the dominant hue, setting the overall tone. Secondary colors provide depth and variation, while accent colors add pops of interest and contrast.
For example, in a “Traditional Elegance” theme, red might be your primary color, gold your secondary, and a deep forest green your accent. When choosing colors, also consider incorporating metallics (gold, silver, bronze) and neutrals (white, cream, brown). Metallics add sparkle and sophistication, reflecting the prelit lights beautifully, while neutrals provide a visual resting place and help other colors stand out.
Finally, consider your home’s existing decor. Your Christmas tree should complement the surrounding environment, not clash with it. If your living room features cool tones, a “Winter Wonderland” theme with blues and silvers would integrate seamlessly. If your home is filled with warm, earthy tones, a “Rustic Charm” theme would feel right at home. This thoughtful consideration ensures your tree enhances your overall holiday decor.
Layering with Purpose: The Art of Ornament Placement
Decorating a Christmas tree isn’t just about hanging ornaments; it’s about strategic placement and layering to create depth, dimension, and visual interest. For a 4-foot prelit tree, this layering technique is even more crucial to maximize its impact and make it appear fuller and more professionally decorated.
The “Rule of Three” for Ornament Application
Think of ornament placement in three distinct layers: base, filler, and focal. This “Rule of Three” ensures a balanced and visually rich tree. Each layer serves a specific purpose, building upon the previous one to create a cohesive and captivating display. This systematic approach prevents the tree from looking flat or haphazardly decorated.
Base Ornaments: Building the Foundation
The first layer consists of your base ornaments. These are typically larger, simpler ornaments, often in solid colors or with minimal detailing. Their purpose is to fill the deeper parts of the tree, adding foundational color and depth. Don’t just hang them on the tips of the branches; instead, push them deeper into the tree, closer to the trunk. This technique helps to fill in any gaps in the tree’s foliage and creates a sense of fullness that extends beyond the outer edges of the branches.
For a 4-foot tree, you’ll want a good number of these. Aim for ornaments that are generally 3 to 4 inches in diameter. You might need anywhere from 15 to 25 base ornaments, depending on how dense you want your tree to appear. Placing them evenly around the tree, both front and back, ensures a consistent foundation. These ornaments are the unsung heroes, providing the backdrop against which your more decorative pieces will shine.
Filler Ornaments: Adding Depth and Texture
Once your base layer is in place, it’s time for filler ornaments. These are usually medium-sized (2 to 3 inches) and come in a variety of shapes, finishes, and textures. This layer is where you start to introduce more of your chosen theme’s character. Distribute these ornaments evenly around the tree, placing them slightly further out on the branches than your base ornaments, but still nestled within the foliage, not just dangling from the tips.
The key here is to incorporate different textures. Mix matte finishes with shiny ones, add glittered ornaments, or include pieces with intricate patterns. This variety adds visual interest and prevents the tree from looking monotonous. For example, if your theme is “Winter Wonderland,” you might use matte silver balls, shiny blue spheres, and iridescent white snowflakes as your filler ornaments. You’ll likely use more filler ornaments than base ornaments, perhaps 20 to 30 for a 4-foot tree, to build up the tree’s visual density.
Focal Ornaments: The Stars of the Show
The final layer is where your tree truly comes to life: focal ornaments. These are your most unique, eye-catching, and often sentimental pieces. They are typically larger, more intricate, or have special significance. These ornaments should be placed on the outer tips of the branches, where they can be easily seen and admired.
Strategic placement is key for focal ornaments. Don’t just scatter them randomly. Instead, place them at varying heights and depths to create visual pathways for the eye. Think about creating small “vignettes” on the tree, where a few focal ornaments are grouped together or placed to draw attention. This is also where you can truly personalize your tree, showcasing ornaments that hold special meaning to you or your family. For a 4-foot tree, you might select 5 to 10 truly special focal ornaments that stand out. These are the pieces that will elicit “oohs” and “aahs” from your guests.
Ornament Sizing and Quantity Guide for 4-Foot Trees
Choosing the right size and number of ornaments is crucial for a balanced look on a 4-foot tree. Overloading a small tree with too many large ornaments can make it look top-heavy or cluttered, while too few can make it appear sparse.
- Recommended Sizes: For a 4-foot tree, aim for a mix of ornament sizes.
- Small (1-2 inches): Use these sparingly for delicate accents or to fill tiny gaps.
- Medium (2-3 inches): These will make up the bulk of your filler ornaments.
- Large (3-4 inches): Ideal for base ornaments and some focal points.
- Extra Large (4+ inches): Use very few, if any, as true statement pieces, ensuring they don’t overwhelm the tree.
- Approximate Quantity: The exact number will depend on the fullness of your tree and your desired look, but a general guideline for a 4-foot tree is:
- Total Ornaments: 40 to 70 ornaments.
- Base Ornaments: 15-25 (3-4 inch)
- Filler Ornaments: 20-30 (2-3 inch)
- Focal Ornaments: 5-10 (mixed sizes, including some larger statement pieces)
Remember, these are guidelines. The most important thing is to balance density with visual appeal. Step back frequently as you decorate to assess the overall look and make adjustments. You want the tree to look full and festive without appearing weighed down or chaotic.
Weaving in Elegance: Ribbon, Garland, and Picks
Beyond ornaments, decorative elements like ribbon, garland, and floral picks are essential for adding texture, flow, and professional polish to your 4-foot prelit Christmas tree. These elements help to unify your theme and fill any remaining visual gaps, creating a truly luxurious look.
Ribbon: Adding Flow and Sophistication
Ribbon is a fantastic way to add movement, color, and a touch of sophistication to your tree. It can create a sense of cascading elegance or provide bold structural lines.
- Types of Ribbon:
- Wired Ribbon: This is highly recommended because it holds its shape beautifully, allowing you to create dramatic loops, spirals, and bows that maintain their form. It typically has thin wires sewn into its edges.
- Velvet Ribbon: Adds a rich, luxurious texture and deep color.
- Sheer Ribbon: Offers a delicate, ethereal quality, often with glitter or subtle patterns.
- Burlap Ribbon: Perfect for rustic or natural themes, adding a coarse, earthy texture.
- Techniques for Applying Ribbon:
- Cascading: For a 4-foot tree, a popular and effective method is to cut several lengths of ribbon (e.g., 2-3 feet long). Tuck one end deep into the tree near the trunk, let it drape naturally, and then tuck the other end into a branch further down and out. This creates a soft, flowing effect. Repeat this around the tree, varying the starting and ending points.
- Spiraling: For a more structured look, you can gently spiral a continuous length of ribbon around the tree, tucking it into the branches every foot or so to secure it. This works well with narrower ribbons.
- Tucked Bows: Create small, simple bows and tuck them into the tree’s branches, especially in areas that need a little extra pop of color or texture.
- Choosing the Right Width: For a 4-foot tree, a ribbon width of 1.5 to 2.5 inches is generally ideal. Wider ribbons (e.g., 4 inches) can overwhelm a smaller tree if not used sparingly, while very narrow ribbons (e.g., 0.5 inches) might get lost among the branches.
Garland: Enhancing Texture and Richness
Garland adds another layer of texture and can dramatically change the look of your tree. While prelit trees already have lights, garland can provide visual weight and a different kind of sparkle or natural feel.
- Types of Garland:
- Bead Garland: Classic and adds a delicate shimmer. Can be simple pearl beads or faceted crystals.
- Tinsel Garland: Adds a playful, retro sparkle.
- Natural Garland: Made from faux berries, pinecones, leaves, or even fabric. This is excellent for rustic or traditional themes.
- Fabric Garland: Made from strips of fabric, often plaid or themed.
- How to Drape and Secure Garland: For a 4-foot tree, use thinner, lighter garlands to avoid weighing down the branches. Drape the garland loosely around the tree, letting it swag naturally between branches. Tuck sections of the garland deeper into the tree to create depth and prevent it from looking like it’s just sitting on the surface. You can use floral wire or pipe cleaners to gently secure the garland to branches if needed, especially if it’s heavier.
- Integrating Garland with Prelit Lights: When adding garland, ensure it doesn’t obscure too many of the prelit lights. The garland should complement the lights, not hide them. If your garland has a reflective quality (like bead or tinsel), it will catch and amplify the light, adding extra sparkle.
Decorative Picks and Sprays: Filling Gaps and Adding Sparkle
Decorative picks and sprays are the unsung heroes of tree decorating. These small, individual elements are perfect for filling in any remaining bare spots, adding a burst of color or texture, and providing extra sparkle or dimension.
- Using Floral Picks, Berry Sprays, Glitter Branches: These come in an enormous variety. You can find picks with faux berries (red, white, frosted), glitter-covered branches, frosted pinecones, small artificial flowers (poinsettias, hydrangeas), or even tiny themed figures.
- Tucking into Bare Spots or for Added Dimension: The beauty of picks is their flexibility. Simply tuck the stem of the pick deep into the tree’s branches, allowing the decorative part to protrude. Use them to:
- Fill Gaps: If you notice any sparse areas after adding ornaments, a well-placed pick can instantly fill it.
- Add Dimension: By varying the depth at which you insert them, you can create a more dynamic, three-dimensional look.
- Provide Pops of Color/Texture: A few red berry picks can instantly brighten a green tree, or glittered branches can add extra shimmer.
- Matching Picks to Your Chosen Theme: Ensure your picks align with your overall theme. For a “Rustic Charm” tree, use picks with natural elements like pinecones or burlap. For a “Winter Wonderland,” opt for frosted or glittered picks. Aim for 5 to 10 picks for a 4-foot tree, distributing them strategically for maximum impact.
The Crowning Glory: Selecting the Perfect Tree Topper
No Christmas tree is complete without its crowning glory: the tree topper. This final element sits at the very peak of your tree, drawing the eye upward and completing your decorative masterpiece. For a 4-foot tree, choosing the right topper is especially important to maintain proportion and visual balance.
Sizing Your Topper for a 4-Foot Tree
Proportion is absolutely key when selecting a tree topper for a smaller tree. A topper that is too large will overwhelm the tree, making it look top-heavy and disproportionate. Conversely, a topper that is too small will get lost and fail to make the statement it should.
For a 4-foot (48-inch) tree, an ideal topper height typically ranges from 8 to 12 inches. This size range ensures the topper is noticeable and impactful without dwarfing the rest of the tree. To visualize this, consider that the topper should generally be about 1/4 to 1/5 the height of your tree. So, for a 48-inch tree, 1/4 would be 12 inches, and 1/5 would be approximately 9.6 inches. Always measure your tree’s top section and the topper itself to ensure a good fit.
Types of Tree Toppers
There’s a wide variety of tree toppers available, each offering a different aesthetic:
- Stars: The most classic and popular choice, symbolizing the Star of Bethlehem. Stars can be simple, glittered, or intricately designed.
- Angels: Representing peace and goodwill, angels often feature fabric gowns, wings, and sometimes illuminated faces.
- Bows: A large, multi-loop bow made from festive ribbon (often wired ribbon for structure) can be an elegant and less traditional topper.
- Finials: These are decorative, often ornate, spire-shaped toppers that add a touch of old-world charm and sophistication. They can be made of glass, metal, or other materials.
- Lighted vs. Unlighted Options: Many toppers come pre-lit, adding an extra glow to the very top of your tree. If your tree is already very bright, an unlighted topper might be a better choice to avoid excessive brightness at the peak. If you choose a lighted topper, ensure its light color (warm white, cool white, multi-color) matches or complements your tree’s prelit lights.
Securing Your Topper Safely
Securing the topper can sometimes be a challenge, especially on a smaller, more flexible tree. Many toppers have a cone-shaped base or a coiled wire base designed to slip over the top branch.
- For Cone Bases: Simply push the cone down over the topmost central branch. If the branch isn’t sturdy enough, you might need to use a few pipe cleaners or zip ties to secure the topper to multiple top branches, creating a more stable anchor.
- For Coiled Wire Bases: These are designed to wrap around the central pole or a sturdy top branch. Gently twist the coil around the branch until the topper feels secure.
- Adding Support: If your topper is particularly heavy or the top branch of your 4-foot tree is not very rigid, you can reinforce it. Insert a thin wooden dowel or a sturdy cardboard tube (like from a paper towel roll) over the top branch, extending it a few inches above the tree. Then, slide the topper’s base over this reinforced support. This provides a much more stable anchor point, preventing the topper from leaning or falling.
The Finishing Touches: Tree Skirt and Base Enhancements
The area around the base of your Christmas tree is just as important as the tree itself. A well-chosen tree skirt or creative base cover-up not only hides the stand but also completes the overall aesthetic, grounding your tree and enhancing its visual appeal.
Choosing the Right Tree Skirt
A tree skirt serves several purposes: it conceals the tree stand, provides a soft landing for fallen needles (though less of an issue with artificial trees), and offers a beautiful backdrop for gifts.
- Size Considerations: For a 4-foot tree, you don’t need an enormous tree skirt. A skirt with a diameter of 30 to 36 inches is usually sufficient. This size will adequately cover the stand without extending too far into your living space, which is especially important for smaller rooms. You want the skirt to extend slightly beyond the widest part of the tree’s base branches.
- Material and Style: The material and style of your tree skirt should complement your chosen theme and color palette.
- Traditional: Red velvet, plaid, or skirts with embroidered holiday scenes.
- Winter Wonderland: Faux fur (white or silver), sequined, or knitted white skirts.
- Rustic Charm: Burlap, natural linen, or skirts with simple patterns.
- Minimalist Chic: Solid color fabrics like felt or canvas in neutral tones.
- Ease of Use: Consider how easily the skirt can be wrapped around the tree stand and secured, usually with ties or Velcro.
Creative Base Cover-Ups
If a traditional tree skirt doesn’t fit your aesthetic, or if you want a more unique look, there are many creative alternatives for covering the tree stand. These options can add a distinct character to your tree’s base.
- Baskets: A large, sturdy wicker or metal basket can beautifully house your 4-foot tree. Ensure the basket’s opening is wide enough to accommodate the tree stand and the base of the tree. This option adds a rustic or farmhouse feel.
- Galvanized Tubs: For an industrial or modern farmhouse look, a galvanized metal tub can serve as a stylish tree stand cover. Make sure it’s large enough to fit the stand inside.
- Fabric Wraps: You can simply wrap a large piece of burlap, a festive blanket, or even a decorative scarf around the tree stand and secure it with twine or ribbon. This offers a softer, more customizable look.
- Wooden Crates or Boxes: Stacked wooden crates or a decorative wooden box can elevate the tree slightly and add a charming, rustic touch.
- Elevating the Tree: Some base cover-ups, like sturdy wooden crates or decorative stands, can subtly elevate your 4-foot tree. This can be particularly useful if you want to give the appearance of a taller tree or if you want the lower branches and base decorations to be more visible, especially if the tree is placed on the floor. Just ensure any elevation is stable and secure.
Adding Gifts and Base Decor
The area around the tree’s base is also the perfect spot for wrapped gifts and other decorative elements.
- Strategically Placed Wrapped Gifts: Even if you don’t have many gifts, wrapping a few empty boxes in coordinating paper and ribbon can add to the festive display. Arrange them artfully around the tree skirt, varying their sizes and shapes to create visual interest.
- Small Decorative Elements: Enhance the base with small decorative items that tie into your theme. This could include:
- Miniature reindeer or snowmen figurines.
- Small decorative lanterns.
- Faux snow blankets for a “Winter Wonderland” effect.
- Pinecones or natural elements for a rustic theme.
- Small battery-operated fairy lights woven around the gifts for extra sparkle.
These final touches complete the overall picture, making your 4-foot prelit Christmas tree a truly immersive and delightful holiday display.
Troubleshooting and Maintenance for Your Prelit Masterpiece
Even with a prelit tree, a few common issues can arise. Knowing how to troubleshoot them and properly maintain your tree ensures its longevity and continued brilliance year after year.
Common Prelit Tree Issues and Solutions
While prelit trees offer convenience, occasional light issues can occur.
- Burnt-Out Bulbs: This is the most common problem. If a section of lights goes out, first check for any obviously burnt-out or loose bulbs. Many prelit trees come with replacement bulbs and a small fuse.
- Checking Fuses: The light strands often have a fuse located in the plug itself. If a whole section is out, carefully check and replace the fuse if it’s blown. The fuse protects the circuit from power surges.
- Replacing Bulbs: If a single bulb is out, replace it with a new one of the same type and voltage. Many prelit trees use shunt-wired bulbs, meaning if one bulb burns out, the circuit remains closed, and the rest of the lights stay on. However, a loose or missing bulb can still cause a section to go out.
- Sections Not Lighting Up: If an entire section of your tree isn’t lighting up, and it’s not a fuse issue, check the electrical connections between the tree sections. Ensure they are firmly plugged together. Sometimes, a slight jostle during setup can loosen a connection. Also, inspect the wires for any visible damage or kinks.
- Wire Management: While the lights are pre-strung, you might find some wires visible after fluffing or decorating. Gently tuck these wires deeper into the branches to conceal them. This creates a cleaner, more professional look. Avoid pulling too tightly on the wires, as this can damage the connections.
Storing Your Decorated 4-Foot Tree (if applicable)
For some, the appeal of a 4-foot tree is its ability to be stored largely intact, minimizing re-decorating efforts next year.
- Tips for Minimal De-Decorating: If your ornaments are securely attached and not fragile, you might be able to store the tree with many of its decorations still on.
- Remove Fragile Ornaments: Always remove delicate glass or sentimental ornaments to prevent breakage.
- Compress Gently: Gently compress the branches and any remaining decorations as you prepare the tree for storage. Avoid forcing them, which could damage ornaments or bend branches permanently.
- Bagging: Use a large, sturdy Christmas tree storage bag. These bags are designed to protect the tree from dust and damage. For a 4-foot tree, you might even find upright storage bags that allow you to keep the tree in one piece.
- Proper Storage to Maintain Shape and Lights: Store your tree in a cool, dry place away from direct sunlight, which can fade colors and degrade plastic components over time. Basements, attics, or dedicated storage closets are ideal. Proper storage helps maintain the tree’s shape and ensures the prelit lights remain in good working order for future holiday seasons.
Safety First: Electrical and Stability Tips
Safety should always be a top priority when setting up and displaying your Christmas tree.
- Overloading Outlets: Never plug too many light strands or other electrical decorations into a single outlet. This can overload the circuit, leading to blown fuses or, in severe cases, electrical fires. Use power strips with surge protectors if you need more outlets, but still be mindful of the total wattage.
- Securing the Tree from Pets/Children: A 4-foot tree is relatively lightweight, making it more susceptible to tipping, especially if you have curious pets or young children.
- Stable Placement: Place the tree on a flat, even surface where it won’t be easily bumped.
- Anchor the Base: If possible, consider anchoring the tree stand. You can place heavy objects (like sandbags or bricks, hidden by the tree skirt) on the stand’s legs for added stability. For extra security, you can also use fishing line or clear wire to discreetly tie the top of the tree to a nearby wall hook or piece of furniture. This provides an additional layer of protection against accidental tipping.
- Pet/Child-Proof Ornaments: If pets or children are a concern, place fragile or small, swallowable ornaments higher up on the tree. Opt for shatterproof ornaments on the lower branches.
By following these troubleshooting and maintenance tips, you can ensure your 4-foot prelit Christmas tree remains a beautiful and safe centerpiece for many holidays to come.
Conclusion
Styling a 4-foot prelit Christmas tree for maximum impact is an art form, but one that is entirely achievable with a thoughtful approach. We’ve explored how to transform a compact tree into a dazzling display, starting with the crucial foundational steps of careful unboxing, meticulous fluffing, and assessing your prelit lights. From there, we delved into the creative heart of decorating: establishing a cohesive theme and a harmonious color palette that elevates your tree’s presence.
The true magic unfolds with the strategic layering of ornaments—from foundational base pieces to textural fillers and captivating focal points—ensuring every inch of your tree contributes to its overall splendor. We then added elegance through the deliberate application of ribbon, garland, and decorative picks, elements that provide flow, richness, and sparkle. Finally, the crowning glory of a perfectly proportioned tree topper and the grounding presence of a complementary tree skirt or creative base enhancement complete the vision.
Remember, the goal isn’t just to hang decorations; it’s to curate a miniature masterpiece that reflects your personal style and brings joy. Don’t be afraid to experiment, step back to assess your progress, and most importantly, infuse your tree with your unique personality. A well-styled 4-foot prelit Christmas tree isn’t just a decoration; it’s a beacon of holiday cheer, proving that even the smallest tree can make the biggest impact. Embrace the process, and let your creativity shine!