This post may contain affiliate links. If you make a purchase through these links, we may earn a commission at no additional cost to you.
The holiday season brings with it a special kind of magic, and what better way to celebrate than with a delicious, show-stopping breakfast centerpiece? Imagine waking up to the sweet aroma of cinnamon, sugar, and warm dough, all shaped into a beautiful Christmas tree. Creating a festive cinnamon roll tree isn’t just about baking; it’s about crafting a memorable experience and a delightful treat that captures the spirit of the season. This pull-apart masterpiece is perfect for Christmas morning, a holiday brunch, or even a cozy evening gathering. It’s an interactive and impressive dish that will surely bring smiles to everyone’s faces.
1. Introduction: The Magic of a Cinnamon Roll Christmas Tree
There’s something truly enchanting about the holidays, isn’t there? From twinkling lights to festive music, every detail adds to the special atmosphere. A cinnamon roll Christmas tree fits right into this joyful picture, offering a unique and incredibly tasty way to celebrate. It transforms a classic comfort food into an edible work of art, making your holiday spread even more inviting.
1.1. Why a Cinnamon Roll Christmas Tree? (Festive Cinnamon Roll Tree Appeal)
So, why choose a cinnamon roll tree over traditional individual rolls? For starters, it’s visually stunning. The tree shape instantly evokes holiday cheer, making it a fantastic centerpiece for your breakfast table. Beyond its looks, the pull-apart design encourages sharing and interaction. Guests can simply pull off a warm, gooey roll, making serving effortless and fun. It also creates a sense of abundance and generosity, which is what the holidays are all about. Plus, it’s a fantastic project for all skill levels, whether you’re a seasoned baker or just starting out. The process itself can become a cherished holiday tradition, especially if you involve family members.
1.2. What You’ll Learn: Your Guide to Holiday Baking Success (Cinnamon Roll Xmas Tree Tutorial Overview)
This comprehensive guide will walk you through every step of creating your own magnificent cinnamon roll Xmas tree. We’ll cover everything from choosing the right dough—whether you prefer the convenience of store-bought options or the satisfaction of making your own from scratch—to crafting the perfect filling, assembling the tree, baking it to golden perfection, and finally, decorating it with luscious frosting and festive embellishments. You’ll also discover essential tips for serving, storing, and troubleshooting common baking challenges. By the end, you’ll feel confident and ready to bake a holiday masterpiece that tastes as good as it looks.
2. Understanding the Foundation: Dough Choices and Preparation
The foundation of any great cinnamon roll is its dough. It needs to be soft, tender, and capable of rising beautifully. You have two main paths to choose from: opting for the convenience of pre-made dough or embracing the rewarding process of making your own. Each has its merits, depending on your time and baking aspirations.
2.1. Store-Bought Dough: Convenience for Your Holiday Tree (Pillsbury Cinnamon Roll Tree)
For many, the holidays are a busy time. If you’re short on time but still want to create a delightful cinnamon roll tree, store-bought dough is your best friend. Brands like Pillsbury offer ready-to-bake cinnamon rolls that are incredibly convenient and produce consistently good results.
2.1.1. Advantages of Canned Cinnamon Rolls for Trees
Using canned cinnamon rolls significantly cuts down on preparation time. You skip the measuring, mixing, kneading, and proofing stages, which can take several hours. This means you can get your festive treat into the oven much faster, perfect for busy Christmas mornings. The dough is also designed to be easy to handle, making the assembly process straightforward, even for novice bakers or when baking with kids. It’s a reliable option that ensures a delicious outcome with minimal effort.
2.1.2. Selecting the Right Canned Dough (Best Canned Cinnamon Rolls for Tree)
When choosing canned cinnamon rolls, look for the larger, “grand” size varieties. These rolls are generally thicker and will create a more substantial and impressive tree. While most brands offer a classic cinnamon roll with icing, some might have seasonal flavors or extra large rolls that can add to the festive feel. Always check the expiration date to ensure freshness, and make sure you buy enough packages to create your desired tree size. Typically, two to three cans are sufficient for a medium-sized tree.
2.2. Homemade Dough: Crafting Your Own Delicious Base (Homemade Cinnamon Roll Tree Dough)
If you have more time and enjoy the process of baking from scratch, making your own homemade cinnamon roll tree dough is incredibly rewarding. It allows for greater control over the flavor and texture, often resulting in a richer, more tender roll.
2.2.1. The Joy of Baking from Scratch (Homemade Cinnamon Roll Benefits)
Baking from scratch offers a unique sense of accomplishment. The aroma of fresh yeast and warm dough filling your kitchen is truly inviting. Homemade dough often yields a superior texture—lighter, fluffier, and more tender—because you can control the quality of ingredients and the kneading process. It also gives you the flexibility to customize the dough with additional flavors, like a touch of vanilla extract or a hint of orange zest, making your homemade cinnamon roll tree truly unique.
2.2.2. Key Ingredients for Perfect Homemade Dough (Cinnamon Roll Dough Recipe)
A classic cinnamon roll dough typically relies on a few core ingredients:
- Active Dry Yeast: This is the leavening agent that makes the dough rise, giving the rolls their light and airy texture. It’s a living microorganism that feeds on sugars and produces carbon dioxide, creating air pockets.
- Warm Milk: Milk provides liquid for the dough and contributes to its tenderness and richness. The warmth is crucial for activating the yeast.
- Granulated Sugar: Sugar feeds the yeast, helping it to activate and grow. It also adds sweetness to the dough itself.
- Eggs: Eggs enrich the dough, adding flavor, color, and structure. They also contribute to a softer crumb.
- Melted Butter: Butter adds richness, flavor, and tenderness to the dough. It also helps with browning.
- All-Purpose Flour: This provides the structure for the dough. The protein in flour forms gluten, which gives the dough its elasticity and chewiness.
- Salt: Salt enhances the flavor of the dough and helps to regulate yeast activity.
2.2.3. Step-by-Step Dough Preparation (Making Cinnamon Roll Dough)
Making homemade dough involves a few critical steps to ensure a perfect rise and texture.
2.2.3.1. Activating Yeast: The Science of Rise (Yeast Activation Tips)
The first step is to activate your yeast. This process, often called “proofing the yeast,” ensures it’s alive and ready to work. You’ll combine warm milk (ideally between 105-115°F or 40-46°C), a pinch of sugar, and the active dry yeast in a small bowl. The sugar provides food for the yeast, and the warm temperature creates an optimal environment for it to become active. After about 5-10 minutes, the mixture should become foamy or bubbly. This foam is carbon dioxide, a sign that your yeast is alive and active. If it doesn’t foam, your yeast might be old or the milk temperature was off, and you should start again with fresh yeast.
2.2.3.2. Kneading Techniques: Developing Gluten for Texture (Kneading Dough for Cinnamon Rolls)
Kneading is essential for developing gluten, the protein network in flour that gives bread its structure and elasticity. As you knead, these proteins align and strengthen, allowing the dough to trap the gases produced by the yeast, resulting in a light and airy texture. You can knead by hand or using a stand mixer with a dough hook.
- By Hand: On a lightly floured surface, push the dough away from you with the heels of your hands, fold it back over, rotate, and repeat. Continue for 8-10 minutes until the dough is smooth and elastic. It should spring back when gently poked.
- Stand Mixer: Use a dough hook on medium-low speed for 5-7 minutes. The dough should pull away from the sides of the bowl and look smooth.
2.2.3.3. First Rise: Proofing for Fluffy Rolls (Cinnamon Roll Dough Proofing)
After kneading, the dough needs to rise, a process called “proofing.” This allows the yeast to produce more carbon dioxide, making the dough double in size and become light and airy. Place the dough in a lightly oiled bowl, turning it once to coat, then cover it with plastic wrap or a clean kitchen towel. Let it rise in a warm, draft-free place (like a slightly warm oven that’s turned off, or near a sunny window) for 1 to 1.5 hours, or until it has doubled in size. The ideal temperature for proofing is around 75-85°F (24-30°C). This first rise is crucial for the final texture of your homemade cinnamon roll tree.
3. The Heart of the Roll: Crafting the Filling
While the dough provides the structure, the filling is where the iconic cinnamon roll flavor truly shines. A rich, sweet, and aromatic filling is what makes these rolls irresistible.
3.1. Classic Cinnamon Sugar Filling: A Timeless Favorite (Cinnamon Roll Filling Recipe)
The traditional cinnamon sugar filling is a beloved choice for a reason. Its simple yet profound flavors perfectly complement the tender dough.
3.1.1. Essential Ingredients for Flavor (Best Cinnamon Sugar Mix)
The classic filling typically consists of:
- Softened Butter: This acts as the binder, allowing the sugar and cinnamon to adhere to the dough. It also adds richness and moisture. Make sure it’s truly softened, not melted, so it spreads easily without soaking into the dough.
- Granulated Sugar (or Brown Sugar): Sugar provides sweetness. Brown sugar adds a deeper, more molasses-like flavor and a slightly chewier texture, while granulated sugar offers a cleaner sweetness. Many recipes combine both.
- Ground Cinnamon: This is the star spice, providing the signature warm, spicy aroma and flavor. Use good quality cinnamon for the best results.
3.1.2. Achieving the Perfect Consistency (Cinnamon Filling Texture)
The key to a great filling is ensuring it’s spreadable but not too runny. You want a thick, paste-like consistency. If using softened butter, you can simply mix the butter, sugar, and cinnamon together until well combined. Some recipes suggest melting the butter and then sprinkling the dry ingredients over it, but a paste ensures better adherence and less leakage during baking. The goal is to have a uniform layer of flavor in every bite of your cinnamon roll tree.
3.2. Creative Filling Variations: Adding a Twist (Unique Cinnamon Roll Fillings)
While the classic is wonderful, don’t be afraid to experiment with your filling to add unique flavors to your holiday tree.
3.2.1. Nutty Additions: Pecans, Walnuts, and More (Nutty Cinnamon Roll Tree)
Adding finely chopped nuts like pecans, walnuts, or even almonds can introduce a delightful crunch and a rich, earthy flavor. Toasting the nuts lightly before adding them to the filling will enhance their flavor even further. This creates a more complex texture and taste profile for your nutty cinnamon roll tree.
3.2.2. Fruity Enhancements: Apple, Cranberry, and Orange Zest (Fruity Cinnamon Roll Tree)
For a brighter, more festive flavor, consider incorporating fruit. Finely diced apples (sautéed briefly to soften), dried cranberries, or fresh orange zest can add a wonderful tang and moisture. Orange zest, in particular, pairs beautifully with cinnamon and adds a lovely citrusy aroma, making your fruity cinnamon roll tree even more special.
3.2.3. Spiced Surprises: Cardamom, Nutmeg, and Ginger (Spiced Holiday Rolls)
Beyond cinnamon, other warming spices can elevate your filling. A pinch of ground cardamom adds a fragrant, slightly floral note. Freshly grated nutmeg offers a warm, woody aroma. A tiny amount of ground ginger can provide a subtle kick. These additions can transform your ordinary cinnamon rolls into truly spiced holiday rolls, perfect for the festive season.
4. Assembling Your Edible Masterpiece: The Tree Formation
Now comes the fun part: transforming your dough and filling into the iconic Christmas tree shape. This stage requires a bit of precision, but it’s incredibly satisfying to see your edible tree take form.
4.1. Preparing Your Workspace and Tools (Cinnamon Roll Tree Assembly Prep)
Before you start rolling, gather all your necessary tools and prepare your workspace. This ensures a smooth and efficient assembly process.
4.1.1. Baking Sheet Selection: Size and Material Matters (Baking Sheet for Cinnamon Roll Tree)
You’ll need a large baking sheet, preferably one with a rim, to contain the rolls as they expand. A standard half-sheet pan (approximately 18×13 inches) is usually ideal for a medium to large tree. The material of your baking sheet can impact browning; light-colored aluminum sheets promote even baking, while darker sheets can lead to faster browning on the bottom.
4.1.2. Parchment Paper: Your Non-Stick Secret (Parchment Paper for Baking)
Always line your baking sheet with parchment paper. This is a non-negotiable step! Parchment paper prevents sticking, makes cleanup incredibly easy, and allows you to transfer the baked tree without damaging its shape. It also helps to prevent the bottom of the rolls from over-browning.
4.2. Rolling Out the Dough: Achieving Uniformity (Rolling Cinnamon Roll Dough)
Whether you’re using homemade dough or canned dough, the rolling process is crucial for creating uniform rolls.
4.2.1. Thickness and Shape: The Foundation of Your Tree (Dough Thickness for Rolls)
For homemade dough, gently punch it down after its first rise and turn it out onto a lightly floured surface. Roll it into a large rectangle, aiming for a thickness of about 1/4 to 1/3 inch (0.6-0.8 cm). Consistency in thickness is important for even baking. If using canned dough, you’ll unroll the individual rolls and gently flatten them slightly, then arrange them as described in the next section. For homemade, the large rectangle will be the base for all your rolls.
4.2.2. Spreading the Filling Evenly (Applying Cinnamon Filling)
Once your dough is rolled out, spread your prepared cinnamon filling evenly over the entire surface, leaving a small border (about 1/2 inch or 1.25 cm) along one of the long edges. This border will help seal the roll. Ensure the filling covers the dough from edge to edge to guarantee flavor in every bite.
4.3. The Art of Rolling and Slicing (Rolling and Slicing Cinnamon Rolls)
How you roll and slice the dough significantly impacts the final shape and texture of your cinnamon rolls.
4.3.1. Tight Rolls for a Defined Shape (How to Roll Cinnamon Rolls)
Starting from the long edge opposite the clean border, tightly roll the dough into a log. The tighter you roll it, the more defined your spirals will be. As you roll, try to keep the log uniform in thickness. Once rolled, pinch the seam closed to prevent the roll from unraveling during baking. This creates a neat, compact log ready for slicing.
4.3.2. Slicing Techniques: Floss vs. Knife (Slicing Cinnamon Roll Dough)
You have two primary methods for slicing your cinnamon roll dough log:
- Dental Floss Method: This is often preferred for a cleaner cut that doesn’t squash the dough. Slide a piece of unflavored dental floss (or strong thread) under the log where you want to make a cut. Cross the ends of the floss over the top and pull them in opposite directions, slicing cleanly through the dough. This method helps maintain the round shape of the rolls.
- Sharp Knife Method: A very sharp, un-serrated knife can also work. Use a gentle sawing motion rather than pressing straight down, which can flatten the rolls. For best results, chill the log slightly in the refrigerator for 15-20 minutes before slicing; this makes it firmer and easier to cut cleanly. Aim for rolls that are about 1 to 1.5 inches (2.5-3.8 cm) thick.
4.4. Arranging the “Branches”: Forming the Tree Shape (Arranging Cinnamon Rolls into Tree Shape)
This is where your cinnamon rolls transform into a festive tree. The arrangement is key to achieving the desired conical shape.
4.4.1. The Base: Creating a Sturdy Foundation (Base of Cinnamon Roll Tree)
Start by placing a row of rolls at the bottom of your parchment-lined baking sheet. This will form the widest part of your tree. Depending on the size of your rolls and baking sheet, this might be 4-5 rolls placed side-by-side, touching slightly. This creates a solid base for the layers above.
4.4.2. Layering for a Conical Shape (Layering Cinnamon Rolls for Tree)
Above the base row, place a slightly shorter row of rolls, offsetting them slightly so they nestle into the gaps of the row below. Continue this pattern, making each subsequent row shorter than the one before it (e.g., 5 rolls, then 4, then 3, then 2, then 1). This tapering creates the classic Christmas tree silhouette. Ensure the rolls are touching but not squished, as they will expand during the second rise and baking.
4.4.3. The “Star” Roll: Topping Your Tree (Star Cinnamon Roll for Tree)
For the very top of your tree, you can use a single roll. For an extra special touch, consider shaping a small piece of dough into a star using a cookie cutter, or simply twisting a small strip of dough into a star shape. Place this “star” on top of the single roll at the apex of your tree. This adds a charming, decorative element to your cinnamon roll Christmas tree.
4.4.4. Spacing for Optimal Baking (Spacing Cinnamon Rolls on Tray)
While you want the rolls to be close enough to form a cohesive tree, avoid packing them too tightly. They need a little room to expand during their second rise and during baking. If they are too cramped, they might not bake evenly and could remain doughy in the center. The slight spacing allows for better air circulation and more uniform cooking.
5. The Second Rise and Baking Perfection
After assembly, your cinnamon roll tree needs one more crucial step before hitting the oven: the second rise. This final proofing stage, followed by precise baking, ensures your rolls are light, fluffy, and perfectly cooked.
5.1. The Crucial Second Proof: Achieving Lightness (Second Rise for Cinnamon Rolls)
The second rise, or “final proof,” is just as important as the first. During this stage, the yeast produces more carbon dioxide, causing the assembled rolls to puff up and become incredibly light and airy. This is what gives cinnamon rolls their desirable soft texture.
5.1.1. Ideal Proofing Environment (Best Proofing Conditions)
For the second rise, cover your assembled cinnamon roll tree loosely with plastic wrap or a clean kitchen towel. Place it in a warm, draft-free spot. An ideal temperature is around 75-85°F (24-30°C). You can achieve this by:
- Placing it in a slightly warm oven that has been turned off (and cooled down if it was recently used).
- Using a proofing drawer if your oven has one.
- Placing it near a sunny window or a warm appliance. Avoid places that are too hot, as this can kill the yeast, or too cold, which will slow down or stop the rise.
5.1.2. Visual Cues for Readiness (When is Dough Proofed?)
The second rise typically takes 30-60 minutes, but the exact time depends on your kitchen’s temperature and the dough itself. The best way to tell if your dough is ready is by visual inspection. The rolls should look visibly puffy and soft, almost doubled in size, and they should be touching each other. A good test is the “poke test”: gently press your finger into the side of a roll. If the indentation slowly springs back, it’s ready. If it springs back quickly, it needs more time. If it collapses, it’s over-proofed.
5.2. Baking Your Cinnamon Roll Christmas Tree (Baking Cinnamon Roll Christmas Tree)
Once your tree is beautifully proofed, it’s time to bake it to golden perfection.
5.2.1. Oven Temperature and Preheating (Oven Temp for Cinnamon Rolls)
Preheat your oven to the recommended temperature, typically around 375°F (190°C) for homemade dough or as directed on canned dough packaging. It’s crucial to preheat your oven fully before placing the rolls inside. A properly preheated oven ensures that the rolls begin baking immediately and rise consistently, setting their structure before the crust forms. Use an oven thermometer to verify the actual temperature, as oven thermostats can sometimes be inaccurate.
5.2.2. Baking Time Guidelines (Cinnamon Roll Baking Time)
The baking time for a cinnamon roll Christmas tree will vary depending on the size of your rolls, your oven, and whether you used homemade or canned dough. Generally, it takes about 20-30 minutes. For canned rolls, follow the package instructions but be prepared to add a few extra minutes due to the larger, connected mass. For homemade, start checking around the 20-minute mark.
5.2.3. Checking for Doneness: Golden Brown and Cooked Through (How to Tell if Cinnamon Rolls are Done)
Your cinnamon roll tree is done when the tops are a beautiful golden brown, and the rolls feel firm to the touch. The internal temperature should reach around 190-200°F (88-93°C) if you’re using a thermometer, indicating that the dough is fully cooked through. The rolls in the center of the tree might take a little longer to cook, so ensure they are also done.
5.2.4. Preventing Over-Browning (Preventing Burnt Cinnamon Rolls)
If the tops of your rolls are browning too quickly but the center isn’t fully cooked, you can loosely tent the tree with aluminum foil. This reflects heat away from the surface, allowing the inside to continue baking without the outside getting burnt. This simple trick helps prevent your cinnamon roll tree from becoming too dark or crispy on the outside while ensuring it’s perfectly tender within.
6. The Icing on the Tree: Frosting and Decoration
Once your cinnamon roll tree emerges from the oven, fragrant and golden, it’s time for the crowning glory: the frosting and festive decorations. This is where you transform a delicious baked good into a true holiday showpiece.
6.1. Classic Cream Cheese Frosting: The Essential Topping (Cream Cheese Frosting for Cinnamon Rolls)
A rich, tangy cream cheese frosting is the quintessential topping for cinnamon rolls. Its smooth, creamy texture and slight tartness perfectly balance the sweetness of the rolls and their cinnamon filling.
6.1.1. Ingredients for a Rich and Tangy Frosting (Best Cream Cheese Frosting Recipe)
The best cream cheese frosting typically includes:
- Cream Cheese: Full-fat cream cheese, softened to room temperature, is essential for a smooth, lump-free frosting. Its tanginess cuts through the sweetness.
- Unsalted Butter: Also softened, butter adds richness and helps create a stable, spreadable consistency.
- Powdered Sugar (Confectioners’ Sugar): This provides sweetness and dissolves easily, ensuring a smooth texture without grittiness.
- Vanilla Extract: A splash of pure vanilla extract enhances the overall flavor profile, adding warmth and depth.
- Milk or Cream (Optional): A tablespoon or two of milk or heavy cream can be added to achieve your desired consistency, making it thinner if needed.
6.1.2. Achieving Smooth, Spreadable Consistency (Smooth Cream Cheese Icing)
To make a smooth cream cheese icing, combine the softened cream cheese and butter in a mixing bowl. Beat them together with an electric mixer on medium speed until the mixture is light and fluffy, usually 2-3 minutes. This aeration is key to a fluffy frosting. Then, gradually add the powdered sugar, one cup at a time, beating after each addition until fully incorporated. Finally, mix in the vanilla extract. If the frosting is too thick, add milk or cream, a teaspoon at a time, until it reaches a spreadable consistency. If it’s too thin, you can add a bit more powdered sugar.
6.2. Alternative Frostings and Glazes (Cinnamon Roll Glaze Ideas)
While cream cheese frosting is a classic, you can explore other options for your cinnamon roll tree if you prefer a different flavor or lighter touch.
6.2.1. Simple Powdered Sugar Glaze (Easy Sugar Glaze for Rolls)
For a quicker, lighter option, a simple powdered sugar glaze is perfect. Whisk together powdered sugar with a small amount of milk (or water) and a touch of vanilla extract until you reach a pourable consistency. This glaze provides a sweet sheen without the richness of cream cheese, allowing the cinnamon flavor to stand out more. It’s an easy sugar glaze for rolls that sets quickly.
6.2.2. Maple or Vanilla Bean Frosting (Maple Cinnamon Roll Icing)
To add another layer of flavor, consider a maple-infused frosting or one made with real vanilla bean. For a maple cinnamon roll icing, simply substitute some or all of the milk in your cream cheese or powdered sugar frosting with pure maple syrup. For vanilla bean, scrape the seeds from half a vanilla bean into your frosting mixture for an intense, aromatic vanilla flavor.
6.3. Decorating Your Festive Tree (Decorating Cinnamon Roll Christmas Tree)
Once frosted, your cinnamon roll Christmas tree is a blank canvas for festive decorations. This is where you can truly unleash your creativity and make it sparkle!
6.3.1. Festive Sprinkles and Candies (Christmas Sprinkles for Rolls)
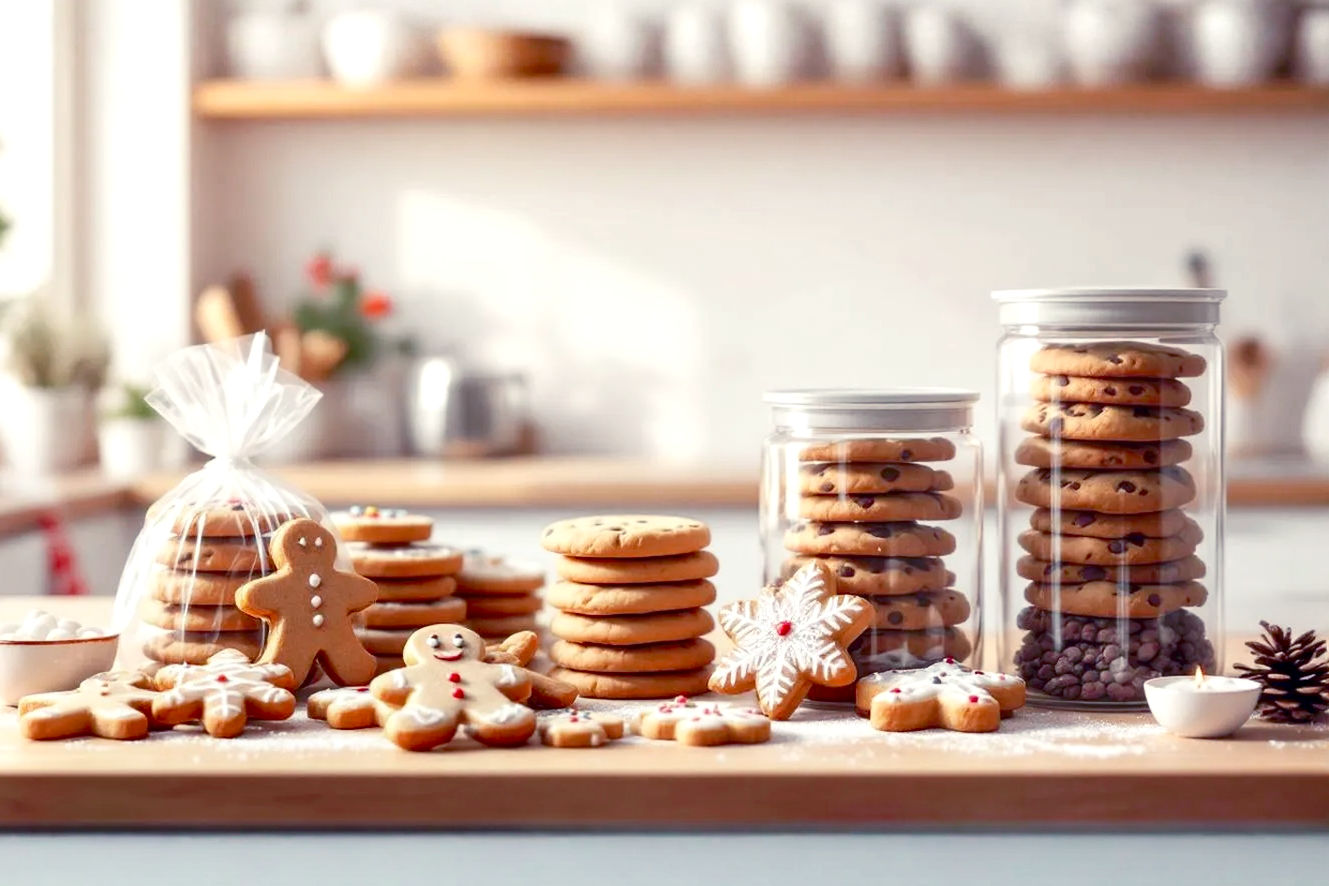
The easiest way to add holiday cheer is with sprinkles. Use green, red, and white Christmas sprinkles for rolls, or choose festive shapes like stars, snowflakes, or tiny trees. Small candies, like mini M&M’s or gumdrops, can also be strategically placed to look like ornaments.
6.3.2. Edible Glitter and Pearls (Edible Glitter for Baking)
For an extra touch of magic, dust your tree with edible glitter or arrange edible pearls. These add a beautiful shimmer and elegance, making your tree truly enchanting. They catch the light, giving your centerpiece a dazzling effect.
6.3.3. Fresh Cranberries or Rosemary “Garland” (Natural Decorations for Cinnamon Roll Tree)
For a more natural and sophisticated look, consider using fresh cranberries or small sprigs of rosemary. Red cranberries can resemble festive berries, while short pieces of rosemary can be artfully placed to mimic evergreen garlands. These additions not only look beautiful but also add a lovely aroma and subtle flavor contrast.
6.3.4. The Finishing Touch: A Candy Star (Candy Star Topper for Tree)
No Christmas tree is complete without a star on top! You can use a small sugar cookie cut into a star shape, a large yellow candy star, or even create a simple star from a piece of candied orange peel. Place this on the very top roll to crown your magnificent candy star topper for tree.
7. Serving and Storage Tips for Your Holiday Masterpiece
You’ve put in the effort to create a beautiful and delicious cinnamon roll Christmas tree; now it’s time to enjoy it! Knowing how to serve and store it properly will ensure everyone gets to savor its freshness.
7.1. When to Serve: Warm and Fresh is Best (Serving Cinnamon Roll Tree)
Cinnamon rolls are always best served warm, right out of the oven, or after a quick reheat. The warmth makes the dough incredibly tender, the filling gooey, and the frosting slightly melted and creamy. If you’ve just baked it, let it cool for about 10-15 minutes before frosting. This allows the rolls to set slightly and prevents the frosting from completely melting off, while still keeping them wonderfully warm.
7.2. Pulling Apart Your Tree: An Interactive Experience (Pull-Apart Cinnamon Roll Tree Serving)
The beauty of a pull-apart cinnamon roll tree is in its interactive serving. Simply place the tree on a large platter or cutting board in the center of your table. Guests can then easily pull off individual rolls or clusters of rolls. No need for knives or serving utensils, making it a relaxed and fun experience, especially for a casual holiday breakfast or brunch.
7.3. Storing Leftovers: Keeping Them Fresh (Storing Cinnamon Rolls)
It’s rare to have leftovers of something so delicious, but if you do, proper storage is key to maintaining freshness.
7.3.1. Room Temperature Storage (How to Store Baked Cinnamon Rolls)
If your frosting is made with butter and powdered sugar (without cream cheese), you can store the baked and cooled cinnamon roll tree at room temperature for up to 1-2 days. Place it in an airtight container or cover it tightly with plastic wrap to prevent it from drying out. This method is suitable for short-term storage.
7.3.2. Refrigeration and Freezing Options (Freezing Cinnamon Rolls)
For cream cheese frosted rolls, or for longer storage, refrigeration is necessary. Store the tree in an airtight container in the refrigerator for up to 3-4 days. The frosting will firm up, but the rolls will still be delicious.
You can also freeze cinnamon rolls for extended storage.
- Baked and Frosted: If already frosted, freeze the entire tree (or individual rolls) on a baking sheet until solid. Then, wrap tightly in plastic wrap and aluminum foil. Store in a freezer-safe bag or container for up to 1 month. The frosting might change texture slightly upon thawing, but it will still be edible.
- Baked and Unfrosted: This is often the best option for freezing. Once baked and cooled, wrap the tree or individual rolls tightly in plastic wrap and then foil. Freeze for up to 2-3 months. You can then thaw and frost them just before serving.
- Unbaked Dough: You can also freeze the unbaked, assembled tree. After arranging the rolls, cover tightly and freeze. When ready to bake, thaw overnight in the refrigerator, then let it come to room temperature and proof as usual before baking.
7.3.3. Reheating for Freshness (Reheating Cinnamon Rolls)
To bring refrigerated or frozen rolls back to life:
- From Refrigerator: Place individual rolls on a microwave-safe plate and microwave for 15-30 seconds until warm and soft. For the whole tree, cover loosely with foil and reheat in a 300°F (150°C) oven for 10-15 minutes, or until warmed through.
- From Freezer (Baked): Thaw overnight in the refrigerator. Then, reheat as you would from the refrigerator. You can also reheat directly from frozen in a 300°F (150°C) oven, covered with foil, for 20-30 minutes, or until warmed through. Reheating helps restore the soft, gooey texture, making your cinnamon roll tree taste freshly baked again.
8. Troubleshooting Common Cinnamon Roll Tree Challenges
Even experienced bakers encounter issues sometimes. Knowing how to troubleshoot common problems can save your cinnamon roll Christmas tree and ensure a successful bake.
8.1. Dough Not Rising (Why is My Cinnamon Roll Dough Not Rising?)
This is a common concern. If your cinnamon roll dough is not rising, the most likely culprits are:
- Inactive Yeast: Your yeast might be old or dead. Always proof your yeast first to confirm it’s active (it should foam).
- Incorrect Water/Milk Temperature: Water or milk that is too hot will kill the yeast, while water that is too cold won’t activate it. Aim for 105-115°F (40-46°C).
- Cold Environment: Yeast needs warmth to thrive. Ensure your proofing spot is warm and draft-free.
- Too Much Flour: Adding too much flour can make the dough stiff and heavy, inhibiting the yeast’s ability to make it rise. Weighing flour is more accurate than measuring by volume.
- Expired Ingredients: Check the dates on your flour and yeast.
8.2. Dry or Tough Rolls (Why are My Cinnamon Rolls Dry?)
If your cinnamon rolls are dry or tough, it’s usually due to:
- Over-kneading: While kneading develops gluten, over-kneading can make the dough too elastic and tough.
- Too Much Flour: Again, excess flour leads to a dry, dense dough.
- Over-baking: Baking for too long at too high a temperature will dry out the rolls. Keep an eye on the clock and the visual cues for doneness.
- Insufficient Fat: Not enough butter or oil in the dough recipe can result in a less tender crumb.
8.3. Uneven Baking (Unevenly Baked Cinnamon Roll Tree)
An unevenly baked cinnamon roll tree can happen, especially with the unique shape.
- Hot Spots in Oven: Ovens often have hot spots. Rotate your baking sheet halfway through baking to promote even browning.
- Dough Thickness: If some rolls are thicker than others, they will bake at different rates. Try to keep roll thickness consistent during slicing.
- Crowding: If rolls are packed too tightly, air circulation is restricted, leading to uneven baking. Ensure proper spacing.
- Pan Material: Darker pans can cause the bottom to brown faster. Use a lighter-colored pan or reduce oven temperature slightly.
8.4. Filling Leaking Out (Cinnamon Roll Filling Leaking)
If your cinnamon roll filling is leaking, it’s often because:
- Too Much Butter in Filling: An excessive amount of butter in the filling can melt out during baking.
- Butter Too Soft/Melted: If the butter in your filling is too soft or melted, it won’t hold the sugar and cinnamon well. It should be softened but still solid.
- Loose Rolls: If the dough wasn’t rolled tightly enough, the filling has more room to escape.
- Over-Proofing: Over-proofed dough can become too fragile, leading to tears and leaks.
8.5. Frosting Too Thin or Too Thick (Fixing Cinnamon Roll Frosting)
Getting the frosting consistency just right is important.
- Frosting Too Thin: If your frosting is too runny, gradually whisk in more powdered sugar until it thickens to your desired consistency.
- Frosting Too Thick: If it’s too stiff, add milk or cream, a teaspoon at a time, until it becomes smooth and spreadable.
- Lumpy Frosting: Ensure your cream cheese and butter are truly at room temperature before mixing. Cold ingredients will result in lumps. Beat them thoroughly until smooth before adding powdered sugar.
9. Advanced Tips and Creative Variations
Once you’ve mastered the basic cinnamon roll Christmas tree, you might want to explore more advanced techniques and creative twists to impress your guests even further.
9.1. Incorporating Savory Elements (Savory Cinnamon Roll Tree Ideas)
While cinnamon rolls are typically sweet, you can adapt the concept to create savory cinnamon roll tree ideas. Instead of a sweet filling, consider:
- Pesto and Cheese: Spread pesto, sprinkle with mozzarella and Parmesan cheese, and roll.
- Garlic Herb Butter: A mixture of softened butter, minced garlic, and fresh herbs like parsley, chives, and dill.
- Sun-Dried Tomato and Feta: Chopped sun-dried tomatoes, crumbled feta cheese, and a sprinkle of oregano. These savory versions make a fantastic appetizer or a unique addition to a holiday brunch spread.
9.2. Mini Cinnamon Roll Trees (Mini Christmas Tree Cinnamon Rolls)
For individual servings or a charming display, create mini Christmas tree cinnamon rolls. Instead of one large tree, make several smaller ones. You can use smaller rolls (slice your dough log thinner) or even use mini muffin tins to help them hold their shape. These are perfect for gifting or for a buffet where guests can easily grab their own personal tree.
9.3. Gluten-Free or Vegan Adaptations (Gluten-Free Cinnamon Roll Tree)
With dietary needs becoming more common, you can also adapt your cinnamon roll tree recipe:
- Gluten-Free: Use a high-quality gluten-free all-purpose flour blend (one that contains xanthan gum) in place of regular flour. Adjust liquid as needed, as GF flours can absorb differently. The dough might be a bit stickier and less elastic, so handle it gently.
- Vegan: Substitute dairy milk with plant-based milk (almond, soy, oat), butter with vegan butter sticks, and eggs with flax eggs (1 tbsp ground flaxseed + 3 tbsp water, let sit for 5 minutes) or commercial egg replacers. For the frosting, use vegan cream cheese and vegan butter.
9.4. Gifting Your Cinnamon Roll Tree (Gifting Baked Goods)
A homemade cinnamon roll Christmas tree makes a wonderful, heartfelt gift.
- Presentation: Once cooled and frosted, place the tree on a sturdy cardboard cake round or a festive platter. Wrap it loosely with cellophane and tie with a holiday ribbon.
- Instructions: Include a small card with reheating instructions and any dietary information if applicable.
- Freshness: For best results, give the tree on the day it’s baked or the day after.
10. Conclusion: A Sweet Tradition for Your Holiday Table
Creating a festive cinnamon roll Christmas tree is more than just following a recipe; it’s about embracing the joy of holiday baking and crafting something truly special for your loved ones. From the comforting aroma that fills your kitchen to the delighted faces when it’s served, this edible masterpiece embodies the warmth and generosity of the season.
10.1. Recap of Your Baking Journey (Cinnamon Roll Tree Summary)
We’ve walked through every essential step: from selecting your dough (whether convenient canned rolls or satisfying homemade dough), to crafting a rich, flavorful filling, and meticulously assembling your tree. You’ve learned about the crucial second rise, the nuances of baking to golden perfection, and the art of frosting and decorating. We’ve also covered important tips for serving, storing, and troubleshooting any bumps along the way. This comprehensive cinnamon roll tree summary highlights that with a little planning and care, anyone can create this impressive holiday treat.
10.2. Embracing the Holiday Spirit (Holiday Baking Traditions)
Baking a cinnamon roll Christmas tree can easily become one of your most cherished holiday baking traditions. It’s a project that invites participation, fosters connection, and results in a delicious reward. Imagine the laughter as family members pull apart the warm, gooey rolls, each bite a reminder of the festive magic you’ve created. This holiday season, let your kitchen be filled with the sweet scent of cinnamon and the joy of a homemade, edible Christmas tree. It’s a simple pleasure that creates lasting memories and truly embodies the spirit of giving.