This post may contain affiliate links. If you make a purchase through these links, we may earn a commission at no additional cost to you.
Introduction: The Magic of Edible Christmas Cupcake Decorations
Christmas is a time for joy, warmth, and, of course, delicious treats! While a beautifully baked cupcake is wonderful on its own, adding edible Christmas decorations transforms it into a miniature work of art. Imagine serving cupcakes adorned with tiny, shimmering snowflakes, festive holly, or even miniature gingerbread men. These aren’t just desserts; they’re edible expressions of holiday cheer.
Why Edible Decorations Matter for Festive Treats
Edible decorations do more than just make your cupcakes look pretty; they enhance the entire experience. They add texture, flavor, and an element of surprise that traditional frosting alone can’t achieve. Think about biting into a soft cupcake and discovering a crunchy candy cane piece or a chewy marzipan reindeer. This multi-sensory experience makes your holiday treats truly memorable. Plus, they offer a fantastic way to personalize your baking, making each cupcake unique and special for your guests. It’s about creating a festive atmosphere that you can literally taste.
The Joy of Homemade Holiday Cupcakes
There’s something incredibly satisfying about creating homemade treats, especially during the holidays. When you craft your own edible Christmas cupcake toppers, you’re not just baking; you’re engaging in a creative process that’s both relaxing and rewarding. It allows you to infuse your personality into every single treat. From choosing your colors to shaping delicate figures, each step is an opportunity to express your holiday spirit. These homemade touches often become cherished memories, far more impactful than store-bought options. They carry the warmth and effort of your hands, making them truly special.
What You’ll Discover in This Guide
This comprehensive guide will walk you through everything you need to know about elevating your Christmas cupcakes with stunning edible decorations. We’ll explore a wide array of materials, from classic fondant to playful candies, and delve into the techniques required to bring your festive visions to life. You’ll learn about essential tools, creative themes, and crucial tips for success. By the end, you’ll feel confident and inspired to create festive edible cupcake decor that will dazzle everyone at your holiday gatherings. Get ready to turn ordinary cupcakes into extraordinary Christmas masterpieces!
Understanding Your Edible Mediums: The Foundation of Festive Decor
To truly master the art of DIY edible Christmas cupcake decorations, you need to understand the different materials available. Each medium offers unique properties, making it suitable for various types of designs and levels of detail. Choosing the right material is the first step toward bringing your creative ideas to life.
Fondant: The Sculptor’s Clay for Cupcakes
Fondant is perhaps one of the most popular and versatile materials for edible decorations. It’s like a sweet, edible playdough that you can roll, cut, and sculpt into almost any shape imaginable.
What is Fondant? Composition and Characteristics
Fondant is a sugar paste primarily made from sugar, water, gelatin (or agar-agar for vegan versions), and vegetable fat. Its smooth, pliable texture makes it ideal for covering cakes and creating detailed figures. Unlike traditional frosting, fondant provides a clean, matte finish and holds its shape exceptionally well once dry. This stability is crucial for intricate designs that need to stand upright or maintain sharp edges. It’s a very forgiving medium, allowing you to rework it if you don’t get it right the first time. The key characteristic is its ability to be rolled very thin without tearing, which is perfect for delicate elements.
Working with Fondant: Coloring, Rolling, and Cutting
Before you start shaping, you’ll often need to color your fondant. Use gel food colors rather than liquid ones, as liquid colors can alter the fondant’s consistency, making it sticky or difficult to work with. Knead the gel color into the fondant until it’s evenly distributed. For rolling, dust your work surface and rolling pin with a little cornstarch or powdered sugar to prevent sticking. Roll the fondant to an even thickness, typically about 1/8 to 1/16 inch (3-1.5 mm) for decorations. For cutting, you can use cookie cutters, sharp knives, or specialized fondant tools. Precision is important here to get clean edges for your designs.
Creating Intricate Fondant Shapes: Molds, Cutters, and Hand-Sculpting
Fondant truly shines when you’re creating detailed shapes.
Fondant Christmas Trees and Wreaths
For fondant Christmas trees, roll green fondant and use a small Christmas tree cookie cutter. You can add texture with a knife or a specialized tool to mimic branches. For wreaths, roll thin ropes of green fondant and twist them together, then form a circle. Add tiny red fondant berries or white nonpareils for a festive touch. These elements are relatively simple but add significant visual impact.
Fondant Holly and Berries
Holly leaves can be cut using a small leaf cutter or even hand-cut with a sharp knife. Use a veining tool to create realistic leaf patterns. For berries, simply roll small balls of red fondant. You can attach them to the leaves using a tiny dab of edible glue or water. This classic Christmas motif is easy to create and instantly recognizable.
Fondant Snowflakes and Stars
Snowflakes require a bit more precision. Small snowflake plunger cutters are incredibly helpful for this, as they cut the shape and emboss details simultaneously. For stars, various star-shaped cutters work well. You can make them in different sizes to create a layered effect on your cupcakes. Dusting them with edible glitter after they dry adds a magical shimmer.
Royal Icing: Precision and Elegance for Delicate Designs
Royal icing is another cornerstone of edible decoration, known for its crisp, hard finish and ability to create incredibly fine details.
What is Royal Icing? Meringue Powder vs. Egg Whites
Royal icing is a hard-drying icing made from powdered sugar, a liquid (water or lemon juice), and a protein source. Traditionally, the protein source was raw egg whites, which give the icing its characteristic strength and shine. However, for safety reasons, many bakers now prefer using meringue powder, a dried egg white product. Meringue powder eliminates the risk of salmonella and provides a more consistent result. It’s essentially a pasteurized, powdered form of egg whites, often with stabilizers, that you rehydrate with water. The chemical reaction between the protein and sugar forms a strong, stable matrix when dried.
Consistency is Key: Flooding, Piping, and Detailing
The success of royal icing largely depends on achieving the correct consistency.
- Stiff consistency (like toothpaste) is used for piping outlines, borders, and intricate details that need to hold their shape firmly.
- Medium consistency (like soft-serve ice cream) is good for piping slightly thicker lines and simple designs.
- Flooding consistency (like honey or thin syrup) is used to fill in outlined areas, creating a smooth, flat surface. You achieve this by gradually adding small amounts of water to stiff icing until it flows smoothly but isn’t too runny. Test by drawing a line; if it disappears within 10-15 seconds, it’s usually good for flooding.
Royal Icing Techniques for Christmas: Snow, Icicles, and Fine Lines
Royal icing is perfect for creating delicate, wintry effects.
Piping Royal Icing Snowmen and Reindeer
You can pipe outlines of small snowmen or reindeer directly onto waxed paper, let them dry, and then transfer them to your cupcakes. Use stiff white icing for the snowman’s body and black for eyes and buttons. For reindeer, use brown icing and add tiny red dots for noses.
Creating Royal Icing Lace and Filigree
For a truly elegant look, pipe intricate lace patterns using a very fine piping tip. This technique requires a steady hand but results in stunning, delicate designs that resemble frozen lace or intricate snowflakes. You can pipe these directly onto the cupcake or onto parchment paper to dry, then carefully place them on top.
Modeling Chocolate: A Deliciously Pliable Alternative
For those who love the taste of chocolate and want a medium that’s easier to handle than fondant for certain tasks, modeling chocolate is a fantastic choice.
What is Modeling Chocolate? Advantages Over Fondant
Modeling chocolate is a simple mixture of melted chocolate and corn syrup (or glucose syrup). Unlike fondant, which can sometimes dry out quickly or crack, modeling chocolate is more pliable and forgiving. It has a rich, decadent taste, which many prefer over the sometimes neutral flavor of fondant. Its main advantage is its flexibility and resistance to tearing, making it easier to sculpt and manipulate without fear of breakage. It also doesn’t dry out as quickly, giving you more working time. It’s essentially a malleable chocolate dough that retains the flavor and aroma of the chocolate itself.
How to Make and Work with Modeling Chocolate
To make modeling chocolate, gently melt chocolate (dark, milk, or white) and then slowly stir in corn syrup until it comes together into a thick, pliable mass. The key is not to overmix, which can cause the chocolate to seize. Once mixed, let it cool and firm up slightly before kneading. Knead it until smooth and workable. It responds well to the warmth of your hands. If it gets too soft, let it cool; if too stiff, knead it gently. You can color white modeling chocolate with gel food colors.
Sculpting with Modeling Chocolate: Figures and Textures
Modeling chocolate is excellent for creating three-dimensional figures. You can sculpt small Santa hats, reindeer antlers, or even miniature presents. Its texture allows for very fine detailing, like wrinkles in fabric or fur on an animal. You can also press it into silicone molds for consistent shapes. For example, you could create small chocolate bows or intricate floral designs that look stunning on a Christmas cupcake.
Gum Paste: For Delicate, Long-Lasting Creations
Gum paste, also known as pastillage, is similar to fondant but dries much harder and more brittle. This makes it perfect for very thin, delicate, and structural decorations.
What is Gum Paste? Its Unique Properties
Gum paste is made from powdered sugar, egg whites (or meringue powder), and a gum-like ingredient such as tylose powder or gum tragacanth. The addition of these gums gives it incredible elasticity and allows it to dry very quickly and very hard. This hardness is its defining characteristic, enabling it to hold intricate shapes that would collapse if made from fondant. It’s often used for edible flowers, intricate lace, or figures that need to stand tall and maintain their form. While it’s edible, it’s generally not as pleasant to eat as fondant or modeling chocolate due to its brittle texture.
Using Gum Paste for Thin, Detailed Elements: Flowers and Figurines
Because gum paste can be rolled incredibly thin (almost paper-thin), it’s ideal for delicate elements like poinsettia petals, intricate snowflakes, or tiny bells that need to be very light and airy. You can use specialized cutters and veiners to create realistic textures. It’s also excellent for making small, standing figurines like elves or angels, as they will dry rigid and hold their pose. When working with gum paste, keep unused portions tightly wrapped, as it dries out very quickly.
Marzipan: The Almond-Flavored Delight
Marzipan offers a distinct flavor and texture, making it a unique choice for edible decorations.
What is Marzipan? Taste and Texture
Marzipan is a confection made primarily from ground almonds, sugar, and sometimes egg whites or corn syrup. It has a sweet, nutty flavor and a smooth, slightly chewy texture. Unlike fondant, which is relatively neutral in taste, marzipan adds a delicious almond note to your treats. It’s very pliable and easy to mold, similar to modeling clay. Its natural pale yellow color can be easily tinted with food colors.
Shaping Marzipan for Festive Cupcake Toppers
Marzipan is traditionally used for shaping small fruits, animals, or figures. For Christmas cupcakes, you can sculpt charming miniature marzipan snowmen, reindeer, or even tiny Santa Clauses. Its natural pliability makes it easy to roll into balls, ropes, and other basic shapes. You can also press it into molds. The subtle almond flavor pairs wonderfully with many Christmas cupcake flavors, adding an extra layer of gourmet appeal.
Candy Creations: Sweet and Simple Edible Accents
Beyond the more elaborate sugar pastes, many common candies can be transformed into delightful and easy Christmas cupcake toppers edible for your holiday treats. These options are often quick to apply and add immediate festive flair.
Hard Candies: Crushed Delights and Stained Glass Effects
Hard candies aren’t just for sucking; they can be a vibrant, crunchy addition to your cupcakes.
Using Crushed Candy Canes for Festive Toppings
Crushed candy canes are a quintessential Christmas decoration. Simply place candy canes in a Ziploc bag and crush them with a rolling pin or a meat mallet. The resulting red and white shards offer a refreshing peppermint flavor and a delightful crunch. Sprinkle them generously over frosted cupcakes for an instant festive look. They look especially striking on white or chocolate frosting, mimicking snow or festive confetti.
Creating “Stained Glass” Candy Shards
For a more unique effect, you can create “stained glass” candy shards. Crush hard candies of various colors (like Jolly Ranchers or clear peppermints) into small pieces. Arrange these pieces on a baking sheet lined with parchment paper, creating patterns or filling small cookie cutters. Bake at a low temperature (around 275°F or 135°C) until the candy melts and fuses together. Once cooled, you’ll have beautiful, translucent candy pieces that resemble stained glass. You can break them into shards or use the shapes directly as festive edible cupcake decor. These look amazing when light catches them.
Gummy Candies: Playful and Colorful Additions
Gummy candies are soft, chewy, and come in a rainbow of colors, making them perfect for playful designs.
Arranging Gummy Bears and Worms into Festive Scenes
Gummy bears, worms, and other shapes can be arranged to create whimsical Christmas scenes on your cupcakes. Imagine a gummy bear “sledding” down a frosted hill or a gummy worm “snake” wrapped around a mini Christmas tree. Their vibrant colors make them pop against frosting. You can use a tiny bit of frosting or edible glue to secure them in place.
Cutting Gummy Candies for Unique Shapes
Don’t limit yourself to the original shapes. Gummy candies can be easily cut with kitchen shears or a sharp knife into smaller, more specific forms. You could cut green gummies into tiny leaves, red gummies into berries, or even use different colors to create abstract Christmas patterns. This allows for more customization and detail than simply placing whole candies.
Chocolate: Versatile and Irresistible Decorations
Chocolate is a universal favorite, and its versatility makes it an excellent medium for homemade edible Christmas cupcake toppers.
Melted Chocolate Drizzles and Shapes
Melted chocolate is incredibly easy to work with. You can drizzle it over frosted cupcakes in festive patterns, like zigzags or snowflakes. For more defined shapes, pipe melted chocolate onto parchment paper in desired designs (e.g., small trees, reindeer antlers, or stars). Let them set in the refrigerator until firm, then carefully peel them off and place them on your cupcakes. White chocolate can be tinted with oil-based food colors for different effects.
Chocolate Shavings and Curls
Chocolate shavings and curls add an elegant touch and rich chocolate flavor. Use a vegetable peeler or a sharp knife to shave a block of chocolate, creating delicate curls. Sprinkle these over your cupcakes for a sophisticated, snow-like appearance, or arrange them to create texture. This works particularly well with dark chocolate for a striking contrast.
Chocolate Covered Pretzels and Strawberries
Chocolate Dipped Pretzels as Reindeer Antlers
This is a popular and adorable idea. Dip pretzel sticks or mini pretzel twists into melted chocolate (milk, dark, or white). While the chocolate is still wet, you can add sprinkles or edible glitter. Once set, these chocolate covered pretzels make perfect, crunchy reindeer antlers when inserted into the top of a frosted cupcake. Add two candy eyes and a red candy nose for a complete reindeer face.
Chocolate Covered Strawberries as Santa Hats
For a quick and charming Santa hat, dip the wide end of a fresh strawberry into melted white chocolate, letting it drip slightly to form the “fur” brim. Place a small marshmallow or a white candy pearl on the tip of the strawberry for the pom-pom. These chocolate covered strawberries are not only cute but also add a fresh, fruity element to your cupcakes.
Marshmallows: Soft, Sweet, and Easy to Transform
Marshmallows are incredibly versatile and easy to cut, shape, and decorate.
Marshmallow Snowmen and Polar Bears
Mini marshmallows can be stacked and secured with a toothpick to create adorable snowmen. Use edible markers or melted chocolate for eyes, buttons, and a carrot nose. For polar bears, use a larger marshmallow for the head and smaller ones for ears and a snout. These marshmallow Christmas cupcake ideas are simple enough for kids to help with and add a soft, whimsical touch.
Toasted Marshmallows for a Cozy Look
For a rustic, cozy feel, lightly toast marshmallows using a kitchen torch or under a broiler until they’re golden brown and slightly gooey. Place them on top of your cupcakes for a warm, comforting appearance, reminiscent of a campfire or a cozy winter night. This adds a lovely caramelized flavor.
Sprinkles and Edible Glitter: The Sparkle Factor
Sometimes, all you need is a little sparkle to make your cupcakes shine.
Understanding Different Types of Sprinkles (Jimmies, Nonpareils, Dragees)
Sprinkles come in many forms, each offering a different texture and look.
- Jimmies are rod-shaped and soft, providing a pleasant chew.
- Nonpareils are tiny, round balls that give a crunchy texture.
- Dragees are larger, often metallic-coated spheres (use with caution, as some metallic dragees are for decorative purposes only and not meant for consumption due to their hard core).
- Sanding sugar is coarse sugar crystals that add sparkle.
- Confetti sprinkles are flat, disc-shaped. Choose a mix of red, green, and white for classic Christmas appeal, or silver and gold for an elegant touch.
Applying Edible Glitter for a Shimmering Finish
Edible glitter is a fantastic way to add a magical shimmer to your cupcakes. It’s made from food-grade ingredients, often sugar, gum arabic, and food coloring. You can brush it directly onto fondant or royal icing decorations, or lightly sprinkle it over frosted cupcakes. For a stronger adherence, apply it while the frosting is still slightly tacky or use a dab of edible glue. It catches the light beautifully, making your Christmas cupcake ideas edible truly sparkle.
Creating Custom Sprinkle Blends
Don’t just buy pre-mixed sprinkles; create your own! Combine different types and colors of sprinkles, nonpareils, and sanding sugars in a bowl to make a unique blend that perfectly matches your Christmas theme. This allows for endless customization and a truly bespoke look for your treats.
Baked & Edible: Integrating Treats into Treats
Why stop at just decorating a cupcake when you can integrate other delicious baked goods directly onto them? This approach creates multi-layered treats that are both visually appealing and incredibly satisfying.
Sugar Cookies: Personalized Mini Masterpieces
Mini sugar cookies Christmas cupcake decorations are a classic choice. They offer a firm, flat surface perfect for detailed decorating.
Baking and Decorating Mini Sugar Cookies for Cupcakes
Bake small sugar cookies using Christmas-themed cutters like stars, trees, gingerbread men, or snowflakes. Once cooled, decorate them with royal icing, edible markers, or even a thin layer of fondant. You can add intricate details like tiny buttons on a gingerbread man or delicate patterns on a snowflake. The flat surface of the cookie allows for more detailed artistry than directly on a curved cupcake top. Ensure they are fully cooled and decorated before placing them on the cupcakes.
Attaching Sugar Cookies to Cupcakes: Edible Glue and Frosting
To attach your decorated sugar cookies, use a dollop of stiff buttercream frosting or a small amount of edible glue. The frosting acts as a strong adhesive and also blends seamlessly with the cupcake’s main frosting. If the cookie is large, you might want to insert a small toothpick into the cupcake and then into the cookie for extra stability, especially if transporting them.
Gingerbread: Warm Spices and Whimsical Shapes
Gingerbread adds a wonderful aroma and a distinct flavor that screams “Christmas.”
Cutting and Decorating Small Gingerbread Figures
Just like sugar cookies, small gingerbread figures are perfect for cupcakes. Use miniature gingerbread man, star, or tree cutters. Once baked and cooled, decorate them with royal icing for details like eyes, buttons, or festive patterns. The warm spices of the gingerbread complement the sweetness of the cupcake perfectly. These gingerbread cupcake toppers are not just decorations; they’re an integral part of the treat.
Using Gingerbread for House or Tree Toppers
For a more ambitious project, you can bake small gingerbread pieces to construct miniature gingerbread houses or trees directly on top of your cupcakes. Use royal icing as “mortar” to assemble the tiny walls and roofs. These intricate toppers create a truly show-stopping display and are a delightful surprise for guests.
Brownie Bites: Rich and Decadent Additions
For chocolate lovers, brownie bites offer a rich, fudgy base for additional decorations.
Cutting Brownie Bites into Festive Shapes
Bake a thin layer of brownies and, once cooled, use small Christmas-themed cookie cutters to cut out shapes like stars, circles, or even tiny trees. These brownie cupcake toppers add a dense, chocolatey layer to your cupcakes. You can also cut them into simple squares or rectangles for a minimalist yet delicious look.
Decorating Brownie Bites for Cupcake Toppers
Once cut, you can decorate the brownie bites further. Drizzle them with melted white chocolate to create “snow,” sprinkle them with powdered sugar, or add a small fondant holly leaf. The richness of the brownie provides a wonderful contrast to lighter cupcake flavors.
Pretzel Rods: Salty-Sweet Structures
Pretzel rods offer a unique salty crunch and can be used to create structural elements.
Dipping Pretzel Rods in Chocolate and Decorating
Dip pretzel rods into melted chocolate (white, milk, or dark) and then immediately roll them in sprinkles, crushed candy canes, or chopped nuts. Let them set on parchment paper. These pretzel Christmas cupcake decorations are simple yet effective. The combination of salty pretzel, sweet chocolate, and festive toppings is irresistible.
Using Pretzel Rods as Structural Elements (e.g., Tree Trunks)
Beyond simple dipping, pretzel rods can serve as structural supports. For example, a chocolate-dipped pretzel rod can act as the trunk for a mini edible Christmas tree made from stacked green frosting swirls or fondant cones. This adds height and an interesting architectural element to your cupcake design.
Natural & Wholesome: Fresh and Dried Edible Elements
Not all edible Christmas decorations for cupcakes need to be sugary confections. Natural elements can add freshness, vibrant color, and a touch of rustic elegance.
Fresh Fruits: Vibrant Colors and Natural Sweetness
Fresh fruits provide a burst of color and a healthy contrast to the sweetness of cupcakes.
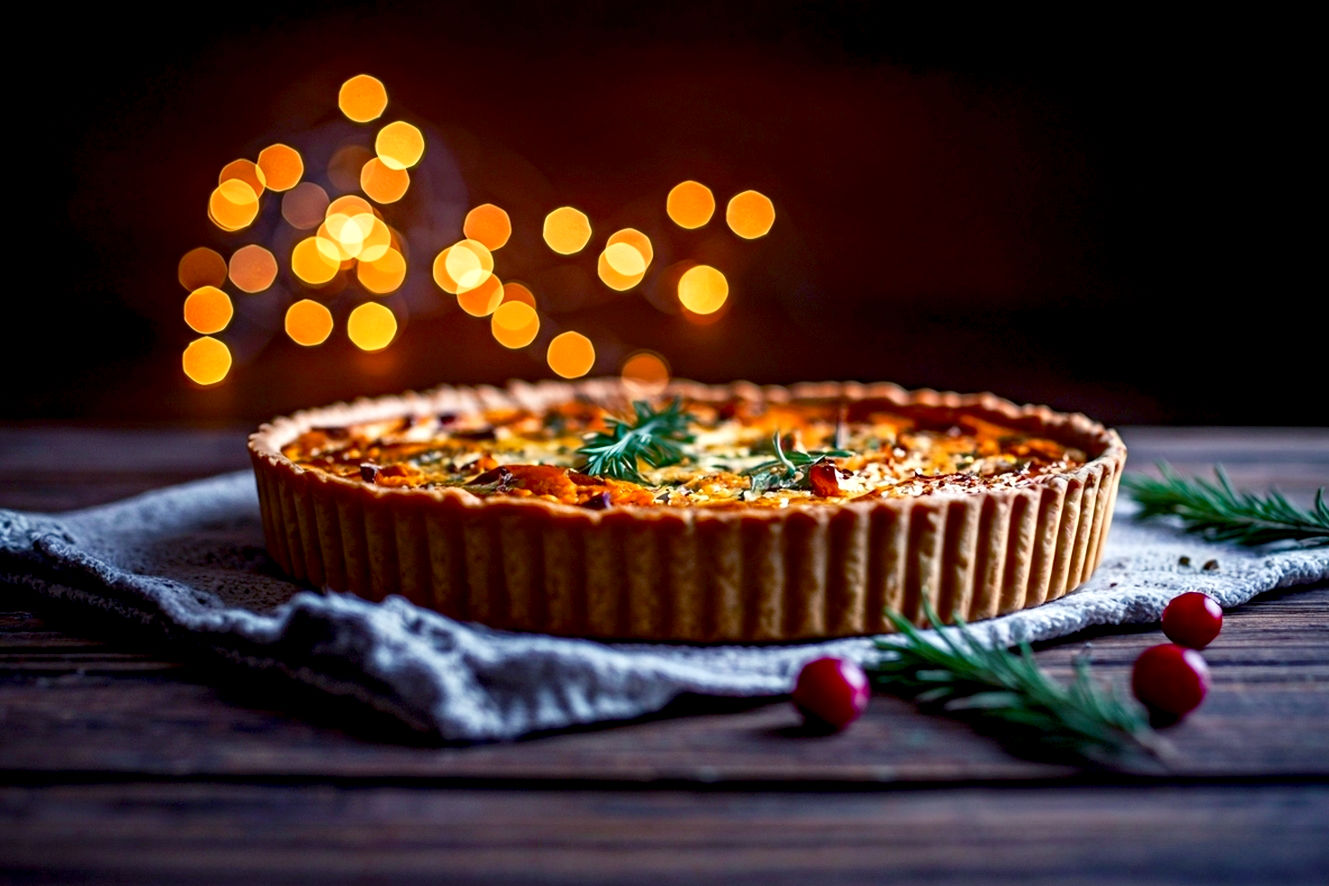
Cranberries and Rosemary for a Festive Garnish
One of the most classic and elegant natural garnishes is a sprig of fresh rosemary and a few bright red cranberries. The deep red of the cranberries and the vibrant green of the rosemary instantly evoke Christmas colors. You can lightly dust the cranberries with powdered sugar to mimic snow. This combination adds a beautiful visual appeal and a subtle aromatic quality without being overly sweet.
Raspberry and Blueberry Combinations
Arrange fresh raspberries and blueberries on top of white frosting to create a striking red and blue contrast. These berries offer a juicy burst of flavor and a natural, wholesome feel. They work particularly well on lemon or vanilla cupcakes, where their tartness can balance the sweetness.
Dried Fruits: Chewy Textures and Rich Flavors
Dried fruits offer concentrated flavors and chewy textures, perfect for a more rustic or sophisticated look.
Candied Orange Slices and Lemon Peels
Candied orange slices or lemon peels make stunning, translucent decorations. Their vibrant color and slightly bitter-sweet flavor add an elegant touch. You can make them by simmering thin slices of citrus in sugar syrup until translucent, then drying them. They look beautiful on top of a cupcake, especially when dusted with a little sugar.
Dried Cranberries and Cherries
Scatter dried cranberries or cherries over your cupcakes for a pop of color and a chewy texture. They provide a deeper, more intense fruit flavor than fresh berries. These are great for adding a rustic, natural feel, especially when paired with nuts or warm-spiced cupcakes.
Nuts: Crunchy Textures and Earthy Tones
Nuts add a satisfying crunch and an earthy, sophisticated flavor.
Candied Pecans or Walnuts
For a gourmet touch, make candied pecans or walnuts. Toss nuts with a little sugar, cinnamon, and butter, then bake until caramelized. These crunchy, sweet nuts can be placed whole on top of cupcakes or chopped and sprinkled for texture. They pair wonderfully with caramel, maple, or spice-flavored cupcakes.
Chopped Pistachios for Green Accents
Chopped pistachios provide a beautiful, natural green color and a subtle nutty flavor. Sprinkle them around the base of a frosted cupcake or over white frosting to mimic grass or a subtle festive accent. Their vibrant green is a lovely alternative to artificial coloring.
Essential Tools and Techniques for Edible Cupcake Decorating
Having the right tools and understanding basic techniques will make your Christmas cupcake decorating much easier and more enjoyable. You don’t need a professional kitchen, but a few key items will significantly improve your results.
Basic Decorating Tools: What You Need to Start
These are the fundamental tools that will get you started with most edible decorations.
Piping Bags and Tips
Piping bags (disposable or reusable) are essential for applying frosting, royal icing, and melted chocolate. A set of basic piping tips (like star, round, and leaf tips) will allow you to create various designs, from swirls of frosting to intricate royal icing details. A round tip is crucial for piping outlines and filling, while a star tip creates beautiful rosettes and borders.
Small Offset Spatulas
An offset spatula with a small blade is invaluable for spreading frosting smoothly and evenly on cupcakes. Its angled blade keeps your knuckles clear of the frosting, allowing for cleaner application. It’s also useful for lifting and placing delicate edible decorations.
Fondant Rolling Pins and Cutters
For working with fondant, a non-stick rolling pin (often plastic or silicone) is ideal. It helps you roll fondant to an even thickness without sticking. A set of small Christmas-themed cookie cutters (stars, trees, snowflakes, gingerbread men) will be your best friend for quickly creating consistent shapes from fondant, gum paste, or sugar cookies.
Food-Safe Brushes
A set of small, soft food-safe brushes is necessary for applying edible dusts, glitters, and edible paints. They are also useful for brushing off excess cornstarch from fondant or applying tiny dabs of edible glue. Make sure these brushes are dedicated solely to food use.
Advanced Tools for Intricate Designs
Once you’re comfortable with the basics, these tools can help you achieve more complex and refined designs.
Silicone Molds
Silicone molds are fantastic for quickly creating detailed, three-dimensional edible decorations from fondant, modeling chocolate, or gum paste. You can find molds for everything from tiny bows and buttons to intricate snowflakes, holly leaves, or even miniature Santa faces. Simply press your edible medium into the mold, chill if necessary, and pop out the perfect shape.
Edible Markers and Paints
Edible markers (food-grade pens) allow you to draw fine details, outlines, or write messages directly onto dried royal icing, fondant, or sugar cookies. Edible paints (liquid food coloring mixed with a little alcohol or clear extract) can be brushed onto dried decorations to add color, shading, or metallic accents. These are great for adding artistic touches.
Airbrush Kits for Food Coloring
For a professional, even finish, an airbrush kit specifically designed for food coloring allows you to spray a fine mist of color onto your cupcakes or decorations. This is excellent for creating gradients, shading, or quickly coloring large batches of fondant pieces. It provides a smooth, streak-free application that’s hard to achieve with brushes.
Adhesives and Glazes: Making Decorations Stick and Shine
Ensuring your decorations stay put and have a polished finish is crucial.
Edible Glue: Composition and Application
Edible glue is a food-safe adhesive made from ingredients like CMC (carboxymethyl cellulose) powder or gum tragacanth mixed with water. It dries clear and tasteless. Use it sparingly with a fine brush to attach small fondant pieces, sugar cookies, or other lightweight decorations to your cupcakes or to each other. A tiny dot is usually all you need.
Royal Icing as an Adhesive
Stiff consistency royal icing also works as an excellent adhesive. It provides a strong bond once dry and is particularly useful for attaching heavier decorations or for assembling multi-part designs, like gingerbread houses or layered fondant figures.
Simple Syrup Glaze for Shine
For a subtle shine on certain edible decorations (like marzipan or dried fruit), you can brush them with a thin layer of simple syrup (equal parts sugar and water, boiled and cooled). This adds a delicate sheen and can also help to keep them fresh.
Coloring Your Creations: Food Gels, Powders, and Sprays
Achieving vibrant and consistent colors is key to eye-catching decorations.
Gel Food Colors vs. Liquid Food Colors
Always opt for gel food colors over liquid ones when coloring fondant, modeling chocolate, or royal icing. Gel colors are highly concentrated, meaning you need only a small amount to achieve intense colors without significantly altering the consistency of your edible medium. Liquid food colors, being water-based, can thin out your mixtures and make them difficult to work with.
Luster Dusts and Petal Dusts
Luster dusts are fine, shimmering powders that add a metallic or pearlescent finish. Petal dusts are matte powders used for realistic shading on edible flowers or figures. Both are applied with a dry brush directly onto dried fondant or gum paste decorations. They can also be mixed with a clear alcohol (like vodka or lemon extract) to create edible paint for a more intense, opaque color.
Edible Color Sprays
Edible color sprays come in aerosol cans and provide a quick, even coating of color. They’re great for adding a metallic sheen (gold, silver) or a uniform base color to large areas of fondant or frosted cupcakes. Use them in a well-ventilated area and protect your work surface.
Creative Christmas Cupcake Themes and Ideas
Once you’ve mastered the materials and techniques, you can start combining them to create stunning, cohesive Christmas cupcake themes. These themes help tie all your decorations together for a truly impressive display.
Winter Wonderland: Snow, Ice, and Sparkle
This theme focuses on the serene beauty of a snowy landscape. Think white, silver, and icy blue colors.
- Decorations: Use white royal icing to pipe delicate snowflakes or create “snowdrifts” on top of the cupcakes. Sprinkle with edible glitter or white nonpareils to mimic shimmering snow. Add small, clear “stained glass” candy shards to represent ice. Fondant polar bears or penguins can be sculpted for a cute touch.
- Cupcake Base: Vanilla or coconut cupcakes with white buttercream frosting work best to create a snowy canvas.
Santa’s Workshop: Elves, Toys, and Gifts
Bring the magic of the North Pole to your treats with this playful theme.
- Decorations: Create small fondant elves, miniature toy trains, tiny wrapped presents, or Santa’s sleigh. Use vibrant red, green, and gold colors. Sugar cookies cut into toy shapes and decorated with bright icing also fit perfectly. You could even use chocolate-dipped pretzel sticks as miniature tools or building materials.
- Cupcake Base: Chocolate or red velvet cupcakes provide a rich base for these colorful decorations.
Classic Christmas: Holly, Berries, and Traditional Colors
Embrace the timeless appeal of traditional Christmas motifs.
- Decorations: Fondant holly leaves with red fondant berries are a must. Royal icing wreaths, candy canes, or small gingerbread men are also perfect. Use a color palette of deep reds, forest greens, and touches of gold or silver. Candied orange slices or cinnamon sticks can add a rustic, traditional feel.
- Cupcake Base: Spice cupcakes, gingerbread cupcakes, or classic vanilla with green or red frosting would be ideal.
Enchanted Forest: Trees, Animals, and Natural Elements
This theme evokes a magical, woodland Christmas.
- Decorations: Fondant or modeling chocolate trees, small deer, squirrels, or owls. Use natural elements like candied nuts, dried cranberries, and fresh rosemary sprigs. Incorporate earthy tones like browns, deep greens, and muted reds. You could even create edible mushrooms from marzipan.
- Cupcake Base: Carrot cake, apple spice, or pumpkin cupcakes would complement the natural flavors and aesthetic.
North Pole Express: Trains, Reindeer, and Polar Bears
A whimsical theme inspired by holiday journeys and Arctic adventures.
- Decorations: Create edible train cars from modeling chocolate or small gingerbread pieces. Use chocolate-dipped pretzels for reindeer antlers for cupcakes. Fondant polar bears, snowmen, and small icebergs (from white chocolate or royal icing) would fit well. Add tracks made from piped chocolate lines.
- Cupcake Base: Any classic cupcake flavor like vanilla or chocolate, frosted with white or light blue buttercream to represent snow and ice.
Tips for Success: Making Your Edible Decorations Shine
Even with the right materials and tools, a few key tips can make all the difference in achieving professional-looking and delicious results.
Planning and Preparation: The Key to Stress-Free Decorating
- Read Recipes Thoroughly: Before you begin, read through all your recipes and instructions for both cupcakes and decorations.
- Gather All Ingredients and Tools: Nothing halts progress like realizing you’re missing a crucial item mid-process. Lay everything out.
- Make Decorations in Advance: Many edible decorations, especially those made from fondant, gum paste, or royal icing, can be made days or even weeks in advance. This significantly reduces stress on the day of your event. Allow them to dry completely before storing.
- Work in Batches: If making many of the same decoration, work in an assembly line fashion.
- Clean Workspace: A clean, organized workspace is essential for hygiene and efficiency.
Proper Storage for Edible Decorations and Decorated Cupcakes
- Unused Fondant/Gum Paste: Store tightly wrapped in plastic wrap and then in an airtight container at room temperature. Avoid refrigeration, as it can cause condensation.
- Dried Fondant/Royal Icing Decorations: Store in an airtight container at room temperature, away from direct sunlight or humidity. They can last for weeks or even months. Place parchment paper between layers to prevent sticking.
- Decorated Cupcakes: Store decorated cupcakes in an airtight container at room temperature for 1-2 days. If they contain fresh fruit or cream cheese frosting, they should be refrigerated. Bring them to room temperature before serving for the best flavor and texture. Avoid stacking decorated cupcakes directly on top of each other, as this can crush the decorations. Use cupcake carriers with individual compartments if possible.
Troubleshooting Common Decorating Challenges
Even experienced decorators encounter issues. Here’s how to tackle some common problems:
Preventing Fondant from Sticking
If your fondant is sticking to your work surface or rolling pin, try dusting lightly with cornstarch or powdered sugar. A very thin layer of vegetable shortening on your hands can also help when kneading. If the fondant is too soft and sticky, knead in a little more powdered sugar. If it’s too dry and crumbly, knead in a tiny bit of vegetable shortening or a drop of water.
Achieving the Right Royal Icing Consistency
This is often the trickiest part of royal icing.
- Too Stiff: If your icing is too thick for piping or flooding, add very small amounts of water (half a teaspoon at a time) and stir until you reach the desired consistency.
- Too Runny: If your icing is too thin, gradually add more powdered sugar (or meringue powder for extra stability) until it thickens. Always test the consistency before using it on your cupcakes.
Fixing Broken Edible Pieces
Accidents happen!
- Fondant/Gum Paste: For small breaks, use a tiny dab of edible glue or water to reattach pieces. Hold them gently in place until they set. For larger breaks, you might need to re-sculpt or start over.
- Chocolate: If a chocolate decoration breaks, you can often “glue” it back together with a tiny bit of melted chocolate. Let it set completely before handling.
Presentation Matters: Arranging Your Masterpieces
The way you present your decorated cupcakes can enhance their appeal.
- Cupcake Liners: Choose festive cupcake liners that complement your decorations.
- Cupcake Stands: Display your cupcakes on a tiered stand for an impressive centerpiece.
- Garnishes: Add a scattering of loose sprinkles, edible glitter, or fresh cranberries around the base of the cupcakes on the serving platter for extra visual appeal.
- Lighting: Good lighting can make your edible decorations sparkle and shine.
Conclusion: Unleash Your Inner Christmas Decorator
You’ve now explored a vast array of possibilities for creating stunning edible Christmas decorations for cupcakes. From the versatile pliability of fondant and modeling chocolate to the delicate precision of royal icing, and the playful charm of candies and natural elements, there’s a world of creativity waiting for you.
Recap of Edible Decoration Possibilities
We’ve covered:
- Sugar Pastes: Fondant, royal icing, modeling chocolate, gum paste, and marzipan for sculpting and intricate details.
- Candies: Crushed candy canes, “stained glass” candy, gummies, melted chocolate, chocolate-covered pretzels and strawberries, marshmallows, sprinkles, and edible glitter for quick, colorful accents.
- Baked Goods: Mini sugar cookies, gingerbread figures, and brownie bites for integrated, delicious toppers.
- Natural Elements: Fresh and dried fruits, and nuts for elegant, wholesome garnishes.
- Essential Tools and Techniques: From piping bags and spatulas to edible glue and luster dusts, you now know what you need and how to use it.
Encouragement for Creative Exploration
Don’t be afraid to experiment! The beauty of edible decorating is that every creation is unique. Mix and match materials, try new color combinations, and put your own spin on classic designs. Even if your first attempts aren’t perfect, they’ll still be delicious and made with love. Practice truly makes perfect, and each cupcake you decorate will build your confidence and skill.
Final Thoughts on Spreading Holiday Cheer
Ultimately, these edible Christmas cupcake decorations are more than just food; they’re a way to share joy and create lasting memories during the festive season. Whether you’re baking for family, friends, or a holiday party, your beautifully adorned cupcakes will undoubtedly bring smiles and delight. So, gather your ingredients, unleash your creativity, and get ready to elevate your treats into true holiday masterpieces. Happy decorating, and may your Christmas be filled with sweetness and cheer!