This post may contain affiliate links. If you make a purchase through these links, we may earn a commission at no additional cost to you.
The holiday season brings a special kind of magic, and nothing captures that spirit quite like handmade Christmas decorations. Imagine your home twinkling with unique ornaments, garlands, and centerpieces, each one crafted with love and care. This isn’t just about saving money; it’s about infusing your celebrations with a personal touch that store-bought items simply can’t replicate.
Making your own festive decor offers a wonderful opportunity for family bonding. Gather your loved ones, put on some holiday music, and create memories that will last long after the last ornament is packed away. It’s also a fantastic way to embrace sustainability, repurposing materials and reducing waste. You’ll discover the joy of transforming everyday items into extraordinary holiday treasures.
This comprehensive guide will take you on a journey through the world of festive crafting. We’ll cover everything from essential tools and materials to step-by-step instructions for dazzling ornaments, charming garlands, stunning wreaths, and even outdoor displays. Whether you’re a seasoned crafter or just starting, you’ll find plenty of inspiration and practical advice to make this Christmas your most crafty one yet. Let’s dive in and make this holiday season truly unforgettable with the warmth of handmade cheer.
Section 1: Getting Started – Your Crafty Christmas Toolkit
Embarking on your DIY Christmas decoration journey requires a few fundamental supplies. Having the right tools and materials on hand makes the creative process smoother and more enjoyable. Think of this as setting up your personal holiday workshop.
Essential Supplies for Every Crafter
Before you begin, gather these basic items. They form the backbone of almost any craft project.
- Basic Tools: You’ll definitely need a good pair of scissors for cutting paper and fabric. A glue gun (with plenty of glue sticks) is indispensable for quick, strong bonds, especially when working with heavier materials like pinecones or fabric. For precise cuts on paper or cardstock, a craft knife is incredibly useful, but always use it with a ruler and a self-healing cutting mat to protect your surfaces. A simple pencil is great for marking and sketching designs.
- Adhesives: Beyond the hot glue gun, stock up on various glues. Craft glue (like PVA glue) is versatile for paper, fabric, and light embellishments. Spray adhesive works well for large areas or delicate materials where you want an even coat without lumps. Double-sided tape is perfect for neat, invisible joins in paper crafts.
- Cutting Tools: Besides general scissors, consider specialized ones. Small, sharp embroidery scissors are great for intricate details on felt. Craft punches come in various shapes (stars, snowflakes) and can quickly create decorative elements from paper. A paper cutter or guillotine ensures perfectly straight lines for garlands or banners.
- Measuring and Marking: A sturdy ruler is crucial for accuracy. Pencils are your go-to for light markings. For fabric projects, chalk or fabric markers can help you transfer patterns without leaving permanent marks.
- Protection: Always work on a craft mat or old newspaper to protect your table from glue, paint, and cuts. If you’re using spray paints or strong adhesives, consider wearing gloves to protect your hands.
Common Materials to Stock Up On
Once your tools are ready, it’s time to think about the materials that will bring your ideas to life. Many of these can be found around your home or purchased affordably.
- Paper and Cardstock: These are incredibly versatile. Keep a variety of weights, from thin construction paper for paper chains to thicker cardstock for sturdy ornaments and banners. Different colors and patterns will add visual interest to your creations.
- Fabric and Felt: Felt sheets are fantastic for soft, no-fray ornaments and garlands. They come in a wide array of colors and are easy to cut and sew. Fabric scraps from old clothes or quilting projects can be repurposed for charming, rustic decorations.
- Yarn, Twine, Ribbon, String: These are essential for hanging ornaments, creating garlands, and adding decorative bows. Stock up on different textures and colors, from rustic jute twine to shimmering satin ribbon.
- Natural Elements: Embrace the beauty of nature. Pinecones (collected from outdoors, then baked briefly to kill bugs), small branches, dried fruit slices (like oranges and apples), and cinnamon sticks add a wonderful organic touch and often a delightful scent.
- Embellishments: These are the finishing touches. Glitter (biodegradable options are great!), beads, sequins, buttons, and tiny bells can elevate a simple craft into something truly special.
- Paints and Brushes: Acrylic paints are versatile for most surfaces. Spray paint is excellent for quickly covering larger items like pinecones or wreath forms. Markers (permanent or washable, depending on the surface) are great for details and lettering.
- Recycled Materials: Don’t underestimate the potential of items you might otherwise discard. Cardboard tubes (from toilet paper or paper towels), plastic bottles, old newspapers and magazines, and even jar lids can be transformed into creative decorations. This is where your eco-friendly crafting truly shines.
Safety First: Crafting Responsibly
While crafting is fun, safety should always be a priority, especially when working with children.
- Using Hot Glue Guns Safely: Hot glue guns can cause burns. Always use them on a heat-resistant surface. Keep fingers away from the nozzle and the freshly applied glue. If working with kids, use low-temperature glue guns or supervise closely.
- Handling Sharp Tools: Craft knives and sharp scissors require careful handling. Always cut away from your body. When using a craft knife, ensure your cutting mat is stable and you have a firm grip on the ruler. Store sharp tools safely out of reach of small children.
- Ventilation for Sprays and Paints: If you’re using spray paints, spray adhesives, or certain strong-smelling paints, work in a well-ventilated area, preferably outdoors or in a garage with open windows. This prevents the inhalation of fumes.
- Child Supervision for Kid-Friendly Crafts: Even with projects designed for children, adult supervision is crucial. Ensure they understand how to use tools safely and don’t ingest any materials. Focus on age-appropriate crafts and adapt projects to their skill level.
By preparing your toolkit and keeping safety in mind, you’ll be ready to unleash your creativity and make some truly beautiful Christmas decorations.
Section 2: Dazzling Ornaments for Your Christmas Tree
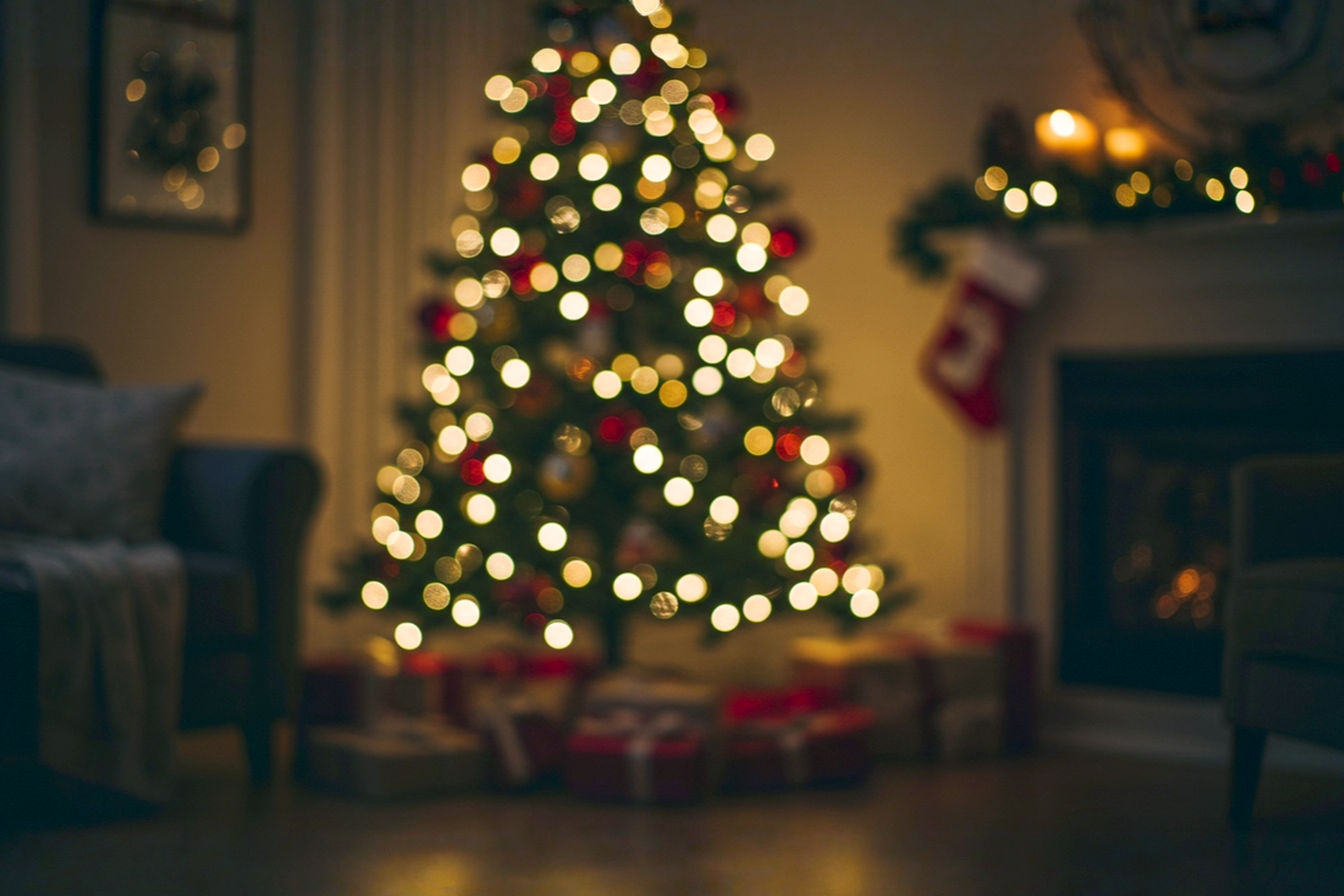
The Christmas tree is often the focal point of holiday decor, and handmade ornaments add a unique charm that store-bought ones can’t match. Each one tells a story, making your tree a collection of cherished memories. Let’s explore some fantastic ideas for creating your own tree treasures.
Classic Paper Ornaments
Paper is an incredibly versatile and affordable material for crafting beautiful, lightweight ornaments.
Elegant Paper Snowflakes
Paper snowflakes are a timeless classic, easy enough for beginners but with endless possibilities for intricate designs.
- Materials: You’ll only need plain white or colored paper (standard printer paper or construction paper works well) and a sharp pair of scissors.
- Technique: The magic lies in the folding. Start with a square piece of paper. Fold it diagonally to form a triangle. Fold this triangle in half again. Then, fold it into thirds, bringing the outer points towards the center to create a narrow, pointed cone. This six-point fold is traditional for snowflakes. Once folded, cut various shapes and patterns into the folded edges. Remember, the more cuts you make, the more intricate your snowflake will be. When you unfold it, a unique, symmetrical design appears.
- Variations: For a more striking look, try making 3D snowflakes by cutting and gluing multiple flat snowflakes together. You can also add glitter accents by lightly applying craft glue to the tips of the snowflake and sprinkling fine glitter over it.
Origami Stars and Cranes
Origami, the Japanese art of paper folding, can produce stunningly precise and elegant ornaments.
- Materials: Origami paper is ideal because it’s thin, crisp, and often comes in beautiful colors and patterns. Its specific texture allows for clean folds.
- Technique: For origami stars, look for tutorials on “lucky stars” or “modular origami stars.” Many simple star patterns involve repeating a basic fold several times and then assembling the units. For origami cranes, the classic “paper crane” is a more complex but rewarding project. It involves a series of precise folds, transforming a flat sheet into a three-dimensional bird shape.
- Tips for Crisp Folds: Precision is key in origami. Use your fingernail or a bone folder (a specialized tool for creasing paper) to make every fold sharp and defined. Work on a flat, clean surface.
Paper Baubles and Lanterns
These crafts add volume and visual interest to your tree.
- Materials: You’ll need cardstock for durability, glue (craft glue or hot glue), and string or ribbon for hanging.
- Technique: For paper baubles, cut multiple strips of cardstock of the same length and width. Stack them, then pierce a hole through one end of the stack. Secure them with a brad or a small knot of string. Fan out the strips and glue the opposite ends together, forming a sphere. For paper lanterns, cut a rectangle of cardstock, fold it in half lengthwise, and make even cuts from the folded edge towards the open edge, stopping about an inch from the edge. Unfold, then bring the short ends together and glue them to form a cylinder. Add a handle for hanging.
Charming Fabric and Felt Creations
Fabric and felt bring warmth, texture, and a cozy feel to your Christmas tree. They’re also forgiving materials for crafters of all skill levels.
Felt Animal Ornaments
These soft, whimsical creatures are delightful additions and make great gifts.
- Materials: You’ll need various colors of felt sheets, embroidery floss for decorative stitching, a sharp needle, a small amount of stuffing (polyester fiberfill), and templates (which you can draw yourself or find online).
- Technique: Start by cutting out two identical shapes for your animal (e.g., a reindeer, a penguin, a gingerbread man) from felt using your template. Cut out smaller felt pieces for details like eyes, noses, or scarves. Stitch these smaller details onto one of the main body pieces using simple running stitches or French knots. Place the two main body pieces together and begin stitching around the edge using a blanket stitch or a simple whipstitch. Before you close the shape entirely, insert a small amount of stuffing to give it a plump, three-dimensional look. Finish stitching, and add a loop of embroidery floss for hanging.
- Simple Designs for Beginners: If you’re new to sewing, start with very basic shapes like stars, hearts, or simple circles. You can decorate them with buttons, sequins, or contrasting felt shapes glued on.
Quilted Star Ornaments
These offer a touch of traditional craftsmanship, even with simplified techniques.
- Materials: Gather small fabric scraps (cotton quilting fabric works well), a thin piece of batting (polyester or cotton), a needle, and thread.
- Technique: This can be simplified for ornaments. Cut two identical star shapes from your fabric scraps and one slightly smaller star shape from the batting. Layer them: fabric (right side down), batting, fabric (right side up). Stitch around the edges, leaving a small opening. Turn it right side out, push out the points, and hand-stitch the opening closed. You can then add simple hand-quilting stitches in a pattern across the star for texture. This technique, while simpler than full quilting, gives the impression of intricate work.
Natural and Rustic Ornaments
Bring the outdoors in with ornaments made from natural elements. These add an earthy, organic feel and often a lovely scent.
Pinecone Critters and Accents
Pinecones are abundant and offer a fantastic base for rustic ornaments.
- Materials: Collect pinecones (ensure they are clean and dry; you can bake them at a low temperature for a short time to open them up and kill any bugs), googly eyes, small pieces of felt (for ears, wings), and hot glue.
- Technique: To make a pinecone owl, for example, hot glue two googly eyes onto the top of the pinecone. Cut small felt triangles for ears and glue them above the eyes. You can also cut a small felt beak. For a more general accent, simply paint the tips of the pinecone scales with white paint to simulate snow, or spray them with glitter spray. Add a loop of twine at the top for hanging.
Dried Orange Slices and Cinnamon Sticks
These not only look beautiful but also release a wonderful, natural aroma.
- Materials: Fresh oranges (or other citrus fruits like lemons, limes, grapefruit), whole cinnamon sticks, and string or thin ribbon.
- Technique: To dry orange slices, preheat your oven to its lowest setting (around 150-200°F / 65-95°C). Slice oranges about 1/4 inch thick. Pat them dry with paper towels. Arrange them on a wire rack over a baking sheet. Bake for 3-6 hours, flipping every hour, until they are completely dry and translucent. Alternatively, a food dehydrator works perfectly. Once dry, they’ll be hard and slightly brittle. Use a needle to thread string through the top of a dried orange slice, or tie it directly to a cinnamon stick. You can combine them into small clusters.
- Aromatic Benefits: The subtle, sweet citrus and spicy cinnamon scent will naturally perfume your home, creating a truly festive atmosphere.
Personalized and Upcycled Ornaments
Give your decorations a unique touch by personalizing them or transforming items that would otherwise be thrown away.
Photo Ornaments
Capture cherished memories right on your Christmas tree.
- Materials: You’ll need clear, fillable plastic or glass baubles (available at craft stores), small printed photos (sized to fit inside the bauble), and ribbon for hanging.
- Technique: Carefully roll or fold your photo and insert it into the opening of the clear bauble. You can add a sprinkle of faux snow or glitter inside for extra sparkle. Once the photo is in place, replace the cap and tie a decorative ribbon to the top for hanging.
Old CD/DVD Mosaic Ornaments
Give old, scratched CDs a new life as shimmering, iridescent ornaments.
- Materials: Old CDs or DVDs, clear plastic or glass baubles (or any other ornament shape you want to cover), and strong craft glue (like E6000 or hot glue).
- Technique: This is a fun way to upcycle. Carefully cut the CDs into small, irregular mosaic pieces using strong scissors (be cautious, as they can be brittle). The shiny, iridescent side is what you want. Apply small dabs of glue to the clear bauble and press the CD pieces onto it, creating a mosaic pattern. The pieces will reflect light beautifully.
Salt Dough Ornaments
A classic, child-friendly craft that results in durable, paintable ornaments.
- Materials: For the dough, you’ll need 2 cups flour, 1 cup salt, and 1 cup water. You’ll also need cookie cutters, paint (acrylics work well), and a paintbrush.
- Technique: In a bowl, mix the flour and salt. Gradually add water, mixing until a stiff dough forms. Knead it for a few minutes until smooth. Roll out the dough to about 1/4 inch thickness. Use cookie cutters to cut out festive shapes (stars, trees, gingerbread men). Use a straw to poke a hole at the top of each ornament for hanging. Bake the ornaments at 250°F (120°C) for 2-3 hours, or until completely hard. Let them cool, then paint and decorate them as desired. Seal with a clear varnish if you want them to last longer.
These ornament ideas offer a fantastic starting point for personalizing your Christmas tree. Each handmade piece will add character and a story to your holiday display.
Section 3: Festive Garlands and Banners to Adorn Your Home
Garlands and banners are fantastic for adding continuous stretches of festive cheer throughout your home. They can drape across mantels, frame doorways, wind up staircases, or hang along walls. They’re also relatively easy to make in long lengths, making a big impact with minimal effort.
Paper Chains and Banners
Paper is a simple, inexpensive material that can create surprisingly dramatic and colorful garlands.
Classic Paper Chains
This is a quintessential Christmas craft, perfect for all ages.
- Materials: You’ll need plenty of construction paper (or patterned paper) and glue (craft glue or a glue stick) or a stapler.
- Technique: Cut your paper into strips, usually about 1 inch wide and 8-10 inches long. Form the first strip into a loop and secure the ends with glue or a staple. Take a second strip, thread it through the first loop, and secure its ends to form another loop. Continue this process, linking each new loop through the previous one, until your chain reaches the desired length.
- Color Schemes: Experiment with different color combinations. Traditional red and green, elegant gold and silver, or a playful mix of bright colors can create different moods. You can also alternate solid colors with patterned papers.
Letter Banners
Spell out festive messages with custom letter banners.
- Materials: Sturdy cardstock is best for the letters, along with stencils or a printer to create the letter outlines. You’ll also need string or ribbon for hanging, and a hole punch.
- Technique: Decide on your festive message (e.g., “MERRY CHRISTMAS,” “JOY,” “NOEL”). Print or stencil each letter onto cardstock and carefully cut them out. You can decorate the letters with glitter, paint, or patterned paper. Punch two holes at the top of each letter (one on each side). Thread your string or ribbon through the holes, ensuring the letters are spaced evenly and facing the correct way.
- Custom Messages: This craft allows for endless personalization. Create banners for specific family members, special events, or inside jokes.
Fabric and Felt Garlands
These garlands offer a softer texture and can be reused year after year.
Felt Ball Garlands
Felt balls create a whimsical, colorful garland that’s easy to assemble.
- Materials: You can buy pre-made felt balls in various sizes and colors from craft stores, or you can make your own using wool roving and a felting needle or wet felting technique. You’ll also need strong thread (like embroidery floss or upholstery thread) and a long, sharp needle.
- Technique: Simply thread the needle with your chosen thread. Carefully push the needle through the center of each felt ball, stringing them onto the thread. You can space them out evenly or clump them together for a different look. A small knot on either side of each ball can help keep them in place, or the friction of the felt itself might be enough.
- Color Gradients: Arrange felt balls in a gradient of colors, from light to dark, or mix and match vibrant hues for a playful effect.
Fabric Scraps Garland
A charming, rustic garland that’s perfect for using up leftover fabric.
- Materials: Gather a collection of fabric scraps (cotton, flannel, or even old t-shirts work well) and a length of twine or sturdy ribbon.
- Technique: Tear or cut your fabric scraps into strips of varying lengths and widths (e.g., 1 inch wide, 6-12 inches long). Simply tie each fabric strip onto the twine using a simple knot. Push the knots close together to create a full, fluffy garland. You can mix different patterns and textures for an eclectic look.
Natural and Edible Garlands
These garlands not only decorate your home but can also offer a delightful scent or even a treat!
Popcorn and Cranberry Garland
A classic, old-fashioned garland that’s surprisingly beautiful and often bird-friendly for outdoor use.
- Materials: You’ll need freshly popped, plain popcorn (let it cool and air out for a day so it’s less brittle), fresh cranberries, a long needle (a darning needle or a specialized garland needle works best), and strong thread or fishing line.
- Technique: Thread your needle. Carefully push the needle through the center of each popcorn kernel and each cranberry, alternating them as you string. Be gentle with the popcorn to prevent it from breaking.
- Tips for Durability (and Bird-Friendliness if Outdoor): If using indoors, this garland will last for a few weeks. If placing outdoors, the birds will love it! The cranberries will dry and shrivel, and the popcorn might become a snack. Ensure the popcorn is unsalted and unbuttered for birds.
Dried Fruit and Spice Garland
An aromatic and visually appealing garland that adds warmth to any space.
- Materials: Use dried orange slices (as detailed in Section 2), cinnamon sticks, star anise, and sturdy string or thin ribbon.
- Technique: Arrange your dried fruit and spices in a pattern. Use a needle to string the orange slices. For cinnamon sticks and star anise, you can tie them directly onto the string or use a small dab of hot glue to secure them to the string. Create small clusters of different elements for visual interest.
- Fragrance Benefits: As these garlands hang, they’ll release a subtle, natural Christmas scent, making your home feel even more festive.
Garlands and banners are a fantastic way to spread holiday cheer throughout your entire home, creating a cohesive and festive atmosphere.
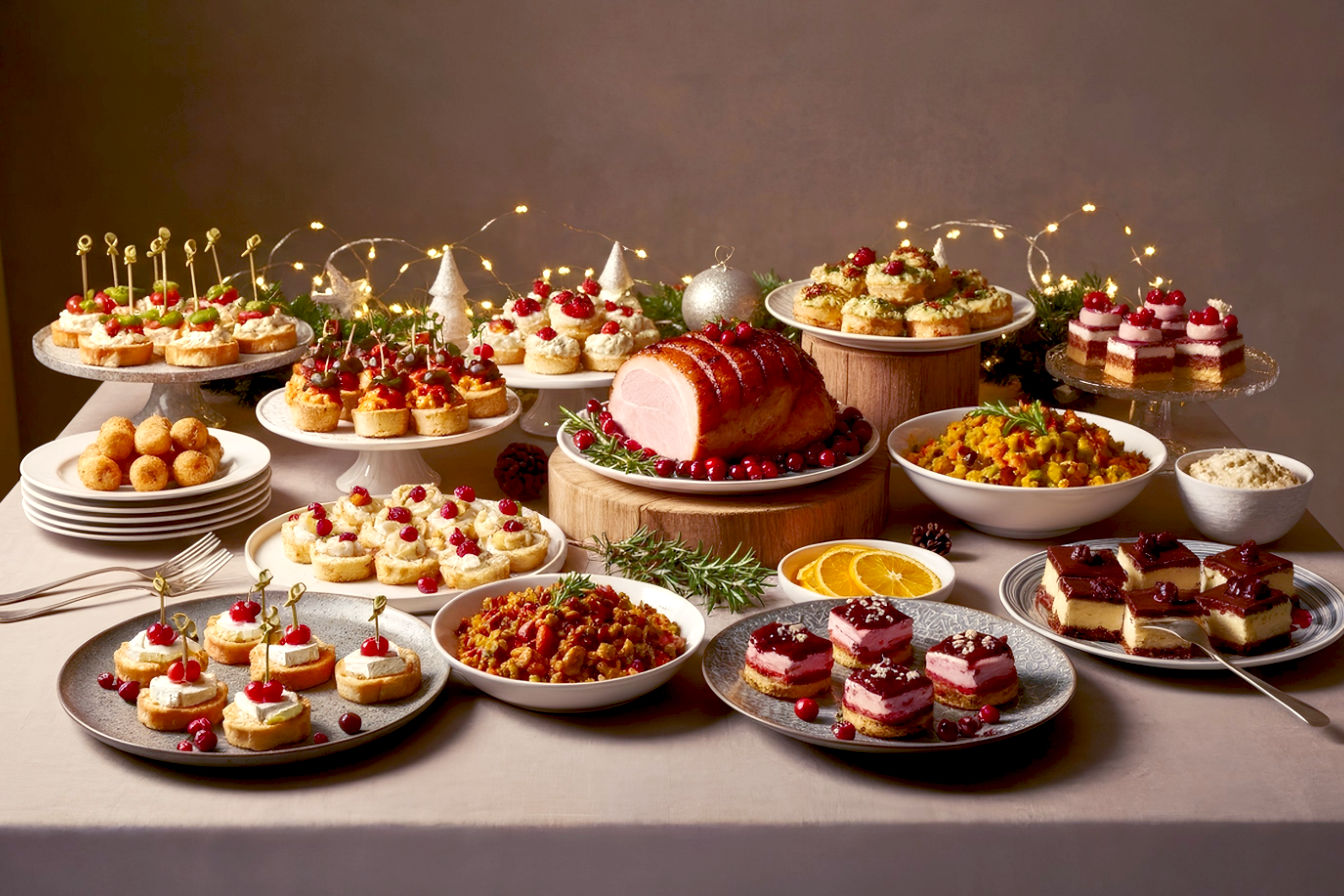
Section 4: Stunning Wreaths and Centerpieces
Wreaths and centerpieces are more than just decorations; they’re focal points that welcome guests and gather loved ones around the table. Crafting your own allows for complete customization, reflecting your personal style and the unique spirit of your holiday season.
DIY Christmas Wreaths
A homemade wreath on your front door or above your mantel instantly signals holiday cheer.
Classic Evergreen Wreath
Embrace tradition with a lush, fragrant evergreen wreath.
- Materials: You’ll need a wire wreath frame (available at craft stores), fresh evergreen branches (pine, fir, cedar, or a mix), floral wire (thin, flexible wire for securing branches), and various decorations like berries, pinecones, or bows.
- Technique: Start by gathering small bundles of evergreen branches. Lay a bundle onto the wire frame and wrap the floral wire tightly around the stems to secure it to the frame. Overlap the next bundle slightly over the stems of the previous one, continuing around the entire frame until it’s fully covered and lush. Once the base is complete, begin adding your embellishments. Use floral wire or hot glue to attach pinecones, faux berries, or a festive bow.
- Sourcing Materials: You can often find evergreen trimmings at Christmas tree lots, local nurseries, or even from your own backyard if you have evergreen trees. Always ask permission if foraging on private property.
Fabric Scrap Wreath
A soft, cozy wreath made from repurposed textiles.
- Materials: A foam wreath form (or even a cardboard one), a generous amount of fabric scraps (cut or torn into strips), and either pins (straight pins or floral pins) or hot glue.
- Technique: There are a few methods. One popular technique is to cut fabric scraps into small squares (e.g., 2×2 inches). Fold each square in half and then in half again to form a small triangle. Use a pin to secure the pointed end of the folded fabric into the foam wreath form. Overlap the fabric pieces closely to create a full, ruffled texture. Continue until the entire form is covered. Alternatively, you can tie fabric strips around the form, similar to the fabric scrap garland.
Pinecone Wreath
A rustic and natural wreath that celebrates the beauty of winter.
- Materials: A sturdy wreath form (grapevine, foam, or wire), a large collection of various-sized pinecones, and a strong hot glue gun with plenty of glue sticks. You might also want accents like faux berries, ribbon, or small ornaments.
- Technique: Begin by arranging your pinecones on the wreath form to get a sense of the layout before gluing. Start gluing the largest pinecones first, evenly distributing them around the form. Then fill in the gaps with smaller pinecones, ensuring they are securely attached. Once all the pinecones are glued, you can add your decorative accents. A large festive bow at the top or bottom can complete the look.
Elegant Table Centerpieces
A well-designed centerpiece transforms your dining table into a festive gathering point.
Natural Elements Centerpiece
Simple, elegant, and brings the beauty of nature indoors.
- Materials: A decorative tray or platter as a base, various sizes of candles (pillar candles or votives), collected pinecones, small evergreen branches, fresh cranberries, and possibly some star anise or cinnamon sticks.
- Technique: Arrange the candles on the tray first, typically in the center or varying heights for visual interest. Then, artfully scatter the pinecones, evergreen sprigs, and cranberries around the base of the candles. You can tuck in cinnamon sticks or star anise for added fragrance and detail.
- Safety with Candles: Always place candles on a stable, heat-resistant surface. Keep them away from flammable materials like curtains or dry branches. Never leave burning candles unattended. Consider battery-operated LED candles for a safer alternative, especially if you have children or pets.
Mason Jar Lanterns
These create a warm, inviting glow and are incredibly versatile.
- Materials: Clean mason jars of various sizes, fairy lights (battery-operated LED strings are safest), or small votive candles. Optional additions include faux snow, glitter, or small miniature ornaments.
- Technique: Fill the bottom of the mason jar with a layer of faux snow or glitter. Gently place the fairy lights inside, allowing them to coil and fill the jar, or carefully place a votive candle. You can tie a festive ribbon around the rim of the jar for an extra decorative touch. Arrange several jars together for a magical display.
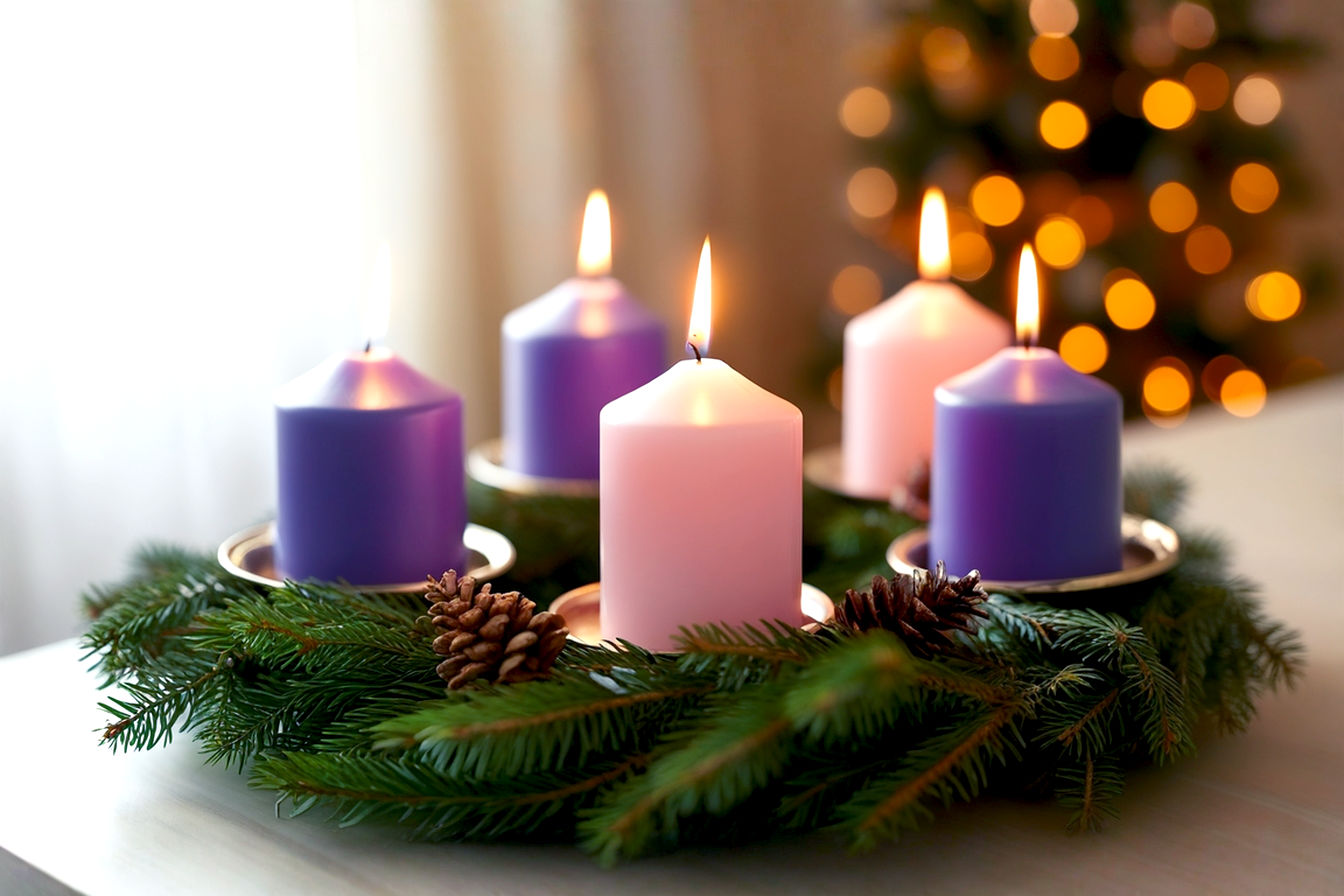
DIY Advent Wreath/Calendar
A meaningful centerpiece that counts down the days to Christmas.
- Materials: A wreath form or a sturdy base (like a wooden tray), four candles (three purple/blue, one pink for a traditional Advent wreath, or any color for a general countdown), numbers (small tags, painted blocks), and small treats or ornaments if making an Advent calendar.
- Technique: For an Advent wreath, secure the four candles evenly around the wreath form. Decorate the wreath with evergreen sprigs, pinecones, or berries. Add small numbers 1-4 next to each candle. For an Advent calendar centerpiece, arrange 24 small boxes, bags, or envelopes on a tray or tiered stand. Number each one and fill with a small treat, activity idea, or miniature ornament. This creates an interactive centerpiece that builds anticipation throughout December.
These wreath and centerpiece ideas will help you create stunning focal points that enhance the festive atmosphere of your home, welcoming guests and celebrating the season in style.
Section 5: Outdoor and Window Decorations
Extending your festive crafting beyond the interior of your home creates a truly magical experience for both your family and your neighborhood. Outdoor and window decorations offer a chance to spread holiday cheer to everyone who passes by.
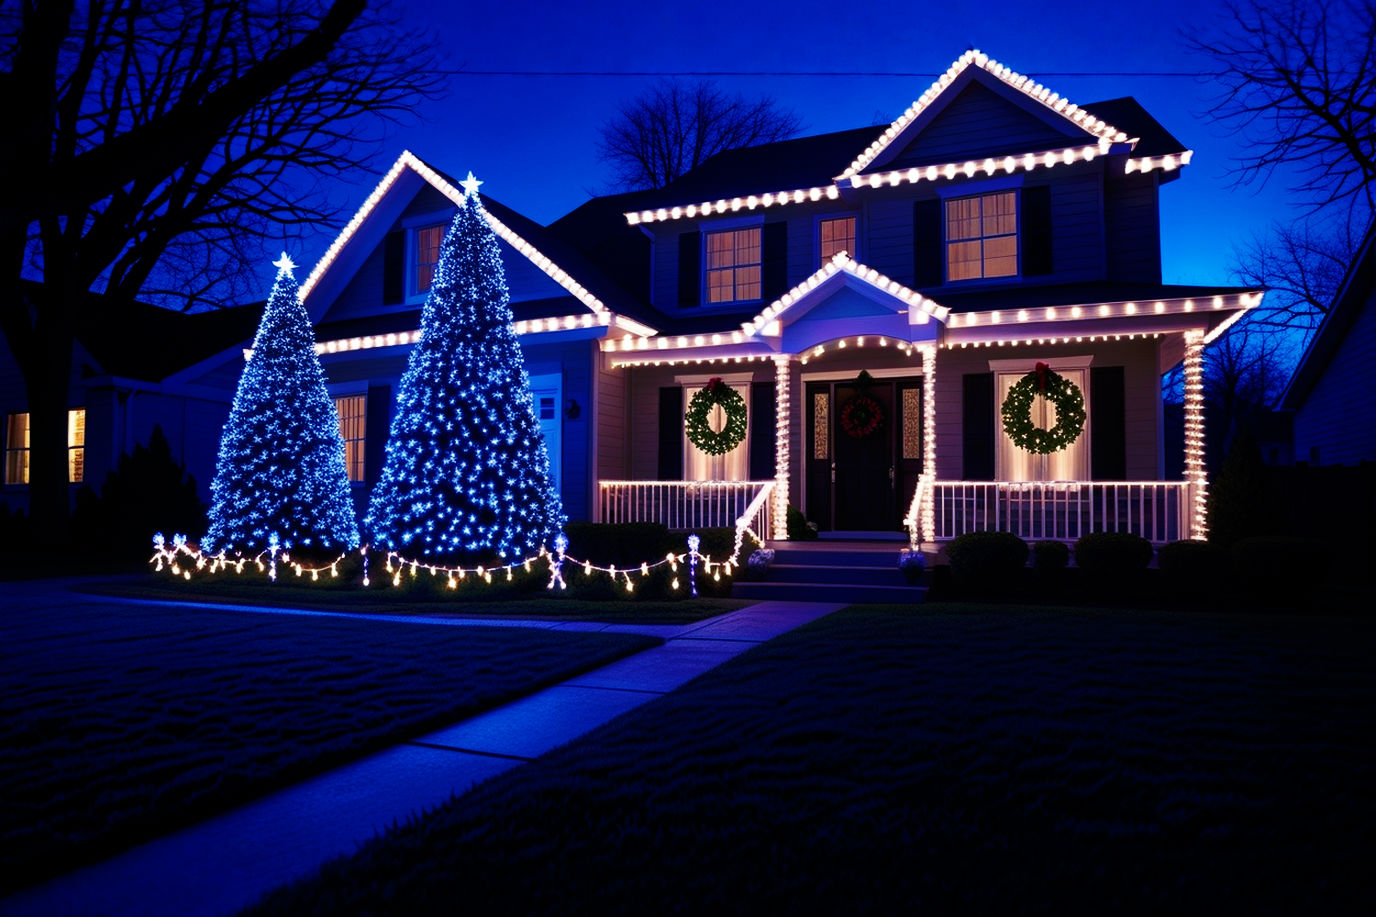
Illuminated Outdoor Displays
Lights are synonymous with Christmas, and DIY lighted decorations can add a unique sparkle to your exterior.
DIY Lighted Garland
Transform your porch railing or fence into a glowing festive display.
- Materials: A length of outdoor-rated Christmas lights (LEDs are energy-efficient and safer), a plain evergreen garland (faux or fresh), and zip ties or floral wire.
- Technique: Lay your evergreen garland flat. Starting at one end, weave the string of lights through the garland, wrapping them around the branches. Ensure the lights are evenly distributed. Use small zip ties or floral wire every foot or so to secure the light string to the garland, preventing it from slipping. Once wrapped, hang the garland on your porch railing, fence, or around a doorway.
- Safety for Outdoor Electricals: Always use lights specifically rated for outdoor use. Check for frayed wires or damaged bulbs before plugging them in. Use outdoor-rated extension cords and ensure all connections are protected from moisture. Plug into a GFCI (Ground Fault Circuit Interrupter) outlet for added safety. Never overload circuits.
Giant Outdoor Ornaments
Create oversized, eye-catching ornaments for your yard or porch.
- Materials: Large inflatable balls (like beach balls or exercise balls), outdoor-rated spray paint or acrylic paint, and sturdy rope or thick twine for hanging.
- Technique: Inflate the balls to your desired size. If using spray paint, work in a well-ventilated area outdoors. Apply a base coat of a festive color (red, green, gold). Once dry, you can add designs like stripes, polka dots, or even glitter. For a “cap” on top of the ornament, you can paint a small plastic bowl or a cut-off top of a plastic bottle and glue it to the top of the inflatable ball. Secure a loop of strong rope to the top (you might need to create a small attachment point with strong tape or by threading it through a small hole in the “cap”). Hang them from tree branches or porch beams.
Window Wonderland Crafts
Your windows are a perfect canvas for festive displays, visible from both inside and out.
Paper Snowflake Window Displays
A classic and elegant way to decorate windows.
- Materials: Plain white or iridescent paper, sharp scissors, and clear tape or removable adhesive dots.
- Technique: Cut a variety of paper snowflakes in different sizes and intricate designs (refer back to Section 2 for techniques). Once you have a collection, arrange them on your windows. You can create a swirling pattern, a border, or a scene. Use small pieces of clear tape rolled into loops on the back of the snowflakes to adhere them to the glass. They create a beautiful, frosted look, especially when backlit by outdoor lights.
DIY Window Clings
These reusable decorations are fun to make and easy to apply and remove.
- Materials: Puffy paint (the kind that dries with a raised texture, often used for fabric painting), clear plastic sheets (like clear report covers or acetate sheets), and templates of Christmas designs (stars, trees, Santa, reindeer).
- Technique: Place your template under the clear plastic sheet. Using the puffy paint, carefully trace the outlines of your chosen designs. Fill in the designs with different colors of puffy paint. Allow the paint to dry completely, which can take 24-48 hours depending on thickness. Once dry, the paint will peel off the plastic sheet like a sticker. You can then press these “clings” onto your window glass. They stick using static electricity and can be peeled off and reused next year.
Natural Branch Decor
Bring a piece of the winter forest indoors, right into your window frame.
- Materials: A sturdy, attractive branch (collected from outdoors, cleaned and dried), small ornaments (lightweight ones work best), fairy lights (battery-operated), and clear fishing line or thin string.
- Technique: Suspend the branch horizontally across your window frame using strong fishing line or hooks. Ensure it’s secure. Then, drape fairy lights around the branch. Use fishing line to hang small, lightweight ornaments from the branch at varying heights. This creates a beautiful, minimalist, and natural display that looks stunning from both inside and outside.
These outdoor and window decoration ideas will help you extend the festive spirit beyond your living room, making your entire home a beacon of holiday cheer.
Section 6: Crafting with Kids – Fun for the Whole Family
Involving children in Christmas crafting isn’t just about making decorations; it’s about creating cherished memories, fostering creativity, and building excitement for the holidays. These projects are designed to be simple, safe, and highly engaging for little hands.
Simple and Safe Projects
These crafts use basic materials and techniques, making them perfect for younger children.
Handprint/Footprint Ornaments
A timeless keepsake that captures a moment in time.
- Materials: Salt dough (recipe in Section 2) or air-dry clay, paint (non-toxic acrylics or tempera), and a paintbrush.
- Technique: Prepare the salt dough. Roll it out to about 1/4 to 1/2 inch thickness. Gently press your child’s hand or foot into the dough to make an impression. Use a straw to poke a hole at the top for hanging. Bake the salt dough ornaments (as per Section 2) or let air-dry clay harden according to package instructions. Once dry, let your child paint and decorate their print. They can add glitter, write their name and the year, or turn the print into a character (e.g., a handprint reindeer).
Popsicle Stick Crafts
Popsicle sticks are incredibly versatile and easy for kids to manipulate.
- Materials: Plenty of popsicle sticks, craft glue (PVA glue is good for kids), paint, glitter, buttons, or other small embellishments.
- Technique: Kids can glue popsicle sticks together to form various shapes. For a simple star, glue five sticks together to form a pentagon, then add five more sticks extending from each point to create the star shape. For a Christmas tree, glue sticks horizontally onto a vertical stick, then cut them into a triangle shape. Once the glue is dry, they can paint their creations green, red, or any festive color, and then decorate with glitter, buttons, or small pom-poms.
Cotton Ball Snowmen
A soft, fluffy, and adorable craft for younger children.
- Materials: Cotton balls, craft glue, construction paper (orange for nose, black for eyes/mouth), and small pieces of pipe cleaners or felt for arms and scarves.
- Technique: Have your child glue cotton balls onto a piece of blue or white paper to form the body of a snowman (one large for the bottom, one medium for the middle, one small for the head). Cut out small orange triangles for noses, black circles for eyes and mouths, and glue them onto the cotton ball head. Use pipe cleaners or felt strips for arms and scarves. They can also draw a hat on top.
Tips for Successful Family Crafting
To ensure a positive and fun experience for everyone, keep these tips in mind.
- Preparation is Key: Before you start, gather all your materials and tools. Lay out newspaper or a craft mat to protect your surfaces. Pre-cut shapes for very young children if the cutting is too complex. Having everything ready minimizes frustration and keeps the momentum going.
- Embrace Imperfections: The beauty of handmade crafts, especially those made by children, lies in their uniqueness and charming imperfections. Don’t strive for perfection; instead, celebrate the effort and creativity. A slightly lopsided star or a snowman with mismatched eyes tells a wonderful story.
- Focus on the Process, Not Just the Product: The joy of crafting with kids comes from the shared experience. Talk, laugh, sing carols, and enjoy the time together. The finished decoration is a bonus, but the memories made during the crafting process are the real treasure.
- Safety First: Always supervise children, especially when using scissors, glue guns, or small embellishments that could be choking hazards for very young ones. Ensure good ventilation if using paints or sprays.
Crafting with kids is a fantastic way to build holiday traditions and create lasting memories. These simple projects provide a fun, hands-on way to get everyone involved in the festive preparations.
Section 7: Sustainable and Eco-Friendly Christmas Decor
In an age where environmental consciousness is increasingly important, embracing sustainable and eco-friendly Christmas decor is a wonderful way to celebrate the holidays. This approach focuses on reducing waste, repurposing materials, and utilizing natural, biodegradable elements. It’s about crafting with a conscience, making your festive season beautiful and responsible.
Upcycling and Repurposing Ideas
Give new life to items that would otherwise end up in a landfill. Upcycling transforms discarded materials into something new and valuable.
Old Sweater Stockings/Ornaments
Soft, cozy, and full of character, old sweaters can be reborn as charming decorations.
- Materials: An old sweater (wool, fleece, or even cotton), sharp scissors, needle, and thread (or a sewing machine).
- Technique: Lay your sweater flat. For stockings, trace a stocking shape onto the sweater fabric (using the cuff for the top of the stocking if desired). Cut out two identical stocking shapes. Place them right sides together and sew around the edges, leaving the top open. Turn right side out. You can add a loop for hanging. For ornaments, cut out smaller festive shapes (stars, hearts, trees) from the sweater. You can sew two shapes together and lightly stuff them, or simply use single layers and decorate them with embroidery or buttons. The texture of the sweater adds a unique warmth.
Jar Lid Ornaments
Don’t toss those metal jar lids! They make surprisingly sturdy bases for ornaments.
- Materials: Metal jar lids (from jam, pickles, etc.), paint (acrylics or spray paint), small fabric scraps, ribbon, or other embellishments.
- Technique: Clean and dry the jar lids thoroughly. You can paint the inside of the lid a festive color (e.g., green, red, gold). Once dry, you can glue a small photo inside, or a piece of patterned fabric. Alternatively, you can create a miniature scene inside the lid using tiny figurines, faux snow, or small sprigs of evergreen. Add a loop of ribbon at the top for hanging.
Newspaper/Magazine Crafts
Transform old paper into unique and artistic decorations.
- Materials: Old newspapers or colorful magazines, craft glue (PVA glue), and possibly a skewer or knitting needle for rolling.
- Technique:
- Rolled Paper Beads: Cut strips of newspaper or magazine pages (e.g., 1 inch wide, tapering to a point at one end). Apply glue to the back of the strip. Starting from the wide end, tightly roll the paper around a thin skewer or knitting needle. When you reach the pointed end, glue it down. Slide the bead off. You can string these beads into garlands or use them as unique ornaments.
- Paper Mache Ornaments: Tear newspaper into small strips. Mix craft glue with a little water to create a paper mache paste. Dip the paper strips into the paste and layer them over a balloon (for a sphere) or a cookie cutter (for a flat shape). Let it dry completely, then pop/remove the base. Paint and decorate your hardened paper mache ornaments.
Using Natural and Biodegradable Materials
Choosing materials that return to the earth easily minimizes your environmental footprint.
- Foraging Responsibly (Pinecones, Branches): If you’re collecting natural elements from outdoors, do so responsibly. Only take what you need, and never strip living trees or plants. Be aware of local regulations regarding foraging in parks or protected areas. Ensure pinecones are free of bugs by baking them at a low temperature for a short time.
- Compostable Decorations: Think about decorations that can be composted after the holidays. Dried fruit slices, plain popcorn, cinnamon sticks, and natural evergreen branches are excellent examples. When decorating these, avoid using non-biodegradable glitter or plastic components if you intend to compost them.
- Avoiding Excessive Plastic and Glitter: While a little sparkle is fun, excessive use of plastic glitter contributes to microplastic pollution. Look for biodegradable glitter made from plant-based materials. Opt for natural alternatives like dried flowers, leaves, or even painted seeds for decorative elements instead of plastic beads or sequins where possible.
By incorporating these sustainable practices into your Christmas crafting, you’re not only making beautiful decorations but also contributing to a healthier planet. It’s a thoughtful way to celebrate the season.
Section 8: Displaying and Storing Your Handmade Treasures
After all your hard work crafting beautiful Christmas decorations, the final steps are to display them proudly and then store them properly so they can bring joy for many years to come. Thoughtful display enhances their beauty, and careful storage ensures their longevity.
Creative Display Ideas
Don’t just hang them on the tree; think outside the box to showcase your unique creations.
- Showcasing Ornaments on a Branch: Instead of just on the main Christmas tree, gather a sturdy, attractive branch (cleaned and dried). Place it in a vase or secure it in a stand. Hang your most special or delicate handmade ornaments from its smaller twigs using fishing line or thin ribbon. This creates a minimalist, artistic display that highlights each individual ornament. It’s perfect for a tabletop or mantel.
- Creating a “Memory Tree” with Personalized Crafts: Dedicate a small tree or a specific section of your main tree to ornaments made by family members over the years. Each year, add a new handmade ornament. This becomes a living scrapbook of your family’s holiday memories, sparking conversations and nostalgia as you unpack them each season.
- Arranging Garlands Creatively: Garlands aren’t just for mantels. Drape them over doorways, around windows, or weave them through banisters on staircases. You can also coil them in glass bowls as a centerpiece, or even hang them vertically in strips from a curtain rod to create a festive backdrop.
Proper Storage for Longevity
Handmade decorations are often delicate and sentimental, so proper storage is crucial to protect them from damage and dust.
- Protecting Delicate Items: Ornaments made from paper, salt dough, or delicate fabric need extra care. Wrap each individual ornament in acid-free tissue paper or soft fabric scraps. This prevents them from scratching or sticking together. For very fragile items, consider storing them in individual compartments within a storage box, or in small, sturdy containers.
- Using Acid-Free Tissue Paper: Regular tissue paper can yellow over time and potentially damage delicate materials. Acid-free tissue paper is a safer choice for preserving the color and integrity of your handmade items. It’s specifically designed not to degrade or transfer acids to the items it protects.
- Labeling Boxes: This might seem obvious, but it’s often overlooked. Clearly label your storage boxes with their contents (e.g., “Christmas Ornaments – Handmade,” “Garlands,” “Wreaths”). This saves you time and frustration next year when you’re looking for specific items. You can even add a small note inside with a list of contents.
- Storing in a Cool, Dry Place: Humidity, extreme temperatures, and direct sunlight can damage decorations over time. Store your Christmas decorations in a cool, dry place like a closet, attic (if well-insulated and not prone to extreme temperature swings), or a dedicated storage area. Avoid damp basements or areas with fluctuating temperatures, as these can lead to mold, warping, or fading.
By taking a little extra time to display your creations thoughtfully and store them properly, you ensure that your beautiful handmade Christmas decorations will continue to bring joy and festive cheer for many Christmases to come.
Conclusion: Cherish Your Crafty Christmas Creations
As we wrap up this ultimate guide to crafting festive Christmas decorations, it’s clear that the magic of handmade decor goes far beyond aesthetics. It’s about the joy of creation, the warmth of shared moments, and the unique story each piece tells. You’ve learned how to gather your tools, transform simple materials into dazzling ornaments, create charming garlands, design stunning wreaths, and even extend your festive spirit to outdoor and window displays. We also explored the special delight of crafting with kids and the importance of sustainable, eco-friendly choices.
The process of making these decorations is a gift in itself. It allows you to slow down, be present, and infuse your home with genuine holiday cheer. Each carefully cut snowflake, each lovingly painted ornament, and each thoughtfully arranged centerpiece carries a piece of your heart and creativity. These aren’t just decorations; they’re cherished keepsakes that will evoke fond memories year after year.
So, don’t wait! Embrace your inner crafter this holiday season. Gather your materials, invite your family, and start making memories. Whether it’s a simple paper chain or an elaborate centerpiece, your handmade creations will make this Christmas truly special and uniquely yours. The true spirit of Christmas, after all, lies not just in receiving, but in the joy of giving, creating, and sharing. Happy crafting!