This post may contain affiliate links. If you make a purchase through these links, we may earn a commission at no additional cost to you.
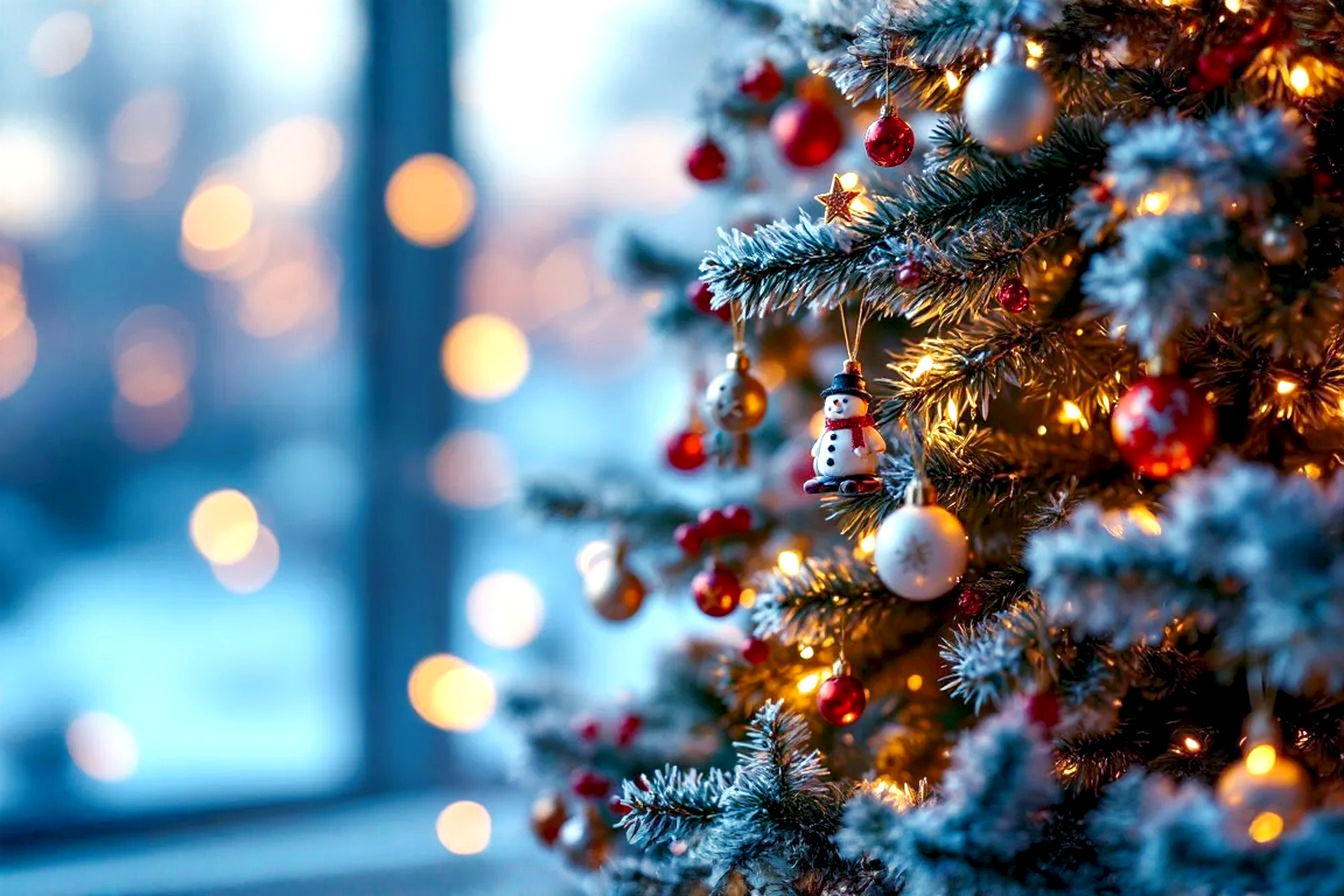
The holiday season brings with it a special kind of magic, and for many, nothing captures that festive spirit quite like a beautifully lit Christmas tree. The soft glow, the twinkling lights, and the overall warmth they bring can truly transform a home. However, creating that dazzling display often comes with a hefty price tag, especially if you’re aiming for a truly elaborate setup with traditional, larger lights or complex smart systems.
But what if you could achieve that same breathtaking sparkle without emptying your wallet? That’s where the humble yet powerful fairy light comes in. These tiny, versatile lights offer a budget-friendly, adaptable, and incredibly dazzling alternative to more expensive lighting options. They can turn a simple tree into a focal point of holiday cheer, all while keeping your finances in check.
This comprehensive guide will show you exactly how to unlock the full potential of fairy lights for your Christmas tree. We’ll explore the different types of fairy lights available, delve into smart placement techniques to maximize their impact, reveal creative hacks for an extra dose of sparkle, and share essential safety tips to ensure your festive display is both beautiful and secure. By the time you finish, you’ll have all the knowledge you need to create a truly brilliant Christmas tree that sparkles with budget-friendly elegance. Get ready to illuminate your holiday spirit without breaking the bank!
Understanding Your Sparkle Arsenal: Types of Fairy Lights
Before you start decorating, it’s helpful to understand the different kinds of fairy lights you can choose from. Knowing their characteristics will help you pick the best ones for your tree and achieve your desired look.
Defining Fairy Lights
So, what exactly are fairy lights? Generally, they are small, often LED-based lights strung along a thin, flexible wire. Unlike traditional Christmas lights with larger, more prominent bulbs, fairy lights feature tiny, delicate bulbs that create a subtle, ethereal glow. They’re designed to be less noticeable themselves, allowing their light to be the star.
LED vs. Incandescent: The Modern Choice
The biggest difference you’ll encounter when buying lights is between LED and incandescent technology. For fairy lights, LEDs (Light Emitting Diodes) are overwhelmingly the modern and recommended choice, especially for budget-conscious decorators.
LED Fairy Lights: The Smart Option
LED fairy lights have become incredibly popular for several compelling reasons:
- Energy Efficiency: This is a major benefit for your budget. LEDs consume significantly less electricity than incandescent bulbs. For example, a string of 100 LED fairy lights might use as little as 4-6 watts, while a comparable incandescent string could use 40-50 watts. This translates to lower electricity bills over the holiday season, making them a truly cost-effective choice in the long run. The technical explanation is that LEDs convert a much higher percentage of electrical energy into light and a much lower percentage into heat, making them more efficient.
- Longevity: LEDs are built to last. They typically have a lifespan of tens of thousands of hours—often 25,000 to 50,000 hours or more. This means you can use the same set of fairy lights for many, many Christmas seasons without needing replacements, further saving you money over time. Incandescent bulbs, by contrast, usually last only 1,000 to 3,000 hours.
- Durability: The bulbs on LED fairy lights are often made of plastic or epoxy, making them much less fragile than the glass bulbs of incandescent lights. They’re more resistant to breakage if dropped or tangled, which is a huge plus when decorating or storing them.
- Color Options: LEDs offer a wide spectrum of colors. You’ll commonly find:
- Warm White: This color mimics the traditional glow of incandescent bulbs, providing a cozy, inviting, and slightly yellowish light. It’s perfect for a classic, comforting holiday feel.
- Cool White: This gives a crisp, bright, and slightly bluish-white light, ideal for a modern, icy, or snow-themed aesthetic. It often creates a more intense sparkle.
- Multi-Color: These strands feature a mix of colors like red, green, blue, and yellow, offering a playful and vibrant look.
- RGB (Red, Green, Blue): Some advanced LED fairy lights can produce millions of colors by mixing these primary colors, often controlled via an app. While sometimes pricier, they’re becoming more accessible.
Incandescent Fairy Lights: A Fading Glow
While incandescent fairy lights still exist, they are far less common now. They produce a very warm, traditional glow, which some people prefer. However, their higher energy consumption, shorter lifespan, and fragile glass bulbs make them a less practical and less budget-friendly choice compared to modern LEDs.
Power Sources: Plug-in vs. Battery-Operated
The way your fairy lights get their power is another important consideration.
Plug-in Fairy Lights: For Continuous Brilliance
These lights connect directly to an electrical outlet.
- Continuous Power: They offer a consistent, bright light without worrying about batteries dying.
- Brighter and Longer Strands: Plug-in lights can typically be much longer than battery-operated ones, allowing you to cover larger areas or entire trees with fewer strands. They also tend to be brighter because they have a steady, higher power supply.
- Ideal Use: Perfect for the main lighting of your Christmas tree, especially larger trees, where you need sustained brightness and coverage.
- Considerations: You’ll need to think about the proximity of electrical outlets and potentially use extension cords to reach your tree. Ensure any extension cords are rated for the appropriate power load and are safely tucked away to prevent tripping hazards.
Battery-Operated Fairy Lights: Portable Sparkle
These lights are powered by batteries (AA, AAA, or small button cells) and come with a small battery pack.
- Portability: Their biggest advantage is that they don’t need an outlet. This makes them incredibly versatile.
- Ideal Use: They are fantastic for decorating wreaths, garlands, smaller tabletop trees, or adding sparkle to hard-to-reach spots on a larger tree where an outlet isn’t convenient. They’re also great for creating small, illuminated accents.
- Considerations: Battery life is the main drawback. Depending on the quality of the batteries and the lights, they might only last for a few days to a few weeks of continuous use before needing a battery change. The brightness can also dim as the batteries lose power. For example, a string of 50 battery-operated micro LEDs using 3 AA batteries might last 48-72 hours of continuous use.
Wire Types and Aesthetics
The wire itself can impact the look of your fairy lights.
- Copper Wire Fairy Lights: These are very popular for their delicate appearance. The thin, flexible copper wire is easily shaped and almost invisible when wrapped around branches, giving the illusion that the tiny lights are floating or sparkling on their own. They create a modern, delicate, and often described as “firefly” or “starry night” effect. The copper wire itself can add a warm metallic glint when not lit.
- Silver Wire Fairy Lights: Similar to copper wire, but with a silver finish. These are great if you prefer a cooler aesthetic or want the wire to blend with silver-themed decorations.
- Green/Clear Wire Fairy Lights: These are more traditional. Green wires are designed to blend seamlessly with the needles of a real or artificial green Christmas tree, while clear wires are less noticeable on white or flocked trees, or when draped against a window.
Special Features for Extra Sparkle
Many fairy light sets come with additional features that can enhance your display and convenience, often without significantly increasing the cost.
- Timer Functions: Many battery-operated and some plug-in sets include a built-in timer (e.g., 6 hours on, 18 hours off). This is incredibly convenient, as you don’t have to remember to turn the lights on and off every day, and it helps conserve battery life or electricity.
- Remote Controls: These allow you to easily turn lights on/off, change modes (if available), or adjust brightness from a distance.
- Dimmable Options: Some sets allow you to adjust the brightness level, letting you create different moods—from a soft, ambient glow to a dazzling, bright sparkle.
- Twinkle/Flash Modes: Many fairy light sets offer various lighting modes, including steady on, slow fade, chasing, and, most importantly for “sparkle,” twinkle or flash modes. These dynamic effects can make your tree truly come alive.
- Smart Fairy Lights: While often a bit pricier, smart fairy lights (controlled via a smartphone app) are becoming more affordable. They offer advanced customization, allowing you to create custom color patterns, sync with music, or integrate with smart home systems. If your budget allows for a slight upgrade, these can offer unparalleled sparkle customization.
The Art of Illumination: How Many Lights Do You Need?
One of the most common questions when decorating a Christmas tree is, “How many lights do I actually need?” The answer depends on your desired effect. While there’s a standard guideline, achieving that “brilliance” and “sparkle” with fairy lights often requires a more generous approach.
The “Rule of Thumb” vs. Sparkle Goal
The general recommendation for Christmas tree lighting is 100 lights per foot of tree height. So, a 7-foot tree would typically need around 700 lights.
However, if your goal is to create a truly “brilliant” and “sparkling” display—the kind that makes your tree look professionally lit and absolutely dazzling—you’ll want to aim for a higher density. For that extra sparkle, consider 150 to 200 lights per foot. This higher count allows for more comprehensive coverage and a richer, multi-dimensional glow.
Tree Height and Density Guide
Here’s a quick guide based on the “sparkle” goal (150-200 lights per foot):
- 4-foot tree: 600-800 lights
- 6-foot tree: 900-1200 lights
- 7-foot tree: 1050-1400 lights
- 9-foot tree: 1350-1800 lights
- 12-foot tree: 1800-2400 lights
Remember, these are guidelines. You might find you need slightly more or less depending on your specific tree and aesthetic preferences.
Factors Influencing Light Count
Several elements can influence how many fairy lights you’ll need to achieve your desired level of sparkle:
- Tree Density: A very full, dense artificial tree with lots of branches will likely need more lights to ensure the light penetrates deep into the foliage and illuminates the entire tree. A sparser tree might require fewer lights to achieve the same visual impact on its surface.
- Desired Effect: Are you aiming for a subtle, ambient glow, or a tree that truly “pops” with light? For a subtle effect, you can stick closer to the 100 lights/foot rule. For maximum sparkle, lean towards the higher end of the 150-200 lights/foot range.
- Light Spacing: How close together do you want the individual bulbs to appear? If you want a very dense, uniform glow, you’ll need more lights to allow for closer spacing. If you’re going for a more scattered, star-like effect, you might use slightly fewer.
- Bulb Size: Most fairy lights feature tiny “micro LED” bulbs. If you happen to be using fairy lights with slightly larger mini-LED bulbs, you might get away with slightly fewer strands, as each bulb emits more light. However, for the delicate “fairy” effect, smaller bulbs are generally preferred, meaning more of them are needed.
Practical Tip: Always Have Extra
It’s a common decorating frustration to run out of lights halfway through the process. To avoid this, it’s always better to have a little extra than not enough. You can always use leftover strands to decorate a mantel, a wreath, or a small tabletop display. Running short means a last-minute trip to the store, which can be stressful during the busy holiday season. Plan ahead and over-estimate slightly.
Strategic Placement: Lighting Techniques for Maximum Impact
Once you have your fairy lights, the way you place them on your tree is crucial for achieving that brilliant, sparkling effect. It’s not just about wrapping them around; strategic placement can create depth, dimension, and a truly professional look.
Before You Begin: Prep Work
A little preparation goes a long way in making the lighting process smoother and more effective:
- Test All Lights: Before you even think about putting them on the tree, plug in every single strand of fairy lights. Check for any dead bulbs, flickering sections, or non-working strands. It’s far easier to deal with a faulty strand before it’s woven into your tree.
- Fluff Out Branches: If you have an artificial tree, take the time to “fluff” each branch. This means spreading out the individual tips to make the tree look fuller and more realistic. A well-fluffed tree provides a better canvas for your lights and helps them sit properly.
- Have Extension Cords Ready: Plan where your tree will sit and ensure you have enough extension cords or power strips to reach the nearest outlet safely. Consider using a power strip with multiple outlets if you have many strands to plug in.
Technique 1: The Wrap-Around Method (Classic & Effective)
This is the most traditional and widely used method for lighting a Christmas tree. It creates a beautiful, even glow.
- Start at the Top: Begin by securing the end of your first light strand near the top of the tree, often near the trunk or the very top branch.
- Work Downward: Gradually wrap the lights around the tree, moving from the top down to the bottom.
- Even Distribution: As you wrap, ensure the lights are evenly distributed around the circumference of the tree. Don’t just wrap the outer tips; push some lights deeper into the branches, closer to the trunk. This creates depth and an internal warmth, making the tree glow from within, not just on the surface.
- Horizontal Wrapping vs. Vertical Draping: While the wrap-around method typically involves horizontal wrapping, you can also incorporate elements of vertical draping. For instance, after wrapping a section horizontally, you might drape a strand vertically down a few branches before continuing the horizontal wrap. This can add visual interest.
Technique 2: The Vertical Draping Method (Modern & Efficient)
This method has gained popularity for its efficiency and ability to create a very uniform, waterfall-like effect. It’s particularly good for pre-lit trees where you want to add more lights, or for creating a sleek, contemporary look.
- Start at the Top: Anchor the end of your light strand at the very top of the tree, near the trunk.
- Drape Vertically: Let the strand fall vertically down a section of the tree, pulling it out slightly to drape over the branch tips.
- Zig-Zag Back Up: Once you reach the bottom of that section, loop the lights back up vertically, slightly to the side of your first drape.
- Repeat: Continue this process, moving around the tree, creating vertical columns of light. This method ensures that the lights are visible from top to bottom on all sides.
Technique 3: The “Zig-Zag” or “Triangle” Method
This technique is especially useful if your Christmas tree is placed against a wall or in a corner, meaning only part of it is visible.
- Focus on the Front: Instead of wrapping lights all the way around the tree, you’ll focus on the visible front sections.
- Start at the Top: Begin at the top of the tree, at the front.
- Zig-Zag Down: Drape the lights in a zig-zag pattern, moving from one side of the front to the other as you work your way down the tree. This creates a series of triangles of light.
- Maximize Impact: This method efficiently uses your lights by concentrating them where they will be seen, making it a budget-friendly way to achieve a bright front-facing display.
Layering for Depth and Dimension
To truly achieve “brilliance” and a professional-looking sparkle, layering your lights is key. This involves using different types of lights or placing lights at varying depths within the tree.
- Layer 1 (Inner Glow): Start by placing your first set of fairy lights deeper into the tree, closer to the trunk. Push them in among the branches. This layer creates an internal warmth and depth, making the tree appear to glow from within. For this layer, warm white fairy lights are often ideal, providing a cozy, inviting foundation. Think of this as the tree’s internal light source.
- Layer 2 (Mid-Depth Sparkle): For your next layer, place lights slightly further out on the branches, perhaps on the tips of the main branches but still somewhat recessed. This layer adds a general, diffused sparkle throughout the tree. You can use the same type of fairy lights or introduce a slightly different shade (e.g., a brighter warm white or a soft cool white) for subtle contrast.
- Layer 3 (Outer Dazzle): This is where you maximize the “twinkle” and “sparkle.” Place your final layer of fairy lights on the very tips of the branches, facing outwards. These lights will be most visible and will catch the eye, creating that dazzling, shimmering effect. This is an excellent place for twinkle-mode fairy lights or those with a slightly brighter lumen output.
Focusing on Key Areas
Don’t forget these specific spots for maximum impact:
- Tree Topper: Ensure there’s ample lighting around the base of your tree topper (star, angel, etc.) to make it stand out. You might even use a dedicated small strand of battery-operated lights for this.
- Gaps: Step back frequently and look for any dark spots or gaps in your lighting. Adjust the lights or add small additional strands if needed.
- Bottom Branches: It’s easy to focus on the middle and top, but ensure the lower sections of your tree are also well-lit for a balanced look.
Hiding Wires
Unsightly wires can detract from your sparkling display. Here’s how to minimize their visibility:
- Tuck Wires: As you wrap, tuck the wires behind branches and needles.
- Blend with Wire Color: Use green-wired lights for green trees and clear-wired lights for white or flocked trees. Copper-wired lights are also very thin and tend to disappear.
- Strategic Ornament Placement: Once your lights are on, use larger ornaments to strategically conceal any visible wire sections.
Budget-Friendly Brilliance Hacks: Elevating Your Sparkle
Achieving a high-end, sparkling Christmas tree doesn’t require expensive lights or professional decorators. With a few clever, budget-friendly hacks, you can amplify the brilliance of your fairy lights and create a truly dazzling display.
Mixing Light Temperatures for Dynamic Effect
Don’t feel limited to just one shade of white light. Combining different color temperatures can add incredible depth and visual interest to your tree.
- Warm White (Cozy Glow): These lights emit a soft, yellowish-white light, reminiscent of traditional incandescent bulbs or candlelight. They create a warm, inviting, and nostalgic atmosphere.
- Cool White (Crisp Sparkle): These lights produce a brighter, slightly bluish-white light. They give a crisp, clean, and often more intense sparkle, especially on metallic or glittery ornaments.
The Hack: Use both! For instance, place warm white fairy lights deeper within the tree (Layer 1) to create that cozy, internal glow. Then, use cool white fairy lights on the outer layers (Layer 3) or mixed in with the mid-depth lights. The contrast between the warm and cool tones will make the tree appear more dynamic, vibrant, and professionally lit. It creates a visual “pop” that’s very effective.
Strategic Ornament Placement for Amplified Light
Ornaments aren’t just for decoration; they can actively enhance your lighting.
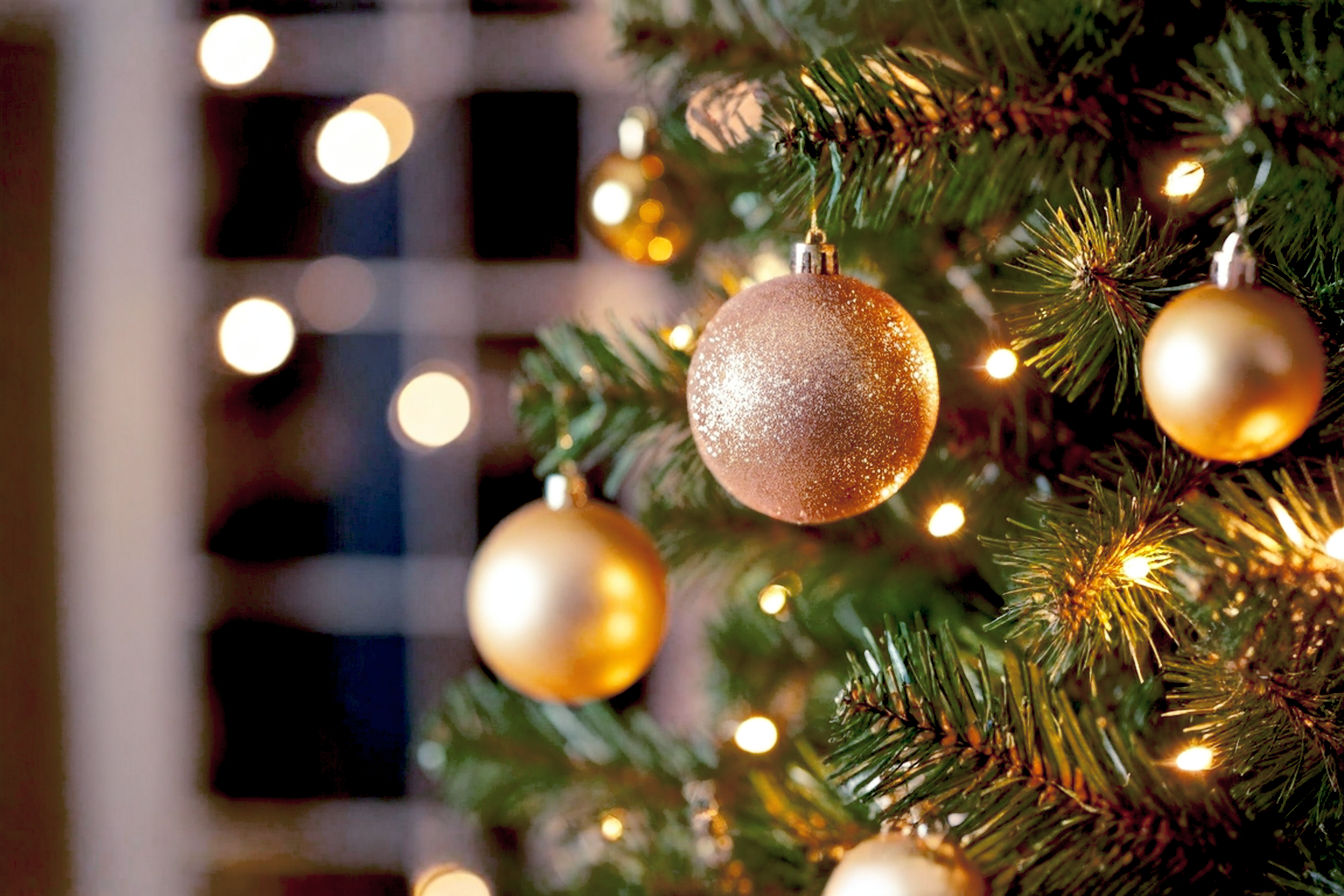
- Reflective Ornaments: Prioritize ornaments made from highly reflective materials. Think silver, gold, mirrored, or glittered balls. These act like tiny disco balls, catching and scattering the light from your fairy lights across the tree and into the room.
- Clear Ornaments: Ornaments made of glass, acrylic, or clear plastic are fantastic for refracting light. They allow the light to pass through them, creating beautiful prisms and adding a delicate shimmer.
- Placement is Key: Position your most reflective and clear ornaments near light sources. Hang them directly in front of or slightly above a cluster of fairy lights. This maximizes their ability to bounce and spread the light, making your tree appear brighter and more sparkling without adding more actual lights.
DIY Light Reflectors
This is a super simple, virtually free hack to boost the brightness of individual lights.
- Materials: Small pieces of aluminum foil, reflective wrapping paper scraps, or even the shiny inside of a potato chip bag.
- How-To: Cut tiny squares or circles (about 1-2 inches) from your chosen reflective material. Gently tuck one piece behind an individual fairy light bulb, ensuring the reflective side faces outwards.
- Effect: This creates a subtle, localized boost in brightness, making that particular bulb appear more intense. It’s like giving each tiny light its own mini spotlight.
- Safety Note: While modern LED fairy lights produce very little heat, it’s always wise to ensure the reflective material isn’t directly touching the bulb for extended periods, especially if you have older incandescent lights. With LEDs, the risk is minimal.
Adding Non-Light Elements for Shine
Not everything that sparkles needs to be electric!
- Tinsel/Garland: Classic silver or gold tinsel, when draped through the tree, reflects light beautifully. The metallic strands pick up the light from your fairy lights and add an extra layer of shimmer. Beaded garlands, especially those with metallic or iridescent beads, also catch and scatter light effectively.
- Glitter Sprays: For artificial trees, a light dusting of glitter spray (available at craft stores) can add an all-over shimmer that catches the light. Apply sparingly for a subtle effect, or more generously for a truly dazzling finish. Ensure the spray is non-flammable and allowed to dry completely before lighting the tree.
Utilizing Battery-Operated Lights Creatively
Battery-operated fairy lights are your secret weapon for targeted sparkle.
- Individual Branch Wraps: Wrap a short strand of battery-operated lights around a single, prominent branch to create a concentrated burst of sparkle. This draws the eye to specific areas.
- Inside Ornaments: Place a small string of battery-operated fairy lights inside clear, hollow ornaments or glass jars that you then hang on the tree. This creates a magical, glowing ornament effect.
- “Light Pockets”: Create small clusters or “pockets” of lights deep within the tree’s foliage using short battery-operated strands. This adds unexpected bursts of light and depth.
The Power of Mirrors
This hack works wonders, especially if your tree is placed against a wall.
- Strategic Placement: Position a large mirror directly behind or immediately beside your Christmas tree.
- Double the Light: The mirror will reflect the entire light display, effectively doubling the perceived amount of light and sparkle. It also makes the room feel brighter and more expansive. This optical illusion is incredibly effective and costs nothing if you already own a mirror.
Smart Shopping for Savings
Being strategic about where and when you buy your fairy lights can lead to significant savings.
- Post-Holiday Sales: The absolute best time to buy Christmas lights is immediately after Christmas. Retailers heavily discount holiday decor to clear inventory. Stock up for next year’s display at a fraction of the original price.
- Bulk Purchases: If you need a lot of lights, look for opportunities to buy in bulk. Sometimes, larger packs or multi-strand sets offer a lower price per foot of lighting.
- Discount Stores/Online Marketplaces: Check stores like dollar stores, discount retailers, or online marketplaces (like Amazon, eBay, or even local classifieds) for deals. Just ensure they are UL or ETL certified for safety.
- LED Kits: Some brands offer “kits” that include multiple strands of LED fairy lights, often with a shared power source or remote, which can be more cost-effective than buying individual strands.
By combining these clever hacks, you can transform your budget-friendly fairy lights into a truly brilliant and sparkling Christmas tree display that looks far more expensive than it actually was.
Safety First: Illuminating Responsibly
While fairy lights are generally very safe, especially modern LED versions, it’s crucial to follow safety guidelines to prevent accidents. A dazzling display should always be a safe one.
Choosing Certified Lights
The first step in ensuring safety is to buy lights that meet recognized safety standards.
- Look for Certifications: Always look for labels from reputable testing organizations. In the United States, the most common certifications are UL (Underwriters Laboratories) or ETL (Intertek). These marks indicate that the lights have been tested and meet specific safety requirements for fire, electric shock, and other hazards.
- Why it Matters: Uncertified lights may have thinner wires, inadequate insulation, or faulty components that can pose a fire risk or lead to electrical shock. Investing in certified lights is a small upfront cost for significant peace of mind.
Indoor vs. Outdoor Lights: A Crucial Distinction
Not all fairy lights are created equal, especially when it comes to their intended environment.
- Indoor Lights: These are designed for use in dry, controlled indoor environments. Their wiring and components are not built to withstand moisture, extreme temperatures, or UV exposure. Using them outdoors can lead to short circuits, electrical hazards, and rapid deterioration.
- Outdoor Lights: These lights are specifically constructed to be more durable and weather-resistant. They feature thicker insulation, sealed connections, and often more robust bulbs to protect against rain, snow, and temperature fluctuations.
- The Rule: Never use indoor lights outdoors. Always check the product packaging for an “indoor use only” or “indoor/outdoor” rating. Using indoor lights outside is a significant safety risk.
Overloading Outlets
Daisy-chaining too many light strands or plugging too many items into one outlet can create a dangerous situation.
- Understand Wattage Limits: Every electrical circuit and outlet has a maximum wattage it can safely handle. Overloading an outlet can cause circuit breakers to trip or, worse, lead to overheating and fire.
- Avoid Daisy-Chaining Too Many Strands: While many light strands are designed to be connected end-to-end, there’s usually a limit (e.g., “connect no more than X sets”). Adhere to these limits.
- Use Power Strips with Surge Protection: If you need to plug in multiple strands, use a high-quality power strip with built-in surge protection. This not only provides more outlets but also protects your lights and home from power surges. Distribute your lights across different outlets if possible.
Inspecting Lights Annually
Even certified lights can become damaged over time.
- Pre-Season Check: Before you put any lights on your tree, take a few minutes to inspect every strand. Look for:
- Frayed Wires: Any exposed wiring is a serious hazard.
- Cracked Insulation: Damage to the plastic coating around the wires.
- Loose or Broken Bulbs: Replace or discard strands with damaged bulbs.
- Melted Sockets: A sign of overheating.
- Discard Damaged Strands: If a strand shows any signs of damage, do not use it. It’s not worth the risk. Dispose of it safely.
Real Trees and Heat
If you have a real Christmas tree, proper watering is key to fire safety.
- Keep Real Trees Well-Watered: A dry Christmas tree is a significant fire hazard. Ensure your real tree stand is always full of water. A well-hydrated tree is much less likely to ignite.
- LEDs and Heat: One of the major advantages of LED fairy lights is that they produce minimal heat compared to old incandescent bulbs. This makes them significantly safer for use on real trees, as they are less likely to dry out needles or ignite flammable decorations. However, caution is still advised.
- Position Away from Flammables: Regardless of light type, position lights away from highly flammable decorations like cotton batting, paper ornaments, or dried floral arrangements.
Children and Pets
Curious little hands and paws can pose unique safety challenges.
- Secure Wires: Tuck all wires securely behind branches or use zip ties/twist ties to fasten them to the tree trunk. This prevents tripping hazards for children and makes wires less accessible for pets who might chew on them.
- Battery Packs: If using battery-operated fairy lights, ensure the battery packs are securely hidden and out of reach of children and pets, as small batteries can be a choking hazard or cause internal injury if ingested.
Unplugging Lights
This simple habit is one of the most effective safety measures.
- Always Unplug: Make it a rule to always unplug your Christmas tree lights before leaving your home or going to bed. Even with LEDs, it’s a good practice to eliminate any potential electrical risk when you’re not present to monitor them.
- Timer Functions: Many fairy light sets come with built-in timer functions (e.g., 6 hours on, 18 hours off). Utilize these! They automate the process of turning lights off, ensuring safety and conserving energy.
By following these safety guidelines, you can enjoy your brilliantly sparkling Christmas tree display with complete peace of mind throughout the holiday season.
Beyond the Tree: Extending the Fairy Light Magic
Fairy lights aren’t just for Christmas trees! Their versatility, affordability, and delicate glow make them perfect for extending the holiday magic throughout your home and even outdoors.
Garlands and Wreaths
Transform ordinary greenery into sparkling focal points.
- Stair Railings and Mantels: Wrap strands of fairy lights around stair railings, weaving them through existing garlands or greenery. On mantels, drape them elegantly over fireplace surrounds, mixing them with pinecones, ornaments, or festive fabrics. The thin wire of fairy lights makes them easy to integrate seamlessly.
- Doorframes and Windows: Outline doorframes or windows with fairy lights for a welcoming glow. This can be done indoors or outdoors with appropriate light types.
- Wreaths: Integrate battery-operated fairy lights into your Christmas wreaths (both indoor and outdoor). Simply weave the strand through the foliage, tucking the battery pack out of sight. This adds a charming, welcoming sparkle to your front door or any wall.
Window Displays
Create a magical view from both inside and outside your home.
- Draping Across Windows: Simply drape strands of fairy lights across the top of your windows, allowing them to hang down like delicate curtains of light.
- Vertical Icicles: For a more structured look, hang multiple vertical strands of fairy lights from the top of your window frame, creating a subtle “icicle” effect. This looks particularly beautiful with cool white lights.
- Backlighting Silhouettes: Place fairy lights behind festive window silhouettes (e.g., paper cutouts of reindeer or snowflakes) to create a glowing outline effect.
Table Centerpieces
Elevate your dining table or coffee table with a touch of sparkle.
- Vase Fillers: Place a strand of battery-operated fairy lights inside clear glass vases, hurricane lamps, or decorative bowls. Add some small ornaments, pinecones, or cranberries for a festive touch. The lights will illuminate the contents, creating a captivating glow.
- Weaving Through Runners: Weave fairy lights through a table runner, around candles, or among small decorative elements on your dining table. This adds an intimate, warm ambiance to your holiday meals.
- Under Cloches: Place a small battery-operated strand under a glass cloche with a few miniature ornaments or figurines for a charming, self-contained display.
Outdoor Accents (with appropriate lights)
Extend the brilliance to your exterior, but remember to only use lights specifically rated for outdoor use.
- Porch Railings and Bushes: Wrap outdoor-rated fairy lights around porch railings, columns, or the branches of outdoor bushes and small trees.
- Pathway Liners: Use ground stakes to line pathways or garden beds with fairy lights, creating a magical illuminated path to your front door.
- “Starry Sky” Effect: For a patio or deck, string multiple strands of outdoor fairy lights overhead, creating a beautiful “starry sky” effect that adds ambiance to outdoor gatherings.
Creating “Light Jars” or “Bottles”
This is a wonderfully simple, elegant, and highly portable decor idea.
- Materials: Empty glass jars (mason jars, old jam jars), wine bottles, or decorative glass bottles.
- How-To: Carefully feed a strand of battery-operated fairy lights into the jar or bottle. The lights will fill the container, creating a beautiful, contained glow.
- Versatility: These light jars can be placed anywhere—on shelves, windowsills, side tables, or even grouped together on the floor for a soft, ambient light source. They make fantastic, inexpensive gifts too.
DIY Fairy Light Art
Unleash your creativity by turning fairy lights into illuminated art.
- Wall Designs: Use small command hooks or clear adhesive clips to shape copper or silver wire fairy lights into words (e.g., “Joy,” “Noel”) or simple designs (stars, trees) on a wall. The thin wire makes them easy to manipulate.
- Backlit Canvases: Attach fairy lights to the back of a canvas or a piece of thin wood with a festive design cut out, creating a backlit silhouette.
By thinking beyond the traditional Christmas tree, you can use budget-friendly fairy lights to infuse every corner of your home with holiday cheer and sparkle.
Troubleshooting Common Fairy Light Issues
Even the most brilliant fairy light displays can encounter minor hiccups. Knowing how to troubleshoot common issues can save you frustration and money, helping you keep your sparkle going strong throughout the season.
One Section Out
This is a common issue, especially with older or cheaper light strands.
- Check for Loose Bulbs/Connections: For traditional mini lights, a single loose or unseated bulb can break the entire circuit. Gently push each bulb into its socket to ensure it’s fully seated. For fairy lights, which often have integrated LEDs, check for any visible loose connections along the wire.
- Inspect for Broken Wires: Carefully run your hand along the entire length of the wire, feeling for any kinks, breaks, or frayed sections. A break in the internal wire will cause a section to go out.
- Incandescent Specific: If you happen to be using older incandescent fairy lights, a single blown bulb can indeed break the entire circuit. Many modern incandescent strands are designed with “shunt” technology, meaning if one bulb blows, the rest stay lit, but it’s not always perfect. With LEDs, individual bulb failure typically doesn’t affect the rest of the strand. If a section is out, it’s more likely a wire break or a faulty segment.
Lights Dimming
If your lights aren’t as bright as they should be, consider the power source.
- For Battery-Operated: This is almost always a sign of low batteries. Replace them with fresh, high-quality batteries. As batteries deplete, their voltage drops, leading to dimmer lights.
- For Plug-in:
- Power Fluctuations: Check if other lights or appliances on the same circuit are also dimming, which could indicate a power issue in your home.
- Too Many Strands: You might be pushing the limits of the circuit. Unplug some strands and see if the remaining ones brighten. If so, you need to redistribute your lights across different outlets or circuits.
- Voltage Drop: If you’re using very long strands or daisy-chaining many sets, there can be a slight voltage drop towards the end of the run, causing the lights furthest from the plug to be slightly dimmer. This is usually minor with LEDs.
Flickering
Occasional flickering can be annoying and detract from your display.
- Loose Connection: The most common cause of flickering is a loose connection. This could be where the strand plugs into the outlet, where two strands connect, or even an internal wire connection within the strand itself. Gently wiggle the wires and connections to see if the flickering stops.
- Faulty Strand/Controller: If flickering persists and you’ve ruled out loose connections, the strand itself might be faulty, or the control box (if it has different modes) might be malfunctioning. Try plugging the strand into a different outlet or testing it alone.
- Power Issues: Less common, but power fluctuations in your home’s electrical system can sometimes cause flickering.
Storage Tips for Longevity
Proper storage is crucial for extending the life of your fairy lights and making next year’s decorating much easier.
- Prevent Tangling: The biggest enemy of fairy lights is tangling.
- Wrap Around Cardboard: Cut a notch at one end of a piece of sturdy cardboard (e.g., from a moving box). Secure the plug end in the notch, then carefully wrap the entire strand around the cardboard. Secure the other end with another notch or a twist tie.
- Use a Spool/Reel: Dedicated light storage spools or reels are inexpensive and work very well.
- Original Packaging: If the lights came with a plastic spool or tray, use it for storage.
- Cool, Dry Place: Store your lights in a cool, dry place away from extreme temperatures and humidity. Attics that get very hot or damp basements are not ideal. A closet or climate-controlled storage area is best.
- Protect Bulbs: If your fairy lights have slightly larger bulbs, consider wrapping them loosely in tissue paper or bubble wrap before storing to prevent crushing.
By understanding these common issues and implementing these simple troubleshooting and storage tips, you can ensure your budget-friendly fairy lights continue to sparkle brilliantly for many holiday seasons to come.
Conclusion: Your Dazzling, Budget-Friendly Christmas Tree Awaits
As we’ve explored, creating a truly dazzling Christmas tree doesn’t require an unlimited budget or professional expertise. The humble fairy light, with its energy efficiency, versatility, and delicate sparkle, is your secret weapon for achieving budget-friendly brilliance this holiday season.
We’ve covered everything from choosing the right type of fairy lights—prioritizing the longevity and energy savings of LEDs—to understanding how many strands you’ll need to create that desired level of sparkle. We then delved into strategic placement techniques, from the classic wrap-around to the modern vertical drape, emphasizing the power of layering to add depth and dimension to your tree.
Beyond basic lighting, we unlocked a treasure trove of budget-friendly hacks: mixing light temperatures for dynamic visual interest, using reflective ornaments to amplify light, creating DIY reflectors, and incorporating non-light elements like tinsel for extra shimmer. We also highlighted the creative potential of battery-operated lights and the magic of mirrors to double your display. Crucially, we stressed the importance of safety, from choosing certified lights to understanding proper power usage and annual inspections. Finally, we looked at how fairy lights can extend their magic beyond the tree, illuminating garlands, windows, and even creating charming light jars.
Now, armed with this comprehensive knowledge, you’re ready to transform your Christmas tree into a breathtaking focal point of holiday cheer. You can create a display that rivals those seen in magazines, all while staying well within your budget. Don’t let cost dim your holiday spirit. Embrace the power of fairy lights and get ready to enjoy the dazzling, sparkling magic you’ve created.
Start planning your sparkling display today, and let your budget-friendly brilliance shine brightly this Christmas!