This post may contain affiliate links. If you make a purchase through these links, we may earn a commission at no additional cost to you.
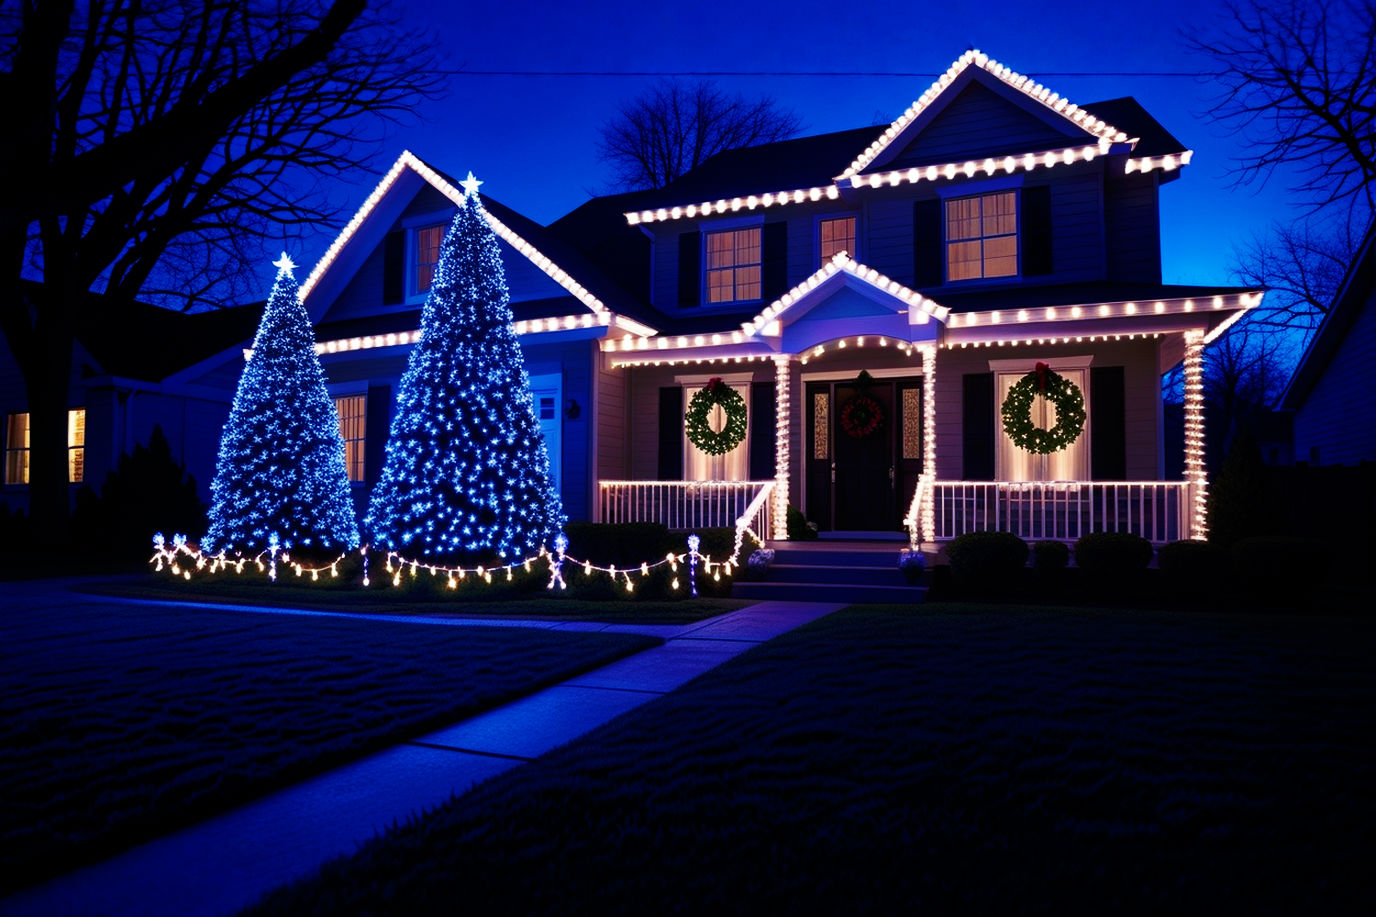
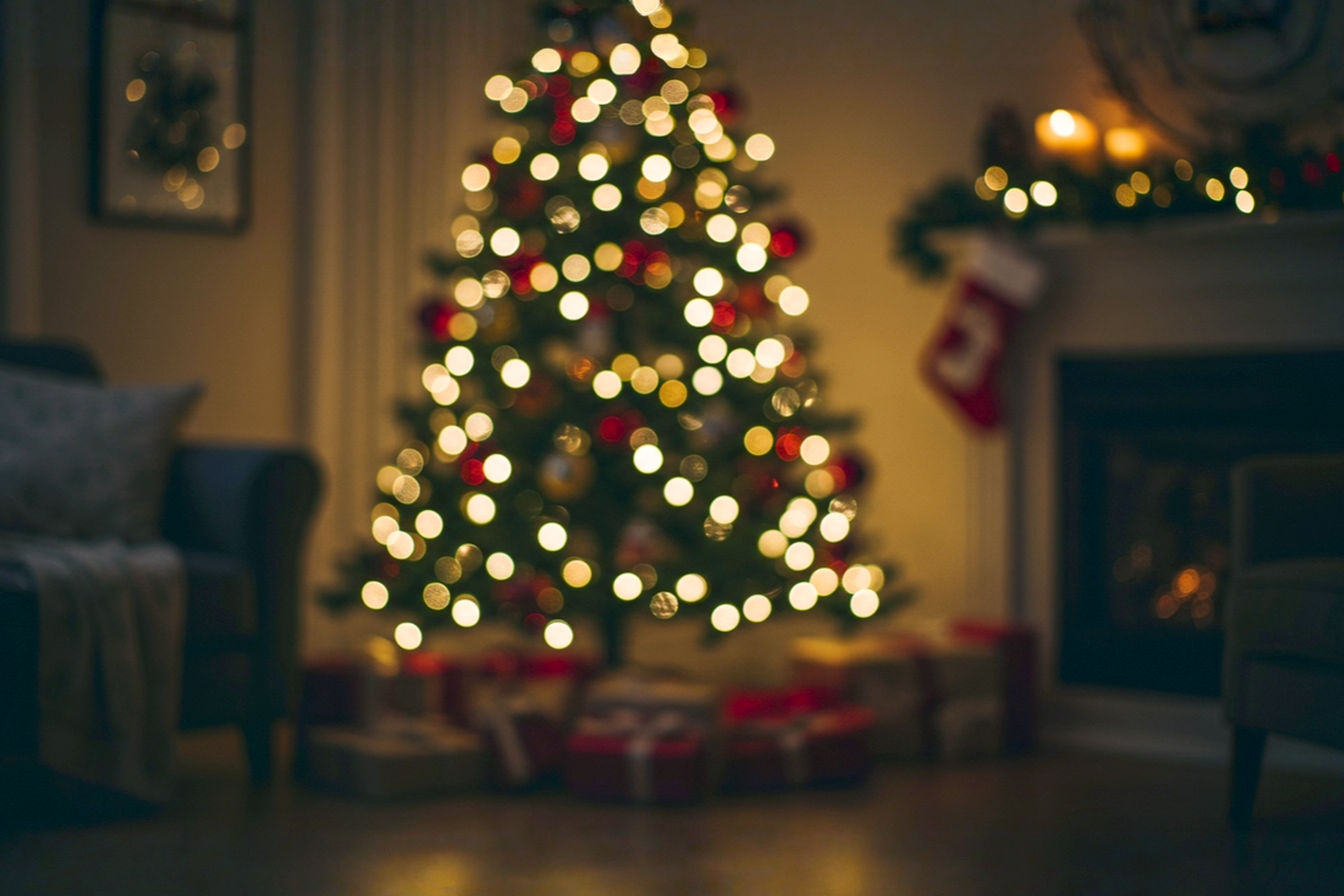
When you picture Christmas lights, you probably think of a beautifully decorated tree, right? But what if we told you those versatile strands of tiny bulbs could do so much more? Imagine transforming your ordinary bushes and shrubs into dazzling focal points, not just for the holidays, but potentially all year round. This article will explore the exciting world of bush lighting, moving beyond the tree to unleash the full potential of these festive illuminations.
The Untapped Potential of Bush Lighting: Why Go “Beyond the Tree”?
Many homeowners overlook their bushes and shrubs when it comes to outdoor lighting. Yet, these natural elements offer an incredible canvas for creativity. By extending your lighting efforts to your landscape, you’re not just decorating; you’re enhancing your entire outdoor living space.
More Than Just Christmas: Year-Round Appeal
While traditionally associated with the festive season, modern Christmas lights, especially durable LED options, are perfect for year-round landscape lighting. Think about it: soft, ambient light can make your garden feel magical on a warm summer evening, highlight a blooming shrub in spring, or add a cozy glow in the depths of winter. They aren’t just for carols and Santa anymore.
Enhancing Curb Appeal and Safety
Well-lit bushes and gardens significantly boost your home’s curb appeal. They create a welcoming atmosphere and show off your landscaping even after the sun sets. Beyond aesthetics, proper outdoor lighting also enhances safety. It illuminates pathways, highlights potential obstacles, and deters unwelcome visitors by eliminating dark hiding spots. This makes your property safer for family and friends.
Cost-Effective Landscape Transformation
Compared to dedicated, professionally installed landscape lighting systems, using Christmas lights for bushes can be a remarkably cost-effective way to transform your outdoor space. You can achieve stunning effects without breaking the bank, especially if you already own strands from previous seasons. Plus, the variety of light types and colors available gives you endless creative freedom.
Understanding Your Canvas: Assessing Your Bushes and Landscape
Before you string a single light, it’s smart to take a good look at your “canvas”—your bushes and the surrounding landscape. This step helps you plan effectively and choose the right approach for your unique space.
Bush Size and Shape: A Guiding Factor
The size and shape of your bushes will heavily influence your lighting strategy. Are they tall and columnar, or short and sprawling? A large, dense hedge might benefit from net lights, while a delicate, open shrub could be beautifully highlighted with carefully draped string lights. Understanding the natural form of each bush is key to achieving a harmonious look. Don’t try to force a square peg into a round hole.
Surrounding Environment: Complementing Your Home
Consider how the lit bushes will look in relation to your home and other outdoor features. Do you want the lights to be a bold statement or a subtle accent? Think about the existing architecture, the color of your house, and other landscape elements like patios, decks, or water features. The goal is to create a cohesive and appealing overall design that complements, rather than competes with, your home.
Power Accessibility: Planning Your Layout
This is a practical but crucial step. Where are your outdoor power outlets located? How far are they from the bushes you want to light? You’ll need to plan for extension cords and ensure you have enough safe, outdoor-rated power sources. Running too many lights from a single outlet can be dangerous, potentially tripping circuit breakers or, in severe cases, causing electrical fires. Always assess your power needs before you start plugging things in.
Choosing the Right Lights: A Deep Dive into Options
The world of Christmas lights has come a long way. Gone are the days of just a single type of bulb. Today, you have a vast array of choices, each with unique characteristics that make it suitable for different outdoor applications.
Types of Christmas Lights for Outdoor Use
Understanding the different light types is essential for creating the effect you desire and ensuring your display lasts.
Incandescent Lights: The Classic Glow (and Considerations)
Incandescent lights are the traditional bulbs you might remember from your childhood. They produce a warm, inviting glow that many people love. These lights work by heating a small filament inside a glass bulb, which then emits light.
While they offer a nostalgic feel, incandescents have some drawbacks for outdoor use. They consume significantly more electricity than LEDs, which means higher energy bills. They also generate heat, which can be a concern if placed directly against delicate foliage for extended periods. Furthermore, incandescent bulbs are more fragile and prone to breaking or burning out, requiring more frequent replacement. Their lifespan is generally much shorter than that of LEDs.
LED Lights: Efficiency, Durability, and Versatility
LED (Light Emitting Diode) lights have become the gold standard for modern outdoor lighting, and for good reason. They are incredibly energy-efficient, durable, and offer a wide range of colors and functionalities.
Understanding LED Technology: Lumens, Watts, and Lifespan
Instead of heating a filament, LEDs produce light through a semiconductor material. When an electric current passes through this material, it emits photons (light particles). The brightness of an LED is typically measured in lumens, which is a more accurate measure of light output than watts. While wattage indicates power consumption, lumens directly tell you how bright a light source appears. A typical LED string might consume only 5-10 watts but produce as much light as an incandescent string using 50-100 watts. This energy efficiency is a primary benefit.
LEDs also have an incredibly long lifespan, often lasting 25,000 to 50,000 hours or more, compared to 1,000-2,000 hours for incandescents. This means less frequent replacement and maintenance.
Advantages of LED for Outdoor Applications
For outdoor bush lighting, LEDs offer several key advantages:
- Energy Efficiency: They use up to 90% less energy than incandescents, significantly reducing your electricity bill.
- Durability: LEDs are made with epoxy lenses, making them much more resistant to breakage from impacts or weather. They also don’t have a fragile filament to burn out.
- Cool Operation: LEDs produce very little heat, making them safer for plants and reducing the risk of fire.
- Vibrant Colors: They offer a wider spectrum of colors, including pure white, warm white, cool white, and various hues. Many also feature color-changing capabilities.
- Longevity: Their extended lifespan means less hassle and replacement costs over time.
- Weather Resistance: Most outdoor-rated LEDs are designed to withstand rain, snow, and temperature fluctuations.
Net Lights: Effortless Coverage for Uniformity
Net lights are strings of lights pre-arranged in a grid or “net” pattern. They are incredibly convenient for covering large, uniformly shaped bushes or hedges. You simply drape the net over the bush, and it provides even, consistent lighting with minimal effort. They’re a great choice for a quick, professional-looking display.
Icicle Lights: Adding a Draping Effect
Icicle lights feature varying lengths of light strands that hang down from a main horizontal wire, creating a shimmering, icicle-like effect. While often used along rooflines, they can be creatively draped over larger bushes or hedges to add a unique, cascading layer of light. They work well for creating a whimsical, snow-dusted look.
String Lights: The Most Versatile Choice
Standard string lights (often called C7, C9, or mini lights depending on bulb size) are the most common and versatile type. They consist of individual bulbs spaced along a flexible wire. Their adaptability makes them perfect for wrapping, weaving, and shaping around bushes of all sizes and forms. You can use them for intricate designs or simple, elegant wraps.
Key Features for Outdoor Lighting: What to Look For
When buying lights for outdoor use, especially for prolonged periods, pay close attention to these critical features:
IP Rating: Understanding Water and Dust Resistance
The IP (Ingress Protection) rating is crucial for any outdoor electrical product. It’s a two-digit number where the first digit indicates protection against solids (like dust) and the second digit indicates protection against liquids (like water).
- First Digit (Solids): Ranges from 0 (no protection) to 6 (dust-tight).
- Second Digit (Liquids): Ranges from 0 (no protection) to 8 (protected against prolonged immersion).
For outdoor Christmas lights, you’ll generally want an IP rating of at least IP44 (protected against solid objects larger than 1mm and splashing water from any direction). Higher ratings like IP65 (dust-tight and protected against water jets) or IP67 (dust-tight and protected against temporary immersion) offer even greater durability for year-round exposure. Always check the IP rating on the product packaging to ensure it’s suitable for your intended outdoor use.
Wire Gauge and Durability: Built to Last Outdoors
The wire gauge refers to the thickness of the wire. A lower gauge number indicates a thicker wire. Thicker wires are generally more durable and less prone to breakage, especially in harsh weather conditions. For outdoor use, especially where lights might be exposed to wind, snow, or accidental tugs, look for lights with thicker, more robust wiring. The insulation around the wire should also be thick and flexible, able to withstand temperature extremes without cracking.
Bulb Spacing and Brightness: Achieving the Desired Effect
Bulb spacing (the distance between individual bulbs on a string) affects the overall density of light. Tighter spacing (e.g., 4-6 inches) creates a more concentrated, brighter look, while wider spacing (e.g., 8-12 inches) results in a more subtle, diffused glow.
Brightness is measured in lumens. Consider the ambient light in your area and the effect you want to achieve. For subtle accents, lower lumen lights might suffice. For a dramatic, eye-catching display, you’ll want brighter options.
Power Source Options: Plug-in, Battery, and Solar
Your choice of power source affects placement flexibility and installation complexity.
Plug-in Lights: Reliability and Power
Plug-in lights connect directly to an electrical outlet. They offer consistent brightness and reliability, making them ideal for larger displays or areas where power is readily accessible. You won’t have to worry about batteries running out. However, they require careful planning for extension cords and GFCIs.
Battery-Operated Lights: Flexibility and Placement
Battery-operated lights are incredibly versatile because they don’t need an outlet. This means you can light up bushes in remote areas of your garden, on fences, or in planters far from your home. They typically use AA, AAA, or D batteries. While offering freedom of placement, their brightness can dim as batteries lose power, and you’ll need to replace batteries periodically. Some models include timers to conserve battery life.
Solar-Powered Lights: Eco-Friendly and Convenient
Solar-powered lights harness energy from the sun during the day, storing it in a rechargeable battery, and then automatically turn on at dusk. They are environmentally friendly and require no wiring or outlets. Their effectiveness, however, depends entirely on sunlight exposure. In shady areas or during prolonged cloudy periods, they may not charge fully and will appear dimmer or not last as long. They are best for accent lighting rather than bright, functional illumination.
Smart Lighting Features: Automation and Control
Many modern outdoor lights, particularly LEDs, come with smart features. These can include:
- Timers: Automatically turn lights on and off at set times.
- Dimmers: Adjust the brightness level.
- Color-Changing: Cycle through different colors or allow you to choose a specific hue.
- App Control: Control lights from your smartphone via Wi-Fi or Bluetooth.
- Music Synchronization: Some advanced systems can even sync lights to music.
These features offer immense convenience and allow for dynamic, personalized displays.
Creative Techniques for Dazzling Bush Displays
Now for the fun part: turning your bushes into works of art! There are numerous ways to apply lights, each creating a distinct visual impact.
Wrapping Techniques: From Spirals to Globes
Wrapping is the most common technique and offers incredible versatility.
The Classic Wrap: Simple and Elegant
For a straightforward, elegant look, simply wrap string lights around the bush, starting from the base and working your way up. Keep the spacing consistent for a uniform glow. This method works well for conical or upright bushes. Think of it like wrapping a Christmas tree, but on a smaller scale.
Spiral Wrap: Dynamic and Eye-Catching
A spiral wrap involves winding the lights in a helix pattern up the bush. This creates a dynamic visual flow, drawing the eye upwards. It’s particularly effective on taller, narrower shrubs like junipers or small evergreens. Begin at the bottom and angle the string upwards, maintaining an even distance between each revolution.
Globe or Ball Wrap: Creating Spherical Illumination
If you have rounded bushes or want to create the illusion of glowing orbs, the globe or ball wrap is ideal. Start by anchoring the lights at the base, then crisscross and weave the string randomly across the bush, filling in gaps until the entire surface is evenly covered. This method aims for a dense, full look, making the bush appear like a solid sphere of light.
Weaving Lights Through Branches: A Natural Look
For a more subtle, integrated look, weave lights through the inner branches of the bush rather than just on the surface. This creates a soft, diffused glow that seems to emanate from within the plant itself. It’s perfect for open-structured shrubs where you want to highlight their natural form without making the lights too obvious.
Net Light Application: Quick and Even Coverage
As mentioned, net lights are perfect for hedges or large, boxy bushes. Simply drape the net over the top of the bush, ensuring it covers the desired area. You might need to gently adjust the net or use a few garden clips to secure it in place, especially on windy days. This method is incredibly fast and produces a uniform, professional finish with minimal effort.
Layering Lights: Adding Depth and Dimension
Don’t be afraid to layer different types of lights or different colors for added depth. For example, you could wrap a bush with warm white string lights for a base glow, then add a layer of net lights with cool white bulbs on top for a subtle contrast. Or, use smaller mini-lights deep within the bush and larger C7 or C9 bulbs on the exterior. Layering creates a more sophisticated, multi-dimensional display.
Themed Displays: Integrating Lights with Decorations
Think beyond just lights. Integrate them with other outdoor decorations to create a themed display. For instance, wrap lights around a bush, then add oversized ornaments, weatherproof bows, or even small figurines. For a winter wonderland theme, combine blue or cool white lights with artificial snow and silver accents. For a rustic look, use warm white lights with natural elements like pinecones.
Uplighting and Downlighting: Creating Dramatic Effects
While stringing lights on bushes is popular, consider uplighting or downlighting them for dramatic effect. This involves placing spotlights (often separate landscape lighting fixtures, but some Christmas light sets offer stake lights) at the base of a bush to project light upwards, highlighting its shape and texture. Conversely, downlighting involves placing lights above the bush to shine light downwards, creating shadows and depth. Combining these techniques with wrapped lights can create truly stunning nighttime scenery.
Combining Light Types: Mixing Textures and Colors
Don’t limit yourself to just one type of light! Mixing mini lights with larger C7/C9 bulbs, or incorporating specialty lights like fairy lights or pathway lights, can add visual interest. Experiment with warm white and cool white lights for contrast, or introduce subtle splashes of color. Just be mindful not to overdo it; sometimes less is more.
Installation Essentials: Safety and Practicality First
Before you get lost in the glow, remember that electricity and the outdoors require careful handling. Safety should always be your top priority.
Planning Your Design: Sketching It Out
Before you even unbox your lights, take a few minutes to sketch out your design. This doesn’t have to be a masterpiece; a simple drawing on paper showing where each bush is, where power outlets are, and how you plan to run the lights can save you a lot of time and frustration. It helps you estimate how many light strands you’ll need and identify potential power challenges.
Power Safety: GFCI Outlets and Extension Cords
This is critically important.
The Importance of GFCI Outlets
All outdoor electrical outlets should be GFCI (Ground Fault Circuit Interrupter) protected. A GFCI outlet is designed to quickly shut off power if it detects a ground fault, which is an unintentional electrical path to the ground. This can happen if water gets into an electrical connection, and a GFCI can prevent electric shock or electrocution. If your outdoor outlets aren’t GFCI protected, you can purchase portable GFCI adapters that plug into standard outlets. Never use outdoor lights with non-GFCI protected outlets.
Choosing Outdoor-Rated Extension Cords
Only use outdoor-rated extension cords (often green or black, thicker, and marked for outdoor use). These cords are designed to withstand moisture, temperature fluctuations, and UV exposure. Check the gauge of the extension cord; lower gauge numbers (e.g., 12 or 14 gauge) indicate thicker wires capable of handling more power, which is important for longer runs or multiple light strands. Always ensure the total wattage of your lights does not exceed the capacity of your extension cord or outlet. Overloading circuits is a major fire hazard. Keep all connections off the ground and consider using waterproof connection boxes for added protection from rain and snow.
Securing Lights: Avoiding Wind and Critter Damage
Once your lights are in place, make sure they’re secure. Wind can quickly dislodge strands, and curious critters like squirrels can chew through wires. Use plastic zip ties, garden clips, or floral wire to fasten lights to branches. Avoid using metal staples or nails, as these can damage wires and create electrical hazards. For net lights, consider using landscape stakes or heavy rocks to hold down the edges.
Ladders and Tools: Reaching High Places Safely
If you’re decorating taller bushes or hedges, use a stable ladder appropriate for the height you need to reach. Always have someone spot you, and ensure the ladder is on firm, level ground. Wear gloves to protect your hands from scratches and a headlamp if working in dim light. Keep small tools like wire cutters or garden scissors handy for precise adjustments.
Working with Existing Landscaping: Protecting Plants
Be gentle with your plants! Avoid pulling or tugging harshly on branches. If a branch seems too delicate, find an alternative way to drape or secure the lights. Don’t wrap lights so tightly that they constrict growth. For permanent installations, allow room for future growth. Remember, the goal is to enhance your plants, not harm them.
Hiding Wires: A Tidy and Professional Look
Visible wires can detract from your beautiful light display. Take time to hide wires as much as possible. You can run them along the ground behind bushes, tuck them under mulch, or use clips to secure them along fences or house foundations. For longer runs, consider burying outdoor-rated extension cords in shallow trenches, ensuring they are protected by conduit. A neat installation makes a huge difference in the overall aesthetic.
Year-Round Bush Lighting: Extending the Magic
Why limit the beauty of outdoor lights to just a few weeks in December? Many modern LED lights are robust enough for year-round outdoor use, transforming your landscape into an enchanting space every day.
Permanent Installation Considerations
If you plan for a permanent display, you’ll want to invest in high-quality, commercial-grade outdoor LED lights. These are designed for continuous exposure to the elements. When installing permanently, think about future plant growth and how lights might need to be adjusted over time. Using heavy-duty clips and weather-resistant connections is even more critical. Some homeowners even opt for low-voltage landscape lighting systems that use Christmas-style bulbs for a more integrated, permanent solution.
Choosing Durable, Weather-Resistant Lights
For continuous outdoor exposure, look for lights with excellent IP ratings (IP65 or higher are ideal). The wires should be heavy-duty, often with thicker insulation. Some manufacturers offer “commercial grade” or “all-weather” LED light strings that are specifically designed for harsh conditions. These usually have sealed bulb bases to prevent moisture intrusion.
Low-Voltage vs. Line-Voltage Systems for Permanent Use
For permanent, year-round lighting, you might consider either low-voltage (12V) or line-voltage (120V) systems.
- Line-voltage (120V) systems use the standard household voltage. While powerful and bright, they require more stringent safety measures, including GFCI protection at every outlet and adherence to local electrical codes. The Christmas lights we’ve primarily discussed fall into this category.
- Low-voltage (12V) systems use a transformer to step down the household voltage to a much safer 12 volts. These systems are generally easier and safer for DIY installation, and the risk of electric shock is significantly reduced. While traditional “Christmas lights” are typically 120V, some manufacturers now offer 12V versions that are part of broader landscape lighting systems. These are excellent for permanent installations around bushes, as they are often more discreet and designed for long-term outdoor exposure. You’ll often see specific landscape lighting products for this.
The choice between the two depends on your comfort level with electrical work, the scale of your project, and local regulations. For true permanent, integrated landscape lighting, a low-voltage system often provides the best long-term solution.
The Benefits of Year-Round Landscape Lighting
Security and Visibility
Well-lit bushes and pathways deter potential intruders. Dark areas provide cover, while illuminated spaces make your property less appealing to trespassers. It also improves visibility for you and your guests, preventing trips and falls.
Aesthetic Enhancement Beyond Holidays
Imagine your garden subtly illuminated every evening, highlighting the textures of your foliage or the vibrant colors of a blooming bush. Year-round lighting enhances the beauty of your landscape after dark, turning it into an extension of your living space.
Seasonal Adjustments: Adapting for Different Times of Year
While the lights stay up, you can still adapt your display for different seasons. For spring, you might use brighter, cooler white lights to mimic natural daylight. In summer, warm white or soft colors create a cozy ambiance. Fall can be accentuated with amber or orange hues, while winter naturally calls for cool whites, blues, or traditional multi-colors. Smart lighting systems make these adjustments effortless.
Troubleshooting Common Issues
Even the best-laid plans can encounter minor hiccups. Here are some common problems and quick solutions.
Lights Not Working: Basic Checks
- Check the Plug: Is it fully plugged into the GFCI outlet?
- GFCI Tripped: Has the GFCI outlet tripped? Press the “Reset” button.
- Fuses/Bulbs: If one section is out, check for a blown fuse in the light strand’s plug or a single burnt-out bulb (especially with older incandescent strings, where one bad bulb can break the circuit).
- Loose Connections: Ensure all connections between strands are secure and dry.
Flickering Lights: Potential Causes
Flickering can be annoying. Common causes include:
- Loose Bulb: A single loose bulb in an incandescent string.
- Faulty Connection: A loose or corroded connection in the plug or between strands.
- Overloaded Circuit: Too many lights on one circuit can cause voltage drops, leading to flickering.
- Defective Strand: If all else fails, the strand itself might be faulty.
Weather-Related Problems: Dealing with Rain and Snow
- Moisture Intrusion: Ensure all outdoor connections are waterproofed with electrical tape or specialized connection boxes.
- Snow and Ice Buildup: Heavy snow can weigh down branches and damage lights. Gently brush off heavy accumulations. Avoid pulling on frozen wires.
- Wind Damage: As mentioned, secure lights properly to prevent them from being blown around.
Critter Damage: Prevention and Repair
Squirrels, rabbits, and other rodents can chew through light wires.
- Prevention: Use critter-resistant wiring if available (some outdoor-rated cords have tougher jackets). Tuck wires away from easy access. Some people use pepper spray (non-toxic, animal-safe) or deterrents around light areas, but this isn’t always effective.
- Repair: For minor nicks, you can use outdoor-rated electrical tape. For significant damage or cut wires, it’s safer to replace the entire strand or consult an electrician. Never try to repair live wires.
Maintenance and Storage Tips
Proper care extends the life of your lights and keeps them performing beautifully season after season.
Regular Cleaning: Keeping Lights Bright
Over time, dust, dirt, and pollen can accumulate on bulbs and wires, dimming their shine. Periodically wipe down bulbs and wires with a damp cloth (ensure lights are unplugged first!). For year-round lights, a gentle spray with a hose (if lights are rated for it) can help, but avoid high pressure.
Inspecting for Damage: Pre-Season Checks
Before putting up your lights each season (or checking your year-round display), thoroughly inspect every strand for damage. Look for:
- Cracked or frayed wires
- Broken or missing bulbs
- Corroded plugs or connectors
- Damage from critters or weather
Replace any damaged strands immediately. Don’t risk electrical hazards.
Proper Storage: Extending Lifespan
When the time comes to take down your seasonal lights, proper storage is key.
- Untangle Carefully: Avoid tangling by wrapping strands around a cardboard cutout, a reel, or even a sturdy coat hanger.
- Store in Dry Place: Keep lights in airtight containers or plastic bins to protect them from moisture, dust, and pests.
- Cool, Dark Location: Store them in a cool, dark, dry place like a garage or basement. Extreme temperatures can degrade wire insulation and bulb components over time.
Energy Efficiency: Timer Usage and Smart Controls
To save energy and extend the life of your lights, use timers. Most modern outdoor light strands have built-in timers, or you can purchase inexpensive outdoor-rated mechanical or digital timers. Set them to turn on at dusk and off a few hours later, or after you’ve gone to bed. If you have smart lights, utilize their scheduling features to automate this process and even dim lights during certain hours.
Beyond the Ordinary: Inspiring Bush Lighting Ideas
Let’s spark some inspiration for truly unique bush lighting displays!
Minimalist Elegance: Subtle Accents
Sometimes, less is more. For a minimalist approach, use warm white micro-LED fairy lights woven sparingly through delicate bushes. This creates a soft, ethereal glow that highlights the plant’s natural beauty without being overtly “Christmasy.” It’s perfect for creating a sophisticated ambiance.
Vibrant Color Displays: Bold and Playful
If you love color, don’t shy away from it! Use color-changing LED lights to create dynamic, ever-shifting displays. Or, choose specific colors to match a party theme, a holiday (e.g., red and green for Christmas, orange and purple for Halloween), or even your favorite sports team. Remember that bold colors can be very eye-catching.
Pathway Illumination: Guiding Guests
Line your garden pathways with lights by wrapping them around low-lying bushes or shrubs along the edge. This not only looks inviting but also serves a practical purpose by illuminating the path for guests. Combine string lights on bushes with small pathway stake lights for a layered effect.
Feature Bush Spotlighting: Highlighting Key Plants
Do you have a particularly beautiful specimen bush, a unique topiary, or a flowering shrub you’re proud of? Make it a focal point by liberally wrapping it with lights, or by using a combination of internal weaving and external wrapping to make it truly glow. This draws attention to your garden’s stars.
Creating an “Outdoor Room” with Light
Use your bush lighting to define and enhance outdoor living spaces. If you have a patio or seating area, light the bushes surrounding it to create a sense of enclosure and intimacy, like an “outdoor room.” This makes the space feel cozy and inviting for evening gatherings. Combine with overhead string lights for a complete outdoor room experience.
Conclusion: Illuminate Your Landscape All Year Long
Moving beyond the tree opens up a world of possibilities for your outdoor lighting. Christmas tree lights, particularly durable and energy-efficient LED options, are no longer just for the festive season. By understanding the types of lights, mastering creative techniques, prioritizing safety, and embracing year-round potential, you can transform your bushes and shrubs into breathtaking illuminated masterpieces. So, go ahead, unplug those lights from the attic, and let your landscape shine bright, all year long!