This post may contain affiliate links. If you make a purchase through these links, we may earn a commission at no additional cost to you.
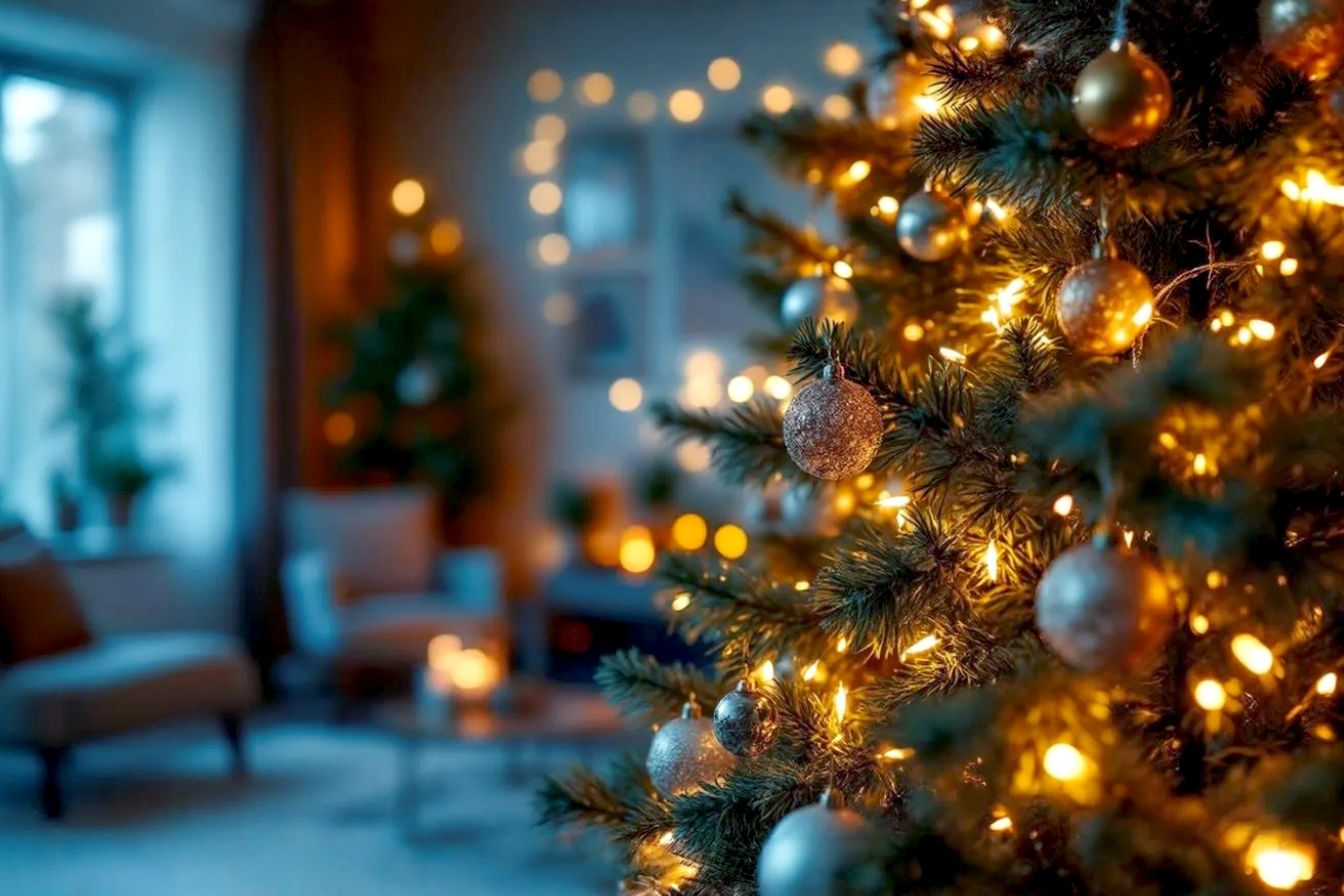
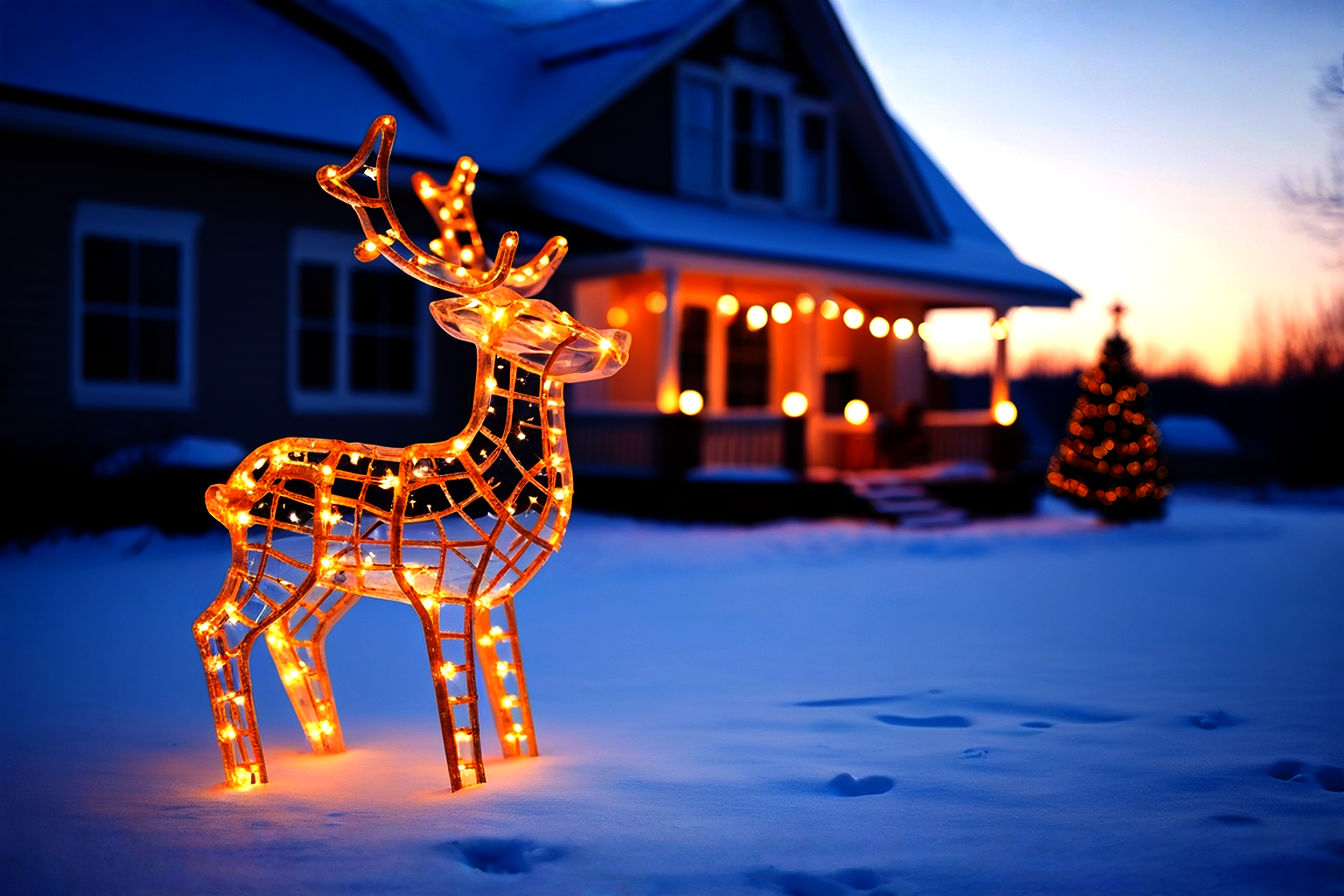
The holiday season often brings with it cherished traditions: classic carols, festive meals, and of course, the beloved Christmas tree. For many, this means a tree adorned in timeless red and green, perhaps with a touch of gold or silver. While these traditional displays are beautiful and comforting, there’s a growing trend to step outside the conventional and infuse more personality into holiday decor. If you’re looking to make your Christmas tree a true reflection of your unique style, interests, or even a whimsical fantasy, this guide is for you.
Introduction: Deck the Halls Differently This Holiday Season
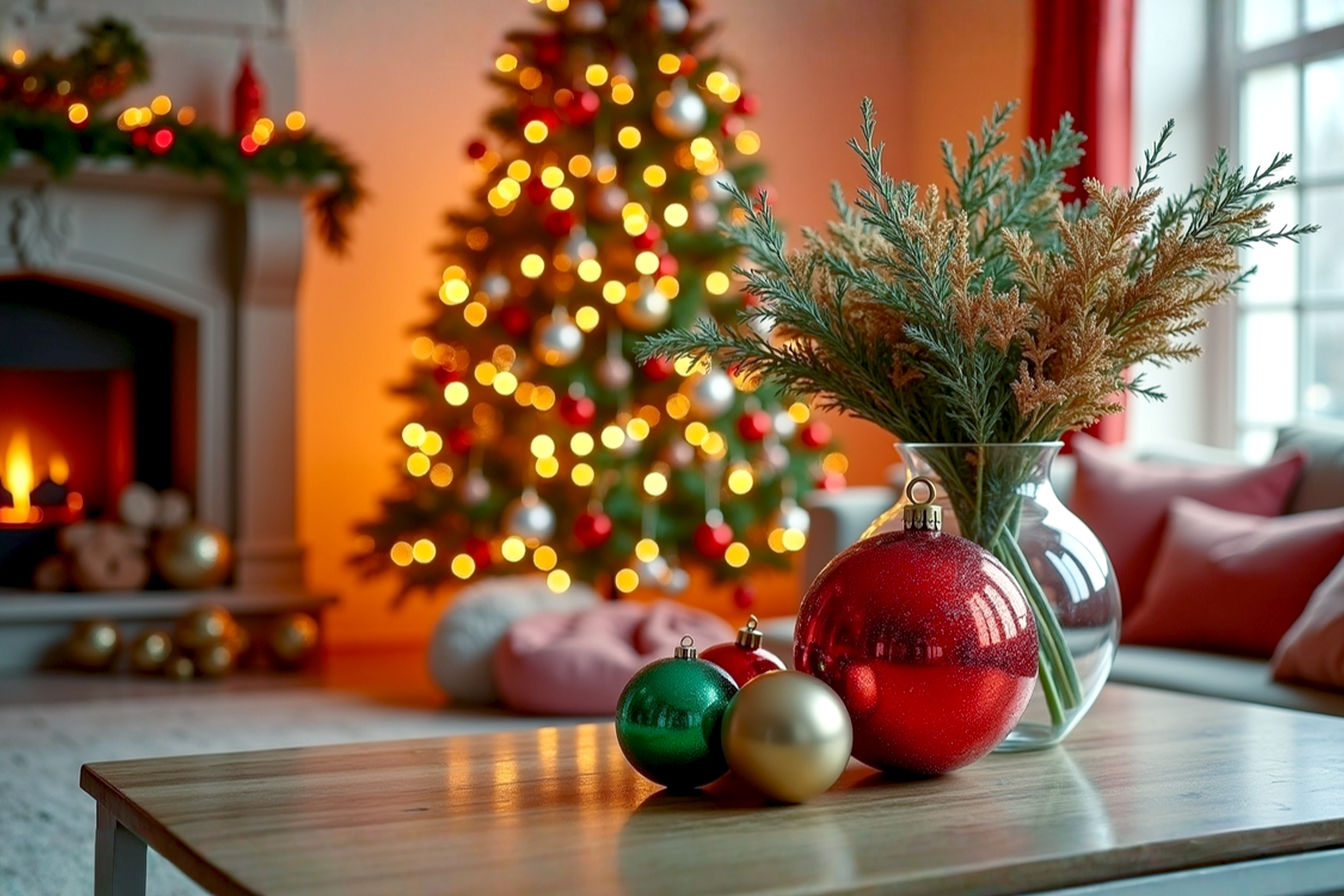
Christmas trees are more than just decorations; they’re canvases for our holiday spirit. This year, why not transform yours into something truly extraordinary? Moving beyond the traditional color schemes and familiar ornaments can unlock a whole new level of festive fun.
Why Break from Tradition? The Appeal of Unique Christmas Tree Themes
For generations, the classic red and green Christmas tree has been a staple in homes around the world. It evokes a sense of nostalgia and comfort, reminding us of holidays past. However, sticking to the same decor year after year can sometimes feel a bit repetitive. Embracing a unique Christmas tree theme allows you to break free from this cycle and inject fresh energy into your holiday celebrations.
One of the biggest appeals is the chance to express your personality and creativity. Your home is a reflection of who you are, and your Christmas tree can be too. Whether you’re an avid traveler, a gaming enthusiast, a nature lover, or someone with a sweet tooth, a themed tree lets you tell a story. It’s an opportunity to showcase your passions, hobbies, or even a sense of humor. This personal touch makes your holiday display feel more authentic and special.
Beyond self-expression, unique themes help create memorable holiday experiences. Imagine the delight on your children’s faces when they see a tree covered in lollipops and gingerbread, or the conversations sparked when guests discover a tree adorned with vintage video game characters. These distinctive displays become talking points, fostering joy and creating new traditions that your family will cherish for years to come. The process of planning and decorating a themed tree can become an event in itself, bringing family and friends together in a fun, collaborative activity. It’s not just about the end result; it’s about the shared experience of bringing a creative vision to life.
What Makes a “Fun” Theme? Defining the Criteria
When we talk about “fun” Christmas tree themes, we’re looking for more than just a different color scheme. A truly fun theme embodies several key characteristics:
Firstly, it should have an element of playfulness and imagination. These aren’t meant to be overly formal or rigid. Instead, they encourage whimsy, unexpected elements, and a sense of lightheartedness. Think outside the box and let your imagination run wild.
Secondly, a fun theme should offer engagement for all ages. While some themes might appeal more to adults, the best ones have elements that captivate children and adults alike. This could be through vibrant colors, recognizable characters, or interactive elements. The goal is to create a tree that everyone in the household can appreciate and enjoy.
Thirdly, a great theme allows for personal connection and storytelling. It’s not just about aesthetics; it’s about what the theme means to you. Perhaps it’s a nod to a favorite family vacation, a beloved book series, or a shared hobby. When a theme resonates personally, the decorating process becomes more meaningful, and the final display feels truly yours. This personal narrative adds depth and character to your tree, making it more than just a collection of ornaments.
Finally, a fun theme often provides an opportunity for creative DIY. Many unique themes lend themselves beautifully to handmade ornaments and decorations. This not only saves money but also adds a unique, handcrafted charm that store-bought items can’t replicate. DIY projects can also be a fantastic way to involve family members in the decorating process, turning it into a collaborative and enjoyable activity. The imperfections of handmade items often add to the character and charm of a themed tree, making it feel more authentic and personal.
Planning Your Themed Tree: Getting Started
Embarking on a themed Christmas tree project requires a bit of forethought, but the planning process itself can be part of the fun.
The first step is choosing the right theme for your home and family. Consider your existing decor: will a vibrant candy land tree clash with your minimalist living room, or will it provide a delightful contrast? Think about the personalities in your household. If you have young children, a whimsical or character-driven theme might be a hit. If you’re an avid traveler, a global wanderlust theme could be perfect. Don’t be afraid to brainstorm ideas with your family; collective input often leads to the most successful and beloved themes.
Next, it’s important to consider your budget and time commitment. Some themes might require more specialized ornaments or materials, while others can be achieved with mostly DIY elements. Decide how much you’re willing to spend and how much time you have for crafting or shopping. A well-planned budget helps prevent overspending and ensures you can achieve your vision without stress. Similarly, understanding the time commitment helps you pace yourself and enjoy the process rather than rushing through it.
Finally, gathering inspiration is crucial. Look at images online, browse holiday magazines, or even visit local craft stores for ideas. Create a mood board, either physical or digital, with colors, textures, and specific ornaments that align with your chosen theme. This visual guide will help you stay focused and ensure a cohesive look when you start decorating. A clear vision board acts as your blueprint, guiding your choices and ensuring that every element contributes to the overall theme.
The Foundation of a Fantastic Themed Tree: Core Decorating Principles
Before diving into specific themes, understanding some fundamental Christmas tree decorating principles will help ensure your themed creation looks professional and polished. These principles apply whether you’re going traditional or wildly unique.
Selecting Your Canvas: Tree Type and Size Considerations
The tree itself is the foundation of your holiday display, and its characteristics can significantly impact your chosen theme.
You’ll need to decide between a real vs. artificial tree. Real trees offer a delightful pine scent and a classic feel, but they require watering and needle cleanup. Artificial trees, on the other hand, are convenient, reusable, and come in a wider variety of colors and pre-lit options, which can be a huge advantage for themed decorating. For instance, a white artificial tree might be the perfect “snowy” base for a winter wonderland or candy land theme, while a traditional green tree might better suit an enchanted forest look. The durability of artificial trees also means they can support heavier or more numerous themed ornaments without drooping.
Size and shape are also critical. A tall, slender tree might be ideal for a minimalist or elegant theme, while a wider, fuller tree can accommodate more ornaments for a maximalist or heavily themed display. Ensure the tree’s size is proportionate to the room it’s in. A tree that’s too large can overwhelm a small space, making the theme feel cramped, while a tree that’s too small might get lost in a grand room. Consider the ceiling height and the available floor space when making your selection.
Finally, consider whether you want a flocked vs. green tree. A flocked tree, which has artificial snow applied to its branches, instantly creates a winter wonderland feel, perfect for themes like “Candy Land” or “Enchanted Forest” where a snowy backdrop enhances the magic. A traditional green tree offers a versatile base that can be transformed with any color palette and theme, acting as a neutral backdrop for your chosen decorations. The base color of your tree is a foundational element that subtly influences the overall mood and aesthetic of your themed display.
Lighting It Up: The Essential Glow
Lights are the first layer of decoration and are crucial for setting the mood of your themed tree. They provide the literal and metaphorical sparkle.
The choice between warm white, cool white, or colored lights significantly impacts the ambiance. Warm white lights (often with a yellowish glow) create a cozy, inviting, and nostalgic feeling, perfect for rustic or traditional themes. Cool white lights (with a bluish tint) offer a crisp, modern, and icy look, ideal for winter wonderland or futuristic themes. Colored lights bring a playful, vibrant energy, making them perfect for themes like “Candy Land” or “Retro Nostalgia.” Some trees even come with multi-function lights that allow you to switch between colors and effects, offering versatility for future themes.
Layering lights is a professional technique that adds depth and dimension. Start by stringing lights deep within the branches, closer to the trunk, to create an inner glow. Then, work your way outwards, wrapping lights around the tips of the branches. This technique ensures an even distribution of light and makes the tree appear fuller and more luminous. Don’t just drape lights on the outside; the internal glow makes a huge difference.
Consider specialty lights to enhance your theme. For a “Candy Land” tree, bubble lights or strings of lights shaped like lollipops could be delightful. For a “Retro Nostalgia” theme, classic C7 or C9 bulbs with their large, colorful glow might be perfect. These unique light strings can serve as ornaments themselves, adding another layer of thematic detail.
The Art of Layering: Building Depth and Visual Interest
Layering is key to a full, rich, and visually interesting themed tree. It’s about building up your decorations from the inside out, creating a cohesive and abundant look.
Start with ribbons and garlands. These elements create a cohesive flow throughout the tree, guiding the eye and adding texture. You can weave wide ribbons vertically down the tree, horizontally around it, or create large bows. Garlands, whether beaded, tinsel, or thematic (like popcorn for a movie theme), fill in gaps and add continuous lines of interest. Choose colors and materials that complement your theme. For example, a burlap garland for an “Enchanted Forest” tree or a metallic tinsel garland for a “Retro Nostalgia” theme. The way you drape or weave these elements can dramatically alter the tree’s perceived shape and density.
Next, add filler ornaments. These are typically smaller, less expensive ornaments that you use to fill in any bare spots and add volume. They don’t necessarily have to be highly thematic, but their color and texture should blend with your overall palette. Think of them as the supporting cast that makes your feature ornaments shine. Simple ball ornaments in coordinating colors, or basic shapes like stars and snowflakes, work well as fillers. They provide a base layer of sparkle and color, ensuring no part of the tree looks sparse.
Finally, place your feature ornaments. These are the stars of your theme – the unique, detailed, or handmade pieces that truly define your chosen concept. Place these strategically throughout the tree, ensuring they are visible from all angles and evenly distributed. These are the ornaments that tell your story and capture the essence of your theme. Give them pride of place, ensuring they are well-lit and not obscured by other decorations.
Topper and Skirt: The Finishing Touches
The tree topper and skirt are the bookends of your Christmas tree, providing crucial finishing touches that tie the entire theme together.
A custom topper can elevate your theme from great to extraordinary. Instead of a traditional star or angel, think about a topper that directly reflects your theme. For a “Candy Land” tree, a giant lollipop or a gingerbread house could be perfect. A “Global Wanderlust” tree might feature a miniature globe or a hot air balloon. These unique toppers become a focal point, immediately communicating your tree’s theme. They are the crowning glory, completing the visual narrative you’ve created.
Similarly, the tree skirt or collar completes the look at the base. A well-chosen skirt hides the tree stand and provides a soft landing for presents, but it also extends your theme to the very bottom. A faux fur skirt for an “Enchanted Forest” tree, a tie-dye skirt for a “Retro Nostalgia” theme, or a world map skirt for a “Global Wanderlust” tree can significantly enhance the overall presentation. Tree collars, which are rigid rings that encircle the base, offer a more modern and clean look and can also be chosen or decorated to match your theme. The skirt or collar acts as a frame, ensuring the entire display feels polished and intentional.
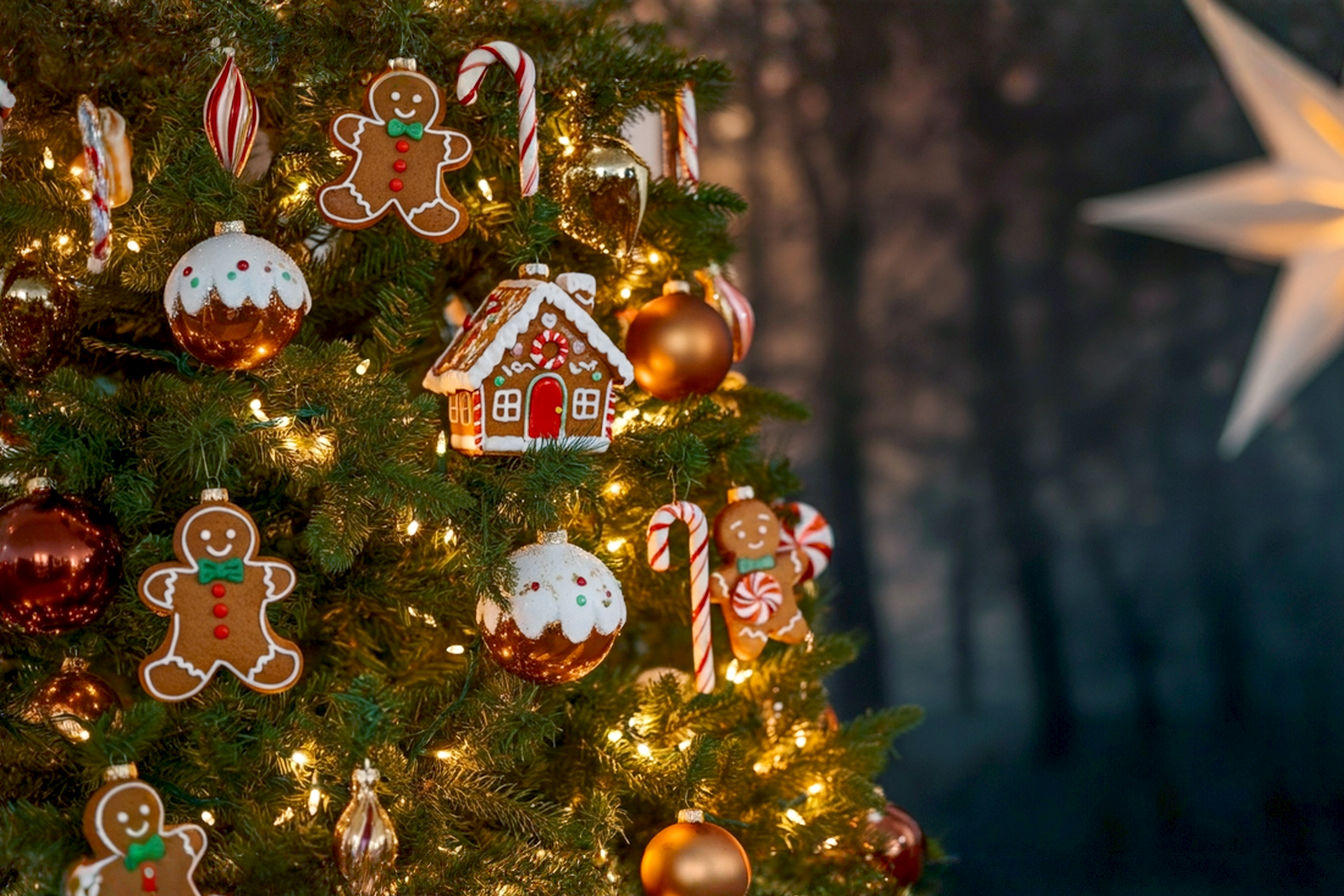
Theme 1: Whimsical Candy Land Christmas Tree
Imagine stepping into a world made of sugar, where every branch sparkles with confectionery delights. A Whimsical Candy Land Christmas Tree is an explosion of color, sweetness, and playful charm, perfect for families, those with a sweet tooth, or anyone who wants to inject pure joy into their holiday decor.
Sweet Dreams and Sugar Plums: The Concept
The core idea behind this theme is to transform your Christmas tree into a giant, edible-looking masterpiece, reminiscent of a fantastical candy store or a scene from a sugary fairytale. It’s inspired by classic candies, decadent desserts, and the vibrant, almost neon, colors often associated with confectionery. This theme is incredibly playful and imaginative, making it ideal for homes with children or for those who simply love a cheerful, bright aesthetic. It evokes a sense of childlike wonder and pure, unadulterated happiness. The goal is to create a visual feast that makes you almost want to take a bite out of the decorations.
Color Palette and Materials
The color palette for a Candy Land tree is anything but subtle. Think bright pastels like bubblegum pink, sky blue, mint green, and lemon yellow, often accented with neon brights for an extra pop. Glitter and metallics (especially silver and iridescent finishes) are essential to give that sugary, frosted look. White is also a key color, often used to mimic icing or snow.
When it comes to materials, durability and visual appeal are key. Plastic and resin are common for pre-made candy ornaments, offering a shiny, hard candy appearance. Fabric and felt are excellent for DIY projects, allowing you to create soft, plush versions of cupcakes, cookies, or gingerbread figures. Pipe cleaners can be twisted into swirly lollipops or candy canes. Incorporating iridescent materials like cellophane or tinsel adds a shimmery, sugary glaze effect, making the tree look even more delicious.
Ornamentation: A Feast for the Eyes
This is where the Candy Land theme truly comes alive. Your ornaments should look good enough to eat!
- Classic Candies: Candy canes (real or faux), lollipops (especially oversized, colorful swirls), and gumdrops are must-haves. You can find these as pre-made ornaments or easily craft them.
- Decadent Desserts: Think cupcakes with frosting and sprinkles, doughnuts, ice cream cones, and gingerbread figures (men, houses, stars). These add a delightful, homemade touch.
- Sweet Treats: Chocolate bars, peppermints, and gummy bears can be represented as ornaments. For a truly whimsical touch, you can even incorporate actual wrapped candies (like foil-wrapped chocolates or individually wrapped hard candies) for a temporary, edible display, though these should be removed before they melt or attract pests.
- DIY Ideas:
- Felt Candies: Cut felt into candy shapes, stuff them lightly, and sew or glue them together. Add beads or glitter for sprinkles.
- Glittered Foam Shapes: Purchase foam balls or shapes, cover them in glue, and roll them in various colors of glitter to create sparkling “sugar” ornaments.
- Painted Ornaments: Plain glass or plastic ball ornaments can be painted to resemble gumballs, peppermints, or even mini cupcakes. Add puff paint for frosting effects.
- Cookie Cutter Ornaments: Use large cookie cutters to trace and cut out shapes from stiff felt or foam, then decorate.
Garlands, Ribbons, and Fillers
These elements help to tie the candy theme together and add volume.
- Gumball Machine Garlands: String together colorful pom-poms or small, bright plastic balls to mimic gumballs.
- Peppermint Swirl Ribbons: Look for wide ribbons with red and white peppermint swirl patterns, or create your own by painting stripes on plain white ribbon.
- Cotton Candy “Clouds”: Use fluffy white or pastel pink batting or faux snow to create soft, cloud-like fillers that resemble cotton candy.
- Iridescent Tinsel: This adds a sugary shimmer and fills in gaps, enhancing the magical, sweet aesthetic.
- Sprinkle-like Strands: Use very fine glitter or small, colorful beads strung together to mimic sprinkles cascading down the tree.
Topper and Skirt Ideas
The topper and skirt should be the cherry on top (or the base) of your candy creation.
- Giant Lollipop: A large, colorful swirl lollipop made from foam or cardboard and glittered.
- Gingerbread House: A miniature, intricately decorated gingerbread house.
- Candy Swirl Star: A traditional star shape adorned with candy swirls and glitter.
- Cupcake Wrapper Skirt: Use oversized cupcake wrappers or fabric cut and gathered to resemble them around the base.
- Striped Candy Cane Skirt: A tree skirt with bold red and white stripes, mimicking a giant candy cane.
Beyond the Tree: Extending the Candy Land Theme
To fully immerse your home in the Candy Land experience, extend the theme beyond the tree itself. Place oversized lollipops or candy canes in planters around the room. Create a “gingerbread village” on a nearby console table. Hang garlands of colorful paper lanterns or string lights that resemble candy dots. Use apothecary jars filled with real candies (that can be eaten later!) as decorative accents. Even your gift wrapping can reflect the theme with bright colors, glitter, and candy-themed tags. This holistic approach creates a truly enchanting and cohesive Candy Land wonderland.
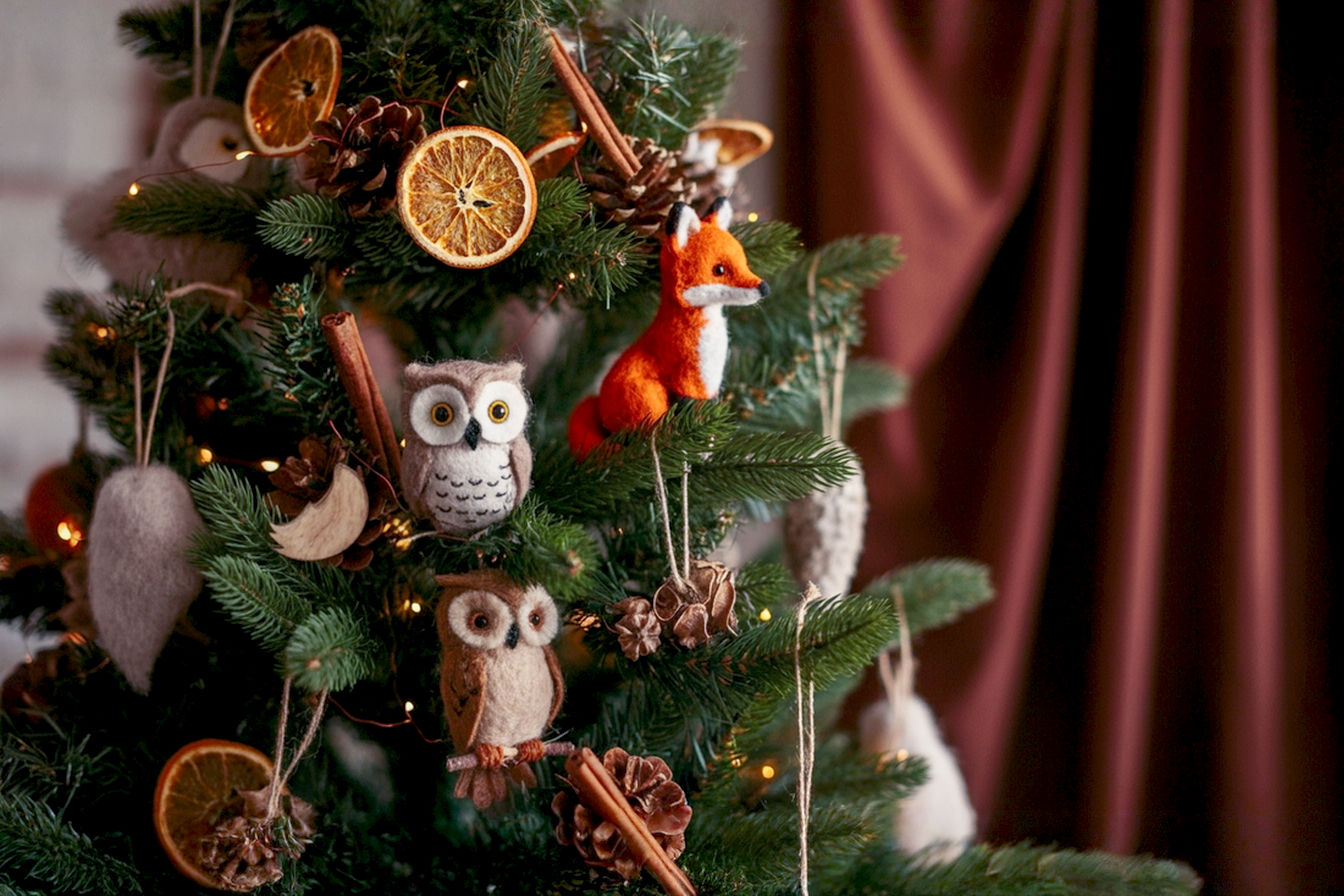
Theme 2: Enchanted Forest/Woodland Wonderland Tree
Step into a serene, magical realm where nature’s beauty meets fairytale charm. An Enchanted Forest or Woodland Wonderland Tree brings the tranquility and whimsy of a magical forest directly into your living room. This theme is perfect for those who love rustic decor, natural elements, and a cozy, mystical ambiance.
Nature’s Magic Indoors: The Concept
The core concept is to recreate the serene and mystical atmosphere of a deep forest, particularly one that feels alive with hidden creatures and ancient magic. It’s about blending the raw beauty of natural elements with a touch of whimsical fantasy. Imagine mossy trees, glowing fireflies, and gentle forest creatures peeking out from behind branches. This theme focuses on bringing the outdoors in, celebrating the quiet majesty of nature during the winter season. It’s a departure from the bright, bold colors of traditional Christmas, opting instead for a more muted, earthy, and sophisticated palette that evokes a sense of peace and wonder.
Color Palette and Materials
The color palette for an Enchanted Forest tree is inspired directly by nature. Think deep greens (like forest green and moss green), rich browns (bark, soil), deep reds (berries, mushrooms), and golds or silvers for a touch of magical sparkle, often in muted, antique finishes. Muted blues can also be incorporated to represent twilight or icy streams.
Materials are predominantly natural or natural-looking. Wood (slices, carved figures, twigs) is fundamental. Burlap adds a rustic texture. Pinecones, acorns, and berries are essential natural elements. Faux fur can mimic animal textures or snowy ground. Feathers add a delicate, airy touch, while moss (real or artificial) provides an authentic forest floor feel. Incorporating twigs, branches, and dried botanicals further enhances the organic aesthetic, creating a tree that feels truly grown from the earth.
Ornamentation: Creatures and Natural Wonders
The ornaments are the inhabitants and treasures of your enchanted forest.
- Forest Creatures: Owls, foxes, deer, squirrels, rabbits, and birds are key inhabitants. Look for realistic or stylized figures. Gnomes, fairies, and woodland sprites add the “enchanted” element, bringing a sense of magic and folklore.
- Natural Elements: Acorns, mushrooms (especially red and white toadstools), pinecones (natural or glittered), and dried orange slices add organic beauty.
- Botanical Accents: Small bundles of faux berries (red, white, or frosted), tiny nests with faux eggs, and miniature wreaths made of twigs enhance the natural feel.
- DIY Ideas:
- Painted Pinecones: Collect pinecones and paint their tips with white for a frosted look, or silver/gold for a touch of magic.
- Felt Animals: Hand-sew or glue felt into simple animal shapes (owls, foxes) and add embroidered details.
- Branch Ornaments: Collect small, interesting twigs, clean them, and tie a loop of twine to hang them. You can also paint them or add glitter.
- Moss Balls: Cover foam balls with artificial moss using hot glue for a natural, earthy ornament.
Garlands, Ribbons, and Fillers
These elements weave through the tree, creating a continuous forest narrative.
- Burlap Ribbons: Wide burlap ribbons, either plain or with a subtle pattern, add rustic charm.
- Twig Garlands: String together small, delicate twigs for a natural, textural garland.
- Berry Strands: Garlands of faux red or frosted white berries mimic winter foliage.
- Faux Snow: Lightly dusting branches with faux snow creates a serene, wintry forest scene.
- Moss: Drape strands of artificial moss or tuck small clumps into branches for added texture and authenticity.
- Dried Floral Elements: Incorporate dried hydrangeas, small bunches of lavender, or preserved eucalyptus for subtle fragrance and visual interest.
Topper and Skirt Ideas
The topper and skirt should complete the forest illusion.
- Large Owl: A majestic faux owl perched at the top, surveying its domain.
- Deer Silhouette: A graceful deer silhouette, perhaps made of wood or metal.
- Star Made of Twigs: A rustic star crafted from interwoven twigs or branches.
- Faux Fur Skirt: A plush, white or brown faux fur skirt mimics snow or animal fur at the base of the tree.
- Burlap Skirt: A simple burlap skirt provides a natural, earthy foundation.
- Moss-Covered Base: Cover the tree stand with artificial moss and perhaps a few scattered pinecones for an immersive forest floor effect.
Beyond the Tree: Complementary Forest Decor
Extend the Enchanted Forest theme throughout your room. Place lanterns with battery-operated fairy lights around the base of the tree or on nearby surfaces to mimic fireflies. Arrange groupings of birch logs or faux antlers. Use natural elements like pinecones and berries in your centerpieces. Incorporate soft, warm lighting to enhance the magical glow. Drape faux fur throws over chairs for a cozy, rustic feel. Even your gift wrapping can use brown kraft paper, twine, and sprigs of evergreen or small pinecones for a natural, cohesive look.
Theme 3: Retro Nostalgia Christmas Tree (e.g., 80s/90s Pop Culture)
Take a trip back in time and infuse your holiday decor with a vibrant, playful energy from a bygone era. A Retro Nostalgia Christmas Tree, specifically focusing on 80s or 90s pop culture, is a fantastic way to celebrate iconic symbols, beloved characters, and the unique aesthetics of these decades. It’s perfect for those who grew up in these eras, love vintage flair, or simply enjoy a quirky, conversation-starting display.
A Blast from the Past: The Concept
This theme is all about celebrating a specific era’s pop culture, fashion, and technology. It’s a playful homage to the decades that brought us arcade games, cassette tapes, neon colors, and iconic TV shows. The concept is to transform your tree into a time capsule, filled with recognizable symbols and characters that evoke a strong sense of nostalgia and fun. It’s less about traditional Christmas imagery and more about the specific cultural touchstones that defined the 80s or 90s. This theme is inherently vibrant and quirky, making it a fantastic choice for those who want a tree that’s truly unique and tells a personal story of their formative years.
Color Palette and Materials
The color palette for a Retro Nostalgia tree is bold and unmistakable. For the 80s, think neon brights (hot pink, electric blue, lime green, fluorescent yellow) combined with primary colors and metallics (especially gold and silver for a glam rock feel). For the 90s, the palette might shift slightly to include more pastels (like teal, lavender, and peach) alongside brights, often with a grunge or skater influence (think plaid and denim textures).
Materials should reflect the era’s common items. Plastic is prevalent for many toys and gadgets. Glitter adds sparkle, reminiscent of disco balls or flashy fashion. Vinyl (like old records) can be repurposed. Authentic elements like cassette tapes (repurposed into ornaments), video game cartridges, and even floppy disks can be incorporated directly or as inspiration for DIY projects. The key is to use materials that immediately transport viewers back to the chosen decade.
Ornamentation: Pop Culture Icons
The ornaments are the heart of your retro tree, featuring the beloved icons of your chosen decade.
- Arcade Game Characters: Think Pac-Man ghosts, Super Mario Bros. characters, Tetris blocks, or even miniature joysticks and arcade cabinets. These are instantly recognizable and add a playful touch.
- Music Memorabilia: Cassette tapes (actual ones, painted or glittered), miniature record players, boomboxes, or even tiny vinyl records with classic album art.
- Classic Toys/Gadgets: Rubik’s Cubes, slinkies, troll dolls, Etch-A-Sketches, or Game Boys. These evoke a strong sense of childhood nostalgia.
- Movie/TV Show References: Ornaments representing iconic films or shows like Ghostbusters, E.T., The Goonies, Saved by the Bell, or Friends. This could be character figures, logos, or memorable props.
- Fashion/Style Elements: Miniature leg warmers, scrunchies, fanny packs, or acid-wash denim patches can add a quirky fashion statement.
- DIY Ideas:
- Mini Record Ornaments: Cut circles from black cardstock, add a printed label, and glue a small piece of string for hanging.
- Pixel Art Ornaments: Use Perler beads or cross-stitch to create pixelated versions of game characters or symbols.
- Painted VHS Tapes: Collect old VHS tapes, paint them with bright colors, and add iconic movie titles or patterns.
- Repurposed Cassette Tapes: Paint old cassette tapes, glue on glitter, or even dismantle them and use the tape itself as a garland.
Garlands, Ribbons, and Fillers
These elements help to weave the retro theme throughout the tree.
- Cassette Tape Garlands: String together old cassette tapes (or replicas) for a unique, thematic garland.
- Neon Bead Strands: Brightly colored plastic bead garlands mimic the vibrant jewelry and accessories of the era.
- Slinky-like Garlands: Use coiled wire or flexible plastic to create garlands that resemble the classic Slinky toy.
- Metallic Tinsel: Abundant use of chunky, metallic tinsel (especially in silver, gold, or iridescent colors) is a must for that authentic retro sparkle.
- Holographic Ribbons: Ribbons with holographic or iridescent finishes capture the futuristic-yet-retro vibe.
- Glow Stick Fillers: For a temporary, fun effect, strategically place unactivated glow sticks among the branches for an unexpected burst of color when activated.
Topper and Skirt Ideas
The topper and skirt should be the ultimate retro statement.
- Giant Pixelated Star: A star shaped like a pixelated graphic from an old video game.
- Boombox: A miniature, detailed replica of a classic boombox.
- Retro Video Game Controller: An oversized replica of a Nintendo or Atari controller.
- Tie-Dye Skirt: A vibrant, multi-colored tie-dye fabric skirt for a 90s vibe.
- Denim Skirt: Repurpose old jeans into a tree skirt for a casual, 90s grunge look.
- Cassette Tape Skirt: Arrange a collage of old cassette tapes around the base of the tree.
Beyond the Tree: Full Retro Holiday Vibe
To complete the retro experience, extend the theme to other parts of your room. Play 80s or 90s holiday music. Hang posters of iconic movies or bands. Use lava lamps or neon signs as accent lighting. Serve snacks popular during the era, like Pop Rocks or Capri Sun. Even your gift wrapping can feature bright, geometric patterns or be adorned with mini slinkies or friendship bracelets. This immersive approach will make your home feel like a true blast from the past, creating a fun and memorable holiday for everyone.
Theme 4: Global Wanderlust/Travel Adventure Tree
For the intrepid spirit and the armchair traveler alike, a Global Wanderlust or Travel Adventure Tree is a beautiful way to celebrate the world’s diverse cultures, cherished memories from past journeys, or dream destinations yet to be explored. This theme transforms your Christmas tree into a visual passport, filled with souvenirs and symbols from around the globe.
Around the World in One Tree: The Concept
The central idea is to showcase memories from your travels or to inspire future adventures by adorning your tree with elements representing different countries, cultures, and iconic landmarks. It’s a deeply personal theme that tells a story of exploration, curiosity, and connection to the wider world. Instead of traditional holiday motifs, the tree becomes a collection of miniature globes, famous buildings, and cultural artifacts. This theme is incredibly rich and educational, offering a chance to reminisce about past trips or to dream about new ones. It’s perfect for avid travelers, those with international heritage, or anyone who simply has a passion for geography and cultural diversity.
Color Palette and Materials
The color palette for a Global Wanderlust tree can be quite varied, reflecting the diverse hues found across continents. You might lean into earthy tones (sands, terracotta, deep greens of jungles) for a natural, adventurous feel, or incorporate jewel tones (sapphire, ruby, emerald) inspired by rich tapestries and precious artifacts. Metallic accents (gold, bronze, copper) can represent ancient treasures or modern cityscapes. The key is to select colors that evoke the spirit of travel and global discovery.
Materials should reflect the authenticity of different regions. Wood (carved figures, natural branches), metal (miniature landmarks, antique compasses), fabric (patterned textiles, embroidered pieces), and glass (blown ornaments, mosaic pieces) are excellent choices. Natural fibers like jute, hemp, or woven grasses can add texture. Maps (actual or printed) are an indispensable material, used for crafting ornaments or garlands. The aim is to create a tactile experience that feels like a collection of treasures from far-off lands.
Ornamentation: Souvenirs and Symbols
The ornaments are the “souvenirs” that tell your travel story.
- Miniature Landmarks: Iconic structures like the Eiffel Tower, Big Ben, the Leaning Tower of Pisa, the Taj Mahal, or pyramids. These instantly transport viewers to famous destinations.
- Globes and Suitcases: Small globes (ornaments or actual mini globes) and vintage-style suitcases evoke the very essence of travel.
- Ornaments from Different Countries: If you’ve collected ornaments during your travels, this is their moment to shine! Otherwise, seek out ornaments that represent specific cultures, such as Japanese fans, African masks, Mexican papel picado, or Russian nesting dolls.
- Transportation Elements: Miniature airplanes, hot air balloons, trains, or ships symbolize the journey itself.
- Cultural Symbols: Ornaments depicting national flags, traditional attire, famous animals (e.g., kangaroos for Australia, elephants for India), or local crafts.
- DIY Ideas:
- Map Ornaments: Cut old maps (or printed map images) into shapes like stars, hearts, or circles. Decoupage them onto plain ball ornaments or cardboard cutouts.
- Passport Photo Ornaments: Print small photos from your travels, laminate them, and attach a string for hanging.
- Miniature Flags: Print tiny flags of countries you’ve visited or dream of visiting and attach them to toothpicks or small sticks.
- Luggage Tag Ornaments: Create oversized luggage tags from cardstock, personalize them with destination names, and tie them with twine.
Garlands, Ribbons, and Fillers
These elements provide the connective tissue for your global journey.
- Map Garlands: Cut strips or shapes from old maps and string them together.
- Airplane or Globe String Lights: Look for novelty string lights shaped like airplanes, globes, or tiny suitcases.
- Ribbons with International Patterns: Use ribbons featuring patterns inspired by textiles from different cultures (e.g., ikat, tribal prints, Asian motifs).
- Postcard Garlands: String together vintage postcards or printed replicas of famous landmarks.
- Twine or Jute Garlands: These natural fibers add a rustic, adventurous feel, reminiscent of ropes used in exploration.
- Compass Rose Cutouts: Scatter small cutouts of compass roses throughout the branches.
Topper and Skirt Ideas
The topper and skirt should complete your global narrative.
- Globe: A beautiful, perhaps antique-style, globe as the tree topper.
- Compass Rose: An oversized compass rose, perhaps made of metal or wood.
- Hot Air Balloon: A miniature hot air balloon, symbolizing adventure and exploration.
- World Map Skirt: A tree skirt made from fabric printed with a world map, or a large map laid out as the skirt.
- Vintage Luggage Tag Skirt: A collection of oversized, personalized luggage tags arranged around the base.
- Suitcase Stack: Arrange a few vintage suitcases of varying sizes at the base instead of a traditional skirt.
Beyond the Tree: Travel-Themed Decor
Extend the wanderlust theme throughout your home. Display travel photography or maps on your walls. Use vintage suitcases as side tables or decorative elements. Incorporate textiles or artifacts you’ve collected from your travels. Play world music playlists. Even your holiday feast can feature dishes inspired by different cuisines. This comprehensive approach creates an immersive experience, making your home feel like a hub of global adventure.
Theme 5: Hobby/Passion Tree (e.g., Gaming, Books, Movies, Music, Sports)
What truly makes your heart sing? A Hobby/Passion Tree is the ultimate expression of personal interest, transforming your Christmas tree into a vibrant shrine to your favorite pastime, fandom, or obsession. Whether you’re a dedicated gamer, a voracious reader, a cinephile, a music lover, or a sports fanatic, this theme allows you to celebrate what you love most.
Celebrating Your Obsession: The Concept
The core concept here is to deeply immerse your Christmas tree in a specific hobby, interest, or fandom. It’s about taking something you’re passionate about and translating it into a festive, visual display. Instead of generic holiday ornaments, your tree will be adorned with symbols, characters, and elements that are instantly recognizable to fellow enthusiasts. This theme is highly personalized and incredibly engaging, often sparking lively conversations among guests who share the same passion. It moves beyond general aesthetics to a specific narrative, making your tree a true reflection of your identity and interests. It’s a bold statement that celebrates your unique quirks and joys.
Color Palette and Materials
The color palette for a Hobby/Passion Tree will be entirely dictated by your chosen interest.
- Gaming Tree: Think vibrant pixelated colors (red, blue, green, yellow), neon accents, or the specific colors of your favorite console (e.g., PlayStation blue, Xbox green). Materials might include plastic, resin, foam, and repurposed circuit boards.
- Book Tree: A more subdued palette of earthy tones, muted golds, and classic library greens or browns. Materials could be paper, parchment, leather (faux), and fabric.
- Movie Tree: Classic Hollywood metallics (gold, silver), deep reds, or colors specific to a film genre (e.g., sci-fi blues, horror blacks). Materials could include film negatives, popcorn kernels, and plastic props.
- Music Tree: Black and white (piano keys, sheet music), metallic silvers and golds (instruments), or vibrant rock-and-roll colors. Materials: Vinyl records, instrument parts, sheet music, fabric.
- Sports Tree: Your favorite team’s colors are paramount! Materials: Miniature sports equipment (plastic, foam), fabric (jersey material), ribbons.
The choice of materials should also reflect the hobby, often involving repurposed items directly related to the passion, adding an authentic and personal touch.
Ornamentation: Fandom-Specific Delights
This is where your chosen hobby truly shines, with ornaments that are specific to your passion.
- Gaming Tree Ornaments:
- Controllers: Miniature replicas of classic or modern game controllers.
- Pixel Art: Ornaments made from Perler beads or cross-stitch depicting pixelated characters (e.g., Mario, Link, Minecraft blocks).
- Character Figures: Small action figures or collectible statues of beloved video game characters.
- Game Logos: Ornaments featuring the logos of iconic game franchises.
- Repurposed Items: Old video game cartridges (cleaned and painted), mini arcade cabinets, or even dice (D20s for RPG fans).
- Book Tree Ornaments:
- Mini Books: Small, handmade books with blank pages or printed covers of favorite titles.
- Literary Quotes: Ornaments featuring famous quotes from books.
- Character Silhouettes: Cutouts of iconic literary characters.
- Reading Glasses, Quill Pens, Open Books: Symbols of reading and writing.
- DIY Ideas: Fold old book pages into specific shapes, or decoupage book covers onto plain ornaments.
- Movie Tree Ornaments:
- Film Reels: Miniature film reels or clapperboards.
- Popcorn Buckets: Small, decorative popcorn buckets.
- Character Figures: Figures of beloved movie characters.
- Film Strip Ornaments: Strips of old film (or printed replicas) wrapped around ornaments.
- DIY Ideas: Print movie posters onto cardstock and create mini movie poster ornaments.
- Music Tree Ornaments:
- Instruments: Miniature guitars, drums, pianos, or microphones.
- Musical Notes: Ornaments shaped like treble clefs, quarter notes, etc.
- Records: Mini vinyl records with custom labels.
- Band Logos: Ornaments featuring logos of favorite bands.
- DIY Ideas: Cut shapes from old sheet music, or paint plain ornaments to look like drum kits or speakers.
- Sports Tree Ornaments:
- Team Logos/Jerseys: Miniature jerseys or ornaments with team logos.
- Miniature Equipment: Tiny footballs, basketballs, baseball bats, hockey sticks, or golf clubs.
- Trophies/Medals: Small replicas of sports awards.
- DIY Ideas: Paint plain ornaments with team colors and numbers, or create small pennants.
Garlands, Ribbons, and Fillers
These elements should echo the chosen hobby’s aesthetic.
- Gaming: Garlands made of old controller cables (cleaned!), pixelated bead strands, or strings of small, brightly colored game tokens.
- Books: Garlands made from old book pages (repurposed), or ribbons printed with literary quotes.
- Movies: Film strip garlands, strings of small popcorn kernels (coated to prevent spoilage), or red carpet-inspired ribbons.
- Music: Garlands made from old sheet music, or strings of miniature musical notes. Ribbons with musical staff patterns.
- Sports: Ribbons in team colors, garlands made of mini sports balls, or small pennants.
Topper and Skirt Ideas
The topper and skirt should be the ultimate symbol of your passion.
- Gaming: A giant D20 dice (for RPG fans), an oversized controller, or a pixelated star.
- Books: A stack of miniature books, an open book with a glowing light, or a quill pen.
- Movies: A clapperboard, a director’s megaphone, or a golden Oscar-like statue.
- Music: A microphone, a treble clef, or a miniature record player.
- Sports: A miniature trophy, a team helmet, or a large sports ball (e.g., a soccer ball).
- Themed Fabric Skirt: A tree skirt made from fabric printed with comic book panels, sheet music, sports team logos, or literary maps.
- Repurposed Item Skirt: For a gaming tree, arrange old video game boxes or console packaging around the base. For a music tree, stack old vinyl records.
Beyond the Tree: Immersing Your Space
To truly celebrate your obsession, extend the theme throughout your room. For a gaming tree, set up a retro console with classic games nearby, or display gaming memorabilia. For a book tree, arrange stacks of favorite books, literary-themed candles, and cozy reading nooks. For a movie tree, have a movie marathon with themed snacks. For a music tree, play your favorite albums on a record player and display album art. For a sports tree, hang team banners and display memorabilia. This comprehensive approach creates an immersive environment that fully celebrates your passion, making your holiday decor uniquely yours.
Tips for Executing Any Themed Christmas Tree
Regardless of the fun theme you choose, a few universal principles can help ensure your Christmas tree turns out exactly as you envisioned, looking polished and professional.
Start with a Vision Board: Visualizing Your Theme
Before you buy a single ornament or cut a piece of ribbon, create a vision board. This can be a physical board with magazine cutouts, fabric swatches, and printed images, or a digital one using platforms like Pinterest. The purpose of a vision board is to gather images, colors, and textures that align with your chosen theme. It helps you visualize the overall look and feel you’re aiming for.
This step is crucial for creating a cohesive plan before buying. It prevents impulse purchases that don’t fit your theme and ensures that every element you acquire contributes to the unified aesthetic. By seeing all your ideas together, you can easily identify what works and what doesn’t, saving you time and money in the long run. A clear vision board acts as your blueprint, guiding your choices and ensuring that every element contributes to the overall theme. It’s a foundational step that minimizes guesswork and maximizes creative success.
The Power of DIY: Personalizing Your Decorations
Do-It-Yourself (DIY) projects are a fantastic way to personalize your themed Christmas tree. Not only are they often cost-effective, allowing you to stretch your decorating budget further, but they also result in truly unique ornaments that can’t be found in stores. These handmade pieces add a special charm and character that mass-produced items simply can’t replicate.
Beyond the aesthetic and financial benefits, DIY projects offer a wonderful opportunity for engaging the family in the creation process. Gather everyone around the table for an afternoon of crafting. Children can help with simple tasks like painting or gluing, while older family members can tackle more intricate designs. This shared activity fosters bonding and creates cherished memories, making the decorating process as much a part of the holiday tradition as the finished tree itself.
Examples of simple DIY techniques:
- Painting: Plain glass or plastic ball ornaments can be transformed with a coat of paint to match your theme’s color palette or to depict specific elements (e.g., painting a plain ball to look like a mini globe for a travel tree).
- Gluing and Glittering: Foam shapes, pinecones, or even old toys can be covered in glue and rolled in glitter for a sparkling effect.
- Cutting and Assembling: Cardstock, felt, or old book pages can be cut into thematic shapes (e.g., pixelated characters, literary quotes, map outlines) and then assembled with glue or string.
- Repurposing: Old items like cassette tapes, vinyl records, or even bottle caps can be cleaned, painted, and embellished to become unique themed ornaments.
Balancing Act: Don’t Overwhelm the Tree
While it’s exciting to gather many themed ornaments, remember that less is often more. A common mistake is to try and cram too many decorations onto the tree, making it look cluttered and overwhelming. The goal is to create a visually appealing display where each ornament has room to shine.
Strategic placement and spacing are key. Step back frequently as you decorate to assess the balance. Ensure that your feature ornaments are evenly distributed and not hidden behind branches or other decorations. Use filler ornaments to provide a backdrop without obscuring the main attractions. Allow some negative space between ornaments; this gives the eye a place to rest and helps the individual pieces stand out. A well-balanced tree feels abundant without feeling chaotic. Think of it as curating a collection rather than simply piling on everything you have.
Integrating with Existing Decor: Harmony in Your Home
A themed Christmas tree is a showstopper, but it should ideally fit harmoniously with your overall home aesthetic. You don’t want your tree to look completely out of place with the rest of your decor.
Consider subtle nods vs. full immersion. If your home is very traditional, a full-blown neon retro tree might feel jarring. In such cases, you might opt for a more subdued version of a fun theme, perhaps using a vintage-inspired theme with more muted colors, or an enchanted forest theme that complements natural wood tones in your home. Alternatively, if your home already has a modern or eclectic style, a bold, maximalist themed tree might fit right in.
You can also integrate elements of your tree’s theme into other parts of the room without redecorating your entire house. For example, if you have a travel tree, place a few globes or travel books on a nearby shelf. If it’s a candy land tree, a bowl of colorful wrapped candies on a coffee table can tie the room together. These small touches create a cohesive look without requiring a complete overhaul of your existing decor. The goal is to create a sense of flow and continuity, where your unique tree feels like an intentional and delightful part of your home’s holiday transformation.
Storage Solutions for Themed Ornaments: Keeping Them Safe
After all the effort you put into creating your unique themed tree, you’ll want to ensure your special ornaments are kept safe for next year. Proper storage solutions are essential, especially for delicate or handmade items.
Invest in specialized ornament storage boxes with individual compartments. These prevent ornaments from shifting, breaking, or scratching each other. For larger or unusually shaped themed ornaments, you might need to use larger bins and wrap each item individually in tissue paper, bubble wrap, or soft cloth. Label your storage boxes clearly with the theme name (e.g., “Candy Land Ornaments,” “Travel Tree Decor”) to make next year’s setup a breeze. Storing your ornaments carefully not only protects them but also makes the unpacking and decorating process smoother and more enjoyable in future seasons.
Conclusion: Your Tree, Your Story
This holiday season, dare to dream beyond the traditional. Your Christmas tree is a magnificent canvas, waiting to be transformed into a reflection of your personality, passions, and wildest imagination. By embracing a fun, non-traditional theme, you’re not just decorating a tree; you’re creating a unique centerpiece that tells your story.
Embracing Creativity and Personal Expression
Choosing a themed Christmas tree is an act of creative liberation. It’s about breaking free from conventional expectations and allowing your individual flair to shine. Whether you opt for the sugary delights of a Candy Land tree, the serene magic of an Enchanted Forest, the nostalgic vibes of a Retro Pop Culture tree, the adventurous spirit of a Global Wanderlust display, or the dedicated celebration of a Hobby/Passion, each theme offers a unique avenue for personal expression. This process is deeply rewarding, allowing you to craft a holiday display that truly resonates with you and your family.
Making New Holiday Traditions
These unique themes aren’t just one-off decorations; they can become the foundation for making new holiday traditions. The annual process of choosing, planning, and decorating a themed tree can become a cherished family activity, building anticipation and creating lasting memories. Imagine the excitement each year as you unveil a new theme, or revisit a beloved one, adding new elements and refining your vision. These shared experiences become the fabric of your family’s holiday story, enriching the season with joy and creativity.
A Call to Action: Share Your Unique Tree!
Now that you’re armed with inspiration and practical tips, it’s time to bring your vision to life. Don’t be afraid to experiment, to mix and match ideas, and to infuse your tree with everything that makes you unique. Once your masterpiece is complete, share your unique tree! Post photos online, invite friends and family over to admire your creation, and inspire others to embrace their own creative holiday spirit. Your tree isn’t just a decoration; it’s a celebration of you, and it deserves to be shared. Happy decorating!